Lace Wig Series ⇢ How To Dye Your Closure/Frontal Jet Black | No Staining
- Posted on 17 March, 2020
- Lace Closure
- By Anonymous
#lacewigtutorial #lacetinting #stainedlace
BE SURE TO LIKE, COMMENT, SHARE & SUBSCRIBE!!!
Welcome to part 1 of my new lace wig series!! In this series, I'll be showing y'all the process of wig making, dyeing a wig, bleaching your wigs, highlighting techniques, etc! Enjoy!
FOR ANY BUSINESS INQUIRIES (NO PERSONAL EMAILS PLEASE): [email protected]
CONNECT WITH ME!! ⇣
Subscribe http://bit.ly/subscribebarbara
Instagram ⇢ @BarbaraAtewe
Twitter ⇢ @BarbaraAtewe
Snapchat ⇢ @BarbaraAtewe
_
MY HAIR JOURNEY:
MY RELAXER TOUCH-UP TUTORIAL ⇢ http://bit.ly/2DWE82Y
MY BIG CHOP ⇢ http://bit.ly/2RvGuh8
I LEFT A RELAXER IN MY HAIR FOR 3 HOURS ⇢ http://bit.ly/355kPAi
I RELAXED MY HAIR TWICE IN ONE WEEK ⇢ http://bit.ly/2LASASu
_
HAIR INFO:
Editorial Looks Hair Company
TEXTURE & LENGTH⇢ "Farrah" Wave in 26, 24, 22, 20 & 18" 6x6 Closure
IG⇢ @editoriallookshairco
Email⇢ [email protected]
ORDER YOUR CUSTOM WIGS @editoriallooksbeautystudio on Instagram!
_
Music I Use:
Music by Daav One - Whim - https://thmatc.co/?l=E2A9B5AD
Location⇢ Austin, TX (Toronto, Canada)
Camera⇢ Canon m100 & Canon EF-M 55-200mm Lens
Age & Ethnicity⇢ 24 & Nigerian
bleaching wig tutorial, closure wig, curly hair, detailed lace wig tutorial, detailed wig tutorial, dye your frontal no bleeding, dye your frontal no stains, dying my hair black, frontal tutorial, how to, how to construct a lace wig, how to dye a closure, how to dye roots, how to dye your hair at home, how to glueless wig, how to make a lace closure wig, how to make a lace wig, how to make a wig, how to make a wig for beginners, how to make lace frontal wig, how to prevent lace stain, how to tint your lace, how to tint your lace frontal, how to use a box dye on natural hair, lace closure, lace frontal, lace frontal wig tutorial, lace tinting for dark skin, lace wig series, lace wig tutorial, lets make a wig, remove stains from lace frontal, tips and tricks on wig making, transparent lace, wig tutorial
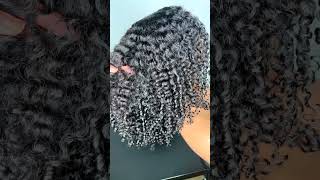
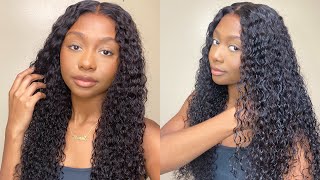
Myself y'all, my name is Barbara, a welcome back to my channel and welcome to the first part of most lace week: series let's dive in okay, so I have my 6x6 closure here and what you're going to need is some petroleum, jelly or Vaseline you're going to Scoop it up and rub it into the closure. It'S gon na prevent the hair dye from bleeding into the lace and staining it so just making sure that you rub it in really well making sure that every single thing is covered even up until the front. If it seeps into the hair, that is completely fine, the hair will still die. I just don't want you just don't want the lace closure to be stained at all all right and now, let's move on to prepping the dye okay, so the hair dye that I'm using is a little colored shoe tubes and then also with 30 volume developer. I'M just cutting the tube cuz, we'll be here, put that in the garbage squeezing out from you know, 30 volume developer as well be using to make some set apply on to the links these positive closure part of my way if this happens to not be enough For my wig I do have seven for me all right so now that y'all are in my shower, because this will be the easiest place to clean up my mess. So I have my weight here. First, what I'm going to do is separate the lace closure from the rest of the link, so there's four bundles, four bundles and my six by six closure yeah. Let'S do that! She is dirty, have a water in a long next time. So what I'm? Just going to do I'm just going to slap it on and just make sure that it is saturated. Just gon na keep my die here. Just go use my hands, no point using a digression. It'S all gon na be the same color, oh yeah, fair warning. My hands are gon na, be asked you. Throughout this video I've been washing my hands a lot yeah. You know the certain club, the particular climate that we're in you know you got ta, wash your hands anyway. So there's no point in me: lotioning my hands over and over again, while I'm dying here. If I'm just gon na wash my hands again, you know so yeah enjoy so for the pleasure all you're going to need. Is this tail comb? So what you're going to want to do is part section by section like row by row, comb it out and then take your dye and dip the teeth of your comb and then turn this wiggle room to the side and then just pull the color through. So, after letting it process for about 25 to 30 minutes, I then rinsed all the colors for the water ran clear and to clean the closure. I took hot water and Palmolive or discard Dawn dish. Salt, whatever it is, whatever you have on hand, is fine, and then I took another shampoo to just make sure every petroleum, crevice or Vaseline specimen was gone from the closure, because having that in your hair is just it's it's disgusting, so yeah, here's the final result As you can see, there is absolutely no staining on the lace. I really hope you guys enjoyed this video. Please stay tuned for part two of the lace series and I'll see you guys next time be sure to LIKE comment, share and subscribe and have a great day.


Comments
Jennahheaven123: Love how you walked us through this. Very informative. And I was surprised that the colors really didn’t bleed into the closure. Thanks for sharing. Sending love ❤️