How To Make My Lace Closure Wig Like A Frontal 丨One More Hair
- Posted on 11 September, 2020
- Lace Closure
- By Anonymous
●▬▬▬▬▬▬▬▬▬ ♛ #Onemorehair ♛ ▬▬▬▬▬▬▬▬●
➤One More Hair Official Store: https://bit.ly/3mekcxg
Discount Code: $10 Off over $129 Code:EA10 , $20 Off Over $189 , $30 Off Over $329
➤The same hair in this video : body wave lace closure wig 22 inch
Direct link : https://bit.ly/35wtf7b
Cheap lace closure wig : https://bit.ly/3m5nR0B
Hot sell lace frontal wig : https://bit.ly/3mavbrM
Transparent lace part wig : https://bit.ly/3k4W7au
Fashion Colored hair for hot summer : https://bit.ly/2ZrjNy0
3 bundles with lace closure : https://bit.ly/35uFUav
➤Contact Us :
Email: [email protected]
Whats App:+86 139 2500 7095
Phone Number:+86 139 2500 7095
Follow One More Hair To Get Free Hair:
Follow @"onemorehair" on FaceBook: https://www.facebook.com/onemorehair/
Follow @"one_more_hair" on Instagram: https://www.instagram.com/one_more_hai...
Follow @"One More Hair" on YouTube: https://www.youtube.com/channel/UCKwtg...
Follow @"onemorehairr" on Twitter: https://twitter.com/onemorehair
#gluelesswiginstall #laceclosurewig #bodywave #bodywavewig #bodywavehair #straighthair #straighthairwig #4x4laceclosure #13x4lacefrontal #eartoearfrontal #wigtutorial #hairtutorial #getreadywithme
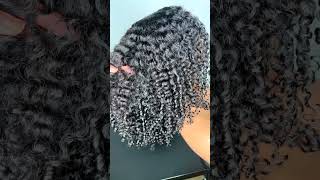
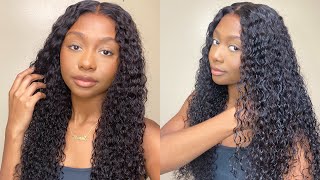
It'S me freda back with another video welcome back to my channel, so, as you can tell by the title in today's video i'll, be installing this 4x4 closure. Yes, i said closure. The last time i wore a closure was last year for prom, which is crazy, and then i just started going with rentals, but this company called one more hair sent me this 4x4 closure, it's a 22 inch body wave and i have all the details about the Hair in the description below, but if you like this video, then give it a thumbs up, don't forget to comment and subscribe and let's just get into the video. I don't look really nice right now, but i want to start doing my um hair because i have to bleach and pluck it so yeah. This is how we are going to start the video hi. I will do a proper intro later, but i think it's best for me to just tie this and my middle finger nail has come off because i um hit my brother's shoes out of his hands and then it fell. It'S not tough, so lydia, i will be seeing you soon. Let'S just get into the video okay, the hair is from one more hair on instagram. This is what the box looks like and inside it. I just have a thank you thing, and then i have the wig which is in here with a wig cap. That'S it the box is cute because it is pink and literally it's a closure, so we're gon na have to do some tweaking. I don't think i have to pluck it. You know, because this looks cool. I just have to bleach it, because look at that guys - and i have watched so many videos on how to make a closure look like a frontal, okay people. I am going to take this jerome russell highlife powder bleach and the developer. I'M just going to call it developer because it basically is developer basically for a frontal. All of this goes inside it. So i'm just going to use like half of it. Gon na make some motion potion, i'm gon na get the which - and you just pull that in to my container and it's 40 volume developer. Is it volume yeah volume and i was supposed to get 30 and i got 40 and i got five bottles of 40, which is just a bad thing. So now we are trying to make the texture into a paste. I don't know how i've just seen youtube. Oh, no, i'm sorry for when it goes unfocused. I know i was supposed to use something smaller, but this is basically all i have upstairs and i can't bother going downstairs. There'S people downstairs and i don't want to say hi. So this is what i have i'm going to add a little bit more developer, i'll, be back when i've added more and done the whole thing. So we are messing with 40 volume developer and someone said: leave it on for 25 minutes, but i'm scared. So here is my wig on the wig stand. I know my extend is dirty because who wants me oh, never mind my wick stand i'll be back aaron's face. This is from dye and then the wig got ruined. So i never did a video on it and it was a wig that i bought myself and then this is from bleach, because i put it on front of the frontal when i wasn't supposed to like the bit, where you're not supposed to put anything on it. If you get one, that's the bleach, i have to wait quick of it because it is 40 of volume. So all i'm doing is using my knife to just scrape it onto here. I'M just gon na leave it on for 25 minutes to be on the safe side. If it doesn't like bleach bleached for 25 minutes, then i will do it again, because i have a lot of bleach. Alexa set a timer for 25 minutes 25 minutes. So off camera i just washed the wig and then i'm just blow drying it. Now. I was supposed to curl it, but my curlers like broke on me, so we didn't get the full effect, so i straightened it instead and, as you can see, i did mention that the hair is a body wave wig, which means that you can just curl it Or straighten it, you can basically do whatever you want with this wig, i am using chi silk infusion, my favorite thing to use when straightening in hair, and then i'm just going in with my kiera care, whack stick and a hot comb to make sure the front Is really nice and flat so off camera? I just um tinted the lace. I think this lace is one of them transparent, laces. So when you put foundation on it, it like changes to like match your skin color foundation, shade um. Now i'm just going to cut the lace. I am going to do the zigzag motion. As we all know now we're going to do the filling down process, i'm just going to use, got to do glue and spray, because it's the easiest to use i'm doing the sliding down technique. So i've got a bit of glue on my rectangle, i'm just going to slide it under i'm just gon na spray it and then do a. Secondly, this layer, i'm just gon na move it down, because i have a big forehead. So this layer is the layer that i'm just going to be pressing it down and sticking onto my forehead. I didn't use a wig cap by the way, because i didn't know how to do the you know the closure method for a wake up so to secure this in a place, i'm just taking this rubber band and then i'm going to tie it like really tight. So it stays so, as you guys can see, we've got that good, good melt, which is amazing. I need to put some little bit off so now. I'M gon na do baby hairs. I do not know how to do like baby. Has the closure way. So i'm just gon na find a picture on pinterest and copy it. So i might do one sweep going like this because my right hand sweeps the better and then one going like this and then one third we'll just see what happens. I'M just using a eraser. This pink one because pink is cute and to just do this i don't know if it's working, it was working. Oh, my gosh, okay, so basically like the baby, has it's supposed to be thin and cute and tiny, but these are just thick and i don't know how to like make them smaller or even like pick this out to make it not look thick. So i'm taking got to be glued. The thing broke, so yeah i'll be back when i've done the baby head, hey how y'all do it? Okay, so now i've just got to make it kind of look like a frontal. This is what i've done so far. The baby hairs are not like my like how do i say this: i'm not really a big fan of the baby hairs because i usually do like a sweep here and then a sleep there, but you know what we can work with this. This looks nice and i love it: okay, um now, i'm just gon na style. It like straighten it some more, even though i did straighten it yesterday wow, i do look nice i didn't even put highlight on for the cheek because, like i just couldn't be bothered to be styling it i'm just using cheese, silk, infusion and camera care white stick! Um, my hot corn melted it. So, let's just remove that around it just style it i don't know if it's gon na focus, you know what um i am going to play some music on alexa because don't mind it's not pleasing. So this is the end of my video. I hope you guys enjoyed it. Don'T forget to like comment and subscribe and i'll see you guys in my next video bye,


Comments
tnrandolph09: “I just couldn’t be bothered”!! This look was too cute!