How To Make A Full Lace Closure Wig (Detailed & Beginner Friendly)
- Posted on 19 November, 2017
- Lace Closure
- By Anonymous
GO AHEAD AND SPAM THAT LIKE BUTTON, COMMENT, SHARE, AND SUBSCRIBE!!!!!
••TURN ON POST NOTIFICATIONS ••
•FOLLOW OUR SOCIAL MEDIAS
Diamond’s Instagram: Diamondmarie_
Mico’s Instagram: MicoDaDon
Diamond’s Twitter: Diamondmarie___
Mico’s Twitter: MicoDaDon
Diamond’s Snapchat: DiamondMarie
Mico’s Snapchat: Mico_DaDon
•BUSINESS INQUIRES: [email protected]
•AGE
Diamond: 20
Mico: 20
Music:
Jhene Aiko stay ready instrumental Reprod by: Korey Indigo
Tory Lanez Luv Reprod. By LionBeats
Jhené Aiko - Never Call Me Reroduced by Yamill PartyNextDoor Ft Drake - Recognize Instrumental by @fibachinosaru3000
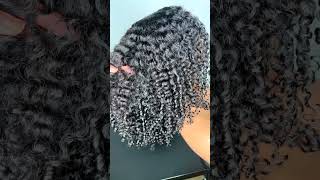
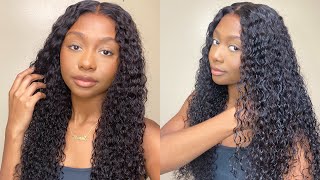
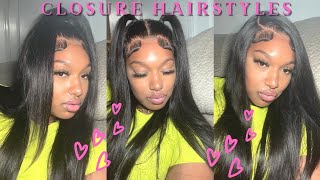
What'S up y'all, I am back with another video today, I'm going to be doing a hair tutorial, I'm going to be constructing a wig. It is beginners friendly, so I'm just going to jump straight into the video okay. So, as you guys can see, I have the forty developer, a bow and a brush to mix it with, of course, the closure and off to the side. I do have the BW number two powder, okay, so what you see here is me taking one scoop of the powder and putting it in the bowl and then I take a half a scoop of the powder and put it in the bow. I kind of just eyeball it cuz, I'm used to it, but I would just take a scoop and a half so right here you see me mixing the developer and the powder together so that I can get a thick enough product to put on to the closure. So that I can bleach the knots basically we're bleaching of an ox, is it's just so that the notch on the closure is not black? You do not want your knots to be black. You want it to kind of look like a scalp, I mean, of course it's not going to look exactly like your scalp and that's why people do different methods by putting concealer and makeup and etc on the closure. So right here I thought that it wasn't thick enough for me, so I went back and put a little bit of more powder in it to make it more thicker. That'S why you see me testing it in the last clip to see if it was going to drip. It was too liquidy, so I just went back and put some more powder in it to make it thicker so right here, you see me applying it to the closure. You do not want to force it. You want to just dab it lightly on there, because if you force it it can sink through and bleach the hair. You don't want blonde roots, it will look ridiculous. I mean it is a way to fix it, but you want to try to prevent that. So after I'm done covering the closure with the bleach I'll just fold the foil over on both sides, you do not press down on it just fold it lightly and let it sit for approximately 20 minutes. So next, after letting it sit, I use my Aussie shampoo and conditioner, and I start to rinse it out in warm water. You can see me doing it in like an angle here. You don't want to press the bleach down. You just want to let it fall off and you know let the water take care of that. You yes, so look at that closure. Those knots are bleached and that closure just looks lovely. So I used a spandex dome cap from my local beauty store. It was $ 2.00, it wasn't expensive, very reasonable. So now I am putting the dome cap on the mannequin. I always used the two lines on the dome cap to help position it on the mannequin. You'Ll, see me flip the mannequin around and fix the dome cap because it was hard to do it when the mannequin was facing the other direction. So here I am laying the closure down with the T pins. I am trying to get the closure as flat as possible. You want to always make your closure as flat as possible. To me honestly, this is the hardest part. So you'll see me fidgeting around with it and you know trying to get it flat. So, as you can see, I did get the closure flat now I am about to start sewing it down. So here you see me sewing the closure down. I start at the very top of the closure, and I make my first stitch because you do not want that closure to start lifting of the slide. You want to make sure that your unit is very secure and that that closure is very secure. Most importantly, so here I am done with the closure. It is pretty flat now you can see I stitch very closely together on the closure, so that a laid very flat. So here you see me taking my bundle and I am starting to sew on my first track. I kind of sew in the middle of the band, because I want to leave enough room for me to sole the wig on to my head. You do not want to go all the way through the band. You just want to go through that top layer, it's very hard to explain, but do not stick the needle all the way through the band, because that will prevent the dumb cap from stretching when needed. So I finished that first track and I did the flip over method. I do not want to cut my bundles, I just fold them over because sometimes you can reuse bundles. I probably won't be reusing these and taking the wig unit apart, but I still wanted to flip that over, so we are almost done I'm about halfway there. I just wanted to say that you don't always have to sew tracks onto a dome cap to make a week some people glue their. You know tracks onto a dome cap or whatever it is. I just prefer to sew it on there so that it's more secure and that tracks are not falling apart, so I haven't shown the way that I handled the track when I come to the end of it. I simply just tie three knots. You know like, as if you're tying your shoes, just three knots and then I'll tie one big knot at the end or maybe a couple. Sometimes if you did so now. I am on my very last track. I like to solve this track very close to the closure, so that you can't see the dome cap if the closure is lifted or whatever so you'll see me. Do it very very, very close to the closure like it doesn't, even look like it stretch there or it doesn't look like the closure is actually starting there, and here we have a finished product, a full wig Union, waist a lace closure. Thank you guys for watching bye.

Comments
Jayliensworld: Good job sis! Love the tutorial
Ta'Leea Brewer: Yessssssss rod. Good job keep working
DeNika Lynnae': Cute! I love it!