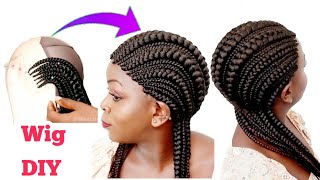
How To Make Lace Closure Net Yourself
- Posted on 11 June, 2022
- Lace Closure
- By Anonymous
HOW TO MAKE LACE CLOSURE NET YOURSELF
Hey Favorites, in this video i showed you guys how to cut and sew your own closure net. Save some money sis, it’s better to buy your own full Swiss lace and cut it yourself, it’s more affordable.
Please leave a comment and let me know you thoughts on this video...
Used:
- Swiss lace
- Measuring tape
- Scissors
- Pins
- Concealer or eye pencil
BUSINESS EMAIL: @[email protected]
Let’s socialize on
~IG-@Favourrr_Ike
~ TikTok
http://www.tiktok.com/@favourrrr_ike
Don’t forget to:
like,
Subscribe,
Leave a comment,
And share to friends and family
See you In my next video
Hey guys welcome welcome back to my channel, my name is, and in this video i'm going to be showing you how to cut your own closure lace yeah. If you want to know how to do that, do keep on watching and please before. We continue do subscribe to my channel and like this video, so the first thing to make sure or take note of is to make sure your list is greeted properly. You want it to run straight and not from the side. You understand like let it run from the top to the bottom. Yes, so i'll be using this lace material i got from the market, they mostly sell it in fabric shops, but you can get these online too. So to make this, you need a squeeze lace. Um, a pair of scissors measuring tape, an eye pencil or a concealer for making, naturally - or if you have a chalk, then make use of that too, and you need a concealer brush if you're, making use of a concealer. So i actually bought this on the day. I bought the swiss lace, but this one is so stiff, so i couldn't use it so we're going to be using the measuring tape and we're going to be using the part that is spaced out so today, i'm going to be making a 4x4 closure so do Observe what i'm doing is very easy and self-explanatory. What you want to do once you measure out your 4 inches, is to mark it using your concealer or eye pencil. So when you're measuring four by four just leave little space, i added half inch based on. I will need to sew it at the end. Yes, so i'm measuring the other part and i'm making it five inches, because i'm going to be cutting off the front, you know that part they cut off after making a closure. Yes that front part. That is why you need to leave about half or one or two more spacing, so this is what it's looking like, i'm just streaming off this part. That is not even so after doing that, just clear everything and make sure it's looking nice, okay! Next, i'm trying to cut out the side you know to create like a curve, so i'm just folding it into two. This is the easiest way so you're going to get an even cutting, so i'm just cutting it yeah, it's already looking good, as you can see. So you can go ahead to actually store it like this to your wig cap, or you can actually use a machine to sew if you actually have a machine, but if you don't, you can actually sew it like this. The difference between that - and this is that this is not elastic, and i tried using my crochet pinot, and i was so grateful that i bought my own swiss lace so yeah this one is more breathable and elastic, so micro shaping can actually go through it and It will not say so. The next thing i'm doing is i'm using my pins to you know, pin the sides just assume it's the part you're sewing. Yes, i'm just using this to show you how to actually secure your lace for sewing. So this is just can't. This is looking good, it looks so real imagine is sewn it's going to be so nice, so, let's measure again so to measure as you can see, it's exactly four inches and then horizontally. It'S actually five inches and remember. We left some space we're going to cut out at the end. So if you pull it down, as you can see, it's four inches. Yes, so i really hope you enjoyed this video and you learned something from this video. Can we see you in my next video bye,


Comments
Ngene Favour: This was so helpful thanks