How To Make A Wig With Lace Closure On A Dome Cap Ft. Klaiyi Hair
- Posted on 28 October, 2017
- Lace Closure
- By Anonymous
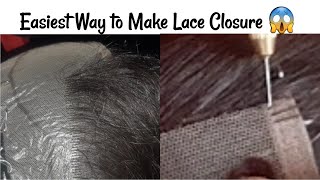
I will be showing you a detailed tutorial on how I make a wig from start to finish, including how to sew down a lace closure flat! Featuring the fold over/ flip over method, this is also the same techniques I use when creating all my wigs which have a lace closure.
TOOLS YOU MAY NEED INCLUDE (but are not limited to):
• Pins
• Weave needle
• Weave thread
• Wig cap of your choice
• Mannequin head
• Lace closure
• Weave bundles
HAIR DETAILS:
Klaiyi Hair --Guaranteed Quality, 7 Days No Reason Return
Klaiyi Hair Official Website: http://bit.ly/2yBG6UC
Link to the hair in the video:http://bit.ly/2xYs5Nm
Promotion Code: BEAUTY2017 $5 OFF
SHOP MY SUNGLASSES STORE: https://www.shop9nineteenframes.com/
SHOP MY AMAZON STORE FOR PRODUCT MENTIONS & MY TECH GEAR:
https://www.amazon.com/shop/aliciamotl...
NEED BEATS, COPYRIGHT FREE INSTRUMENTALS ?!?- https://www.instagram.com/marvlus_beat...
*Watch All My Videos In 1080p HD Angels*
NEW VIDEOS WEEKLY
WELCOME ALICIA'S ANGELS
Please SUBSCRIBE: https://goo.gl/hzTL1N ✔& TURN YOUR POST NOTIFICATIONS ON
SUBCRIBE TO OUR COUPLES CHANNEL: https://www.youtube.com/channel/UCeuuA...
For Business & Branding Opportunities
Contact: [email protected]
Philadelphia, PA
SEND ME FAN MAIL:
Alicia Motley
PO BOX 403
Sicklerville, NJ 08081
Connect With Me
Instagram: https://www.instagram.com/mrsyoung89/
Facebook: https://www.facebook.com/aliciainspire...
Tumblr: https://www.tumblr.com/blog/alicia-ins...
Periscope: AliciaYoung
Twitter: https://twitter.com/AliciaInspires
Google+ : https://plus.google.com/u/0/+AliciaIns...
……………………………………………….
FTC: Not sponsored. Affiliate links are used.
The video in this video today I'm going to be actually showing you guys how I created this wig. I hope you guys are really enjoyed this video if you have not caught my video, where I actually color this hair without bleach I'll make sure I leave it up here in a car, for you guys and without further ado. Let'S just dive right into this video. Hey angels, okay, so first we're gon na get our supplies. You need a dome cap, a needle and thread you're gon na need some seat. Pins and you're also going to need your hair, of course, hair of choice. So now we're going to apply this dome cap onto the canvas head. You guys can use a mannequin head, whatever you decide to use and then we're going to start applying this closure. So with the closure. You just want to line it up with the dome cap. That'S close to the front, as you can see, is line right up and then I'm just gon na take my tee pens and stick it right in the canvas block. Like so excuse my voice, guys, I'm actually fighting a cold and my throat is killing me, but I'm going to push through for you guys so jess I've wrapped this hair up into like a bun, I'm going to actually clip it away, and this is so that We can sew down this closure and it's not moving and shifting around so now we're going to take a tea pan and we're actually going to pin down the back of this closure and we're going to prepare to start sewing it down. Okay, so take your needle and thread and you're gon na start right there at the front and we're going to start sewing. It pull that needle through and you're gon na go back through it again and when you go through the second time. What you want to do is wrap that thread around about two or three times just to make sure it is nice and secure, and you just want to continue sewing this closure around an au part method. You guys are going to see me do that and I'm just going to let you watch in a minute, but just be very careful guys when you're working in the front of this closure here, because you see me going through the cap very easily. You don't want to go too deep down into the cap so where, as though you're touching that rubberband that's right there in the front, be very careful because it'll make your wig extra tight if you do go through that bin, but just sew through continue on this Is actually the thread stuck on the tee pen but wrap the thread around and keep sewing and I'm going to come back when I'm ready to tell you guys something: okay and you so now you want to turn your way camp inside out what we're going to Do now is we're going to take a trek, pin it around the head and then we're going to start sewing just as one single track around the base of this cap. Like you see me doing here, what this is going to do angels is. This is going to allow you to be able to pull your wick up if you decide that you want you to wake up in a ponytail or anything, this will keep from seeing the back of your nape area, any type of tracks that you have going on Under there, your wig cap, you won't see any of that. If you saw this one track one for some people. This is not important. You might be the type of person where you know you always wear your wigs down. You never pull them up anyway, but for somebody who wants to pull their hair up or you're worried that the wind might blow and blow your hair up, then you definitely don't want to skip this step guys. So I'm going to let you watch me sew this around and then I'll come right back, okay, Angeles! So it's time to flip the cat back around. So we can get ready to start really making his wig and starting off with our first one doing everything. So what you want to do is just situate that cap onto the head nicely how you would normally do make sure everything is lined up. You guys will see in a minute it's nothing too hard to do, but just adjust that cap and make sure everything is flat. No bumps no grooves flatten it out and we're ready to go. Take that first track and I'm actually doing the double. What'S it method, and what that means is that you're, taking that long track and you're folding it in half and as you're sewing it you're sewing it double like you can see here, as I'm going through I'm going through two tracks at one time. So this is the double method, so just take it through and take your time. It can be a little tough to get through both of those tracks at the same time, but it actually saves a lot of time if you do the double. What'S it method, so I'm going to, let you guys watch me do this okay, so I am also doing the flip over my thing. What this means is that once you sew down that track, you want to flip it back over and sew in that direction. Flip it back over and sew in that direction. You guys will see me doing it, but this here is actually the second bundle, so I'm using a double method as well, and you guys see me - lay that double track down and I'm sewing through both sides and I'm going to sew this all the way across. Once I get on the other side, you guys will see me do that flip over method, I'm going to show you how you flip it over and then you want to sell back into that opposite direction, and you just want to keep doing this until that bundle. Actually runs out so only one, I let you watch it so guys pay attention this here is the flip over. That'S it sorry that my camera is going in and out of focus guys, but you can see. I just grabbed that track and I flipped it over and I'm pinning it on the other side and now it's time to start sewing again. So we are going to sew this all the way on the other side, and I will see you guys on the other side. Okay, so flip it back over, so it all the way over and then that's it. So I skipped over into that third bundle. This is the third bundle guys and we are going to so this single with E. So, as you can see in a minute, my finger is kind of in the way, but you're gon na see that I'm only sewing down one track is no longer double track. There'S no longer two tracks there guys so take that one track and you're gon na sew it all the way over. This is where you can see it very clear. Take that and sew it all the way over we're gon na do the flip over mess it and flip it over and we're gon na bring it back and sew it all the way over and we're just going to keep doing that back and forth until we Get really close to the top of that closure and then I'll come back and tell you guys, okay, so with this method guys, it makes it easier for you to lay all of your tracks down flat and for having really close. So this is why, with the first two bundles, I actually sold it double with. I actually sold it double with it, but with that third bundle I actually did single with it just so you can get really close to that closure and you're gon na see me as you get really close to the top of that closure. You can't really see it in the video, but in the front, where you see that lace there's actually a real thin piece of like lace on the side on the sides of the closure, and you can take your track and you can sew right through that thin Piece of lace - and this will ensure that your track is really really close to the closure, as close as you can get it, and that is exactly how you want it, and this is pretty much the end of this video guys. Remember you can style it any way that you like. This is a 4 by 4 closure, so you can actually part this any way within that 4 by 4 section, which is awesome. Pluck it. How do you like style it cut? It cut it whatever? It is that you want to do if you got this far in a video. I love you. I really do appreciate you guys so much if you're still here and you're not subscribed. Please subscribe guys I'm trying to get to 10 K by the end of this year and, as you can see, this unit is cute and it's very, very a bomb. Please give this video a thumbs up and other than that I'll see you guys in my next video bye. That was the end of this video. I hope you guys are really enjoyed this video. I tried to slow it down a little more with the voiceover, just to kind of show you guys what was going on. I know my last video was a little faster, but I hope you guys really enjoyed it and if you want more videos like it, please give this video a thumbs up, make sure you subscribe before you get out of here. Hit up that comment section. You guys know I love to see you guys comments so comment down below. Let me know if you would like more wave videos other than that I'll see you guys in my next video, but always remember the secret to success. Put God. First always be determined and consistency is key. I love you guys so much and I'll see you guys in my next video that angels


Comments
Alicia Motley: LOOKING FORWARD TO YOUR COMMENTS ANGELS!!! SPAM IT UP
The Dreaming Beauty: Wow I never knew this is how it’s done! I love the finished look!
ThatlocdAries: Yesss! This is so easy to follow! I always struggle making wigs I’m going to try again !
TheKingKasie: The red looks so good on you! And this was helpful since i want to start making my own wigs soon!
Christina Maria: Love ❤️ the hair I need to get me a wig!!! Maybe one day I can try to make one!!! Great video sis!!
LA's Lifestyle: You made this look so easy, I just brought a block head to try making more wigs. I love how full this hair looks and the color came out so nicely!
Annie Walker: Just did mine and it came out perfect
jjac'Keee KooKz: Your editing is great Looking beautiful Awesome Hair Thanks for tutorial
tybaby111: I want this wig !! I love the color I always use a dome cap ! Easier
Sneiko the Diva: Love it I thought I was the only one who flips inside out ...nice and simple tutorial...I need to refresh my skills
Melanin Kay: The hair is beautiful you make it look so simple and easy I'm about to make me a wig lml
PhatGirlsRun: Okay, so I'm gassed up to make this unit! I hope it comes out as good as yours lol #NewSubbie
Coolie Vixen: I've always wanted to try that flip over method. Have you tried hot glue gunning your wigs? That process is so much faster .
Melissia Williams: Awesome!
Chelsie Jones: Would I have to glue the cap down for it to stay well? Would it stay on if someone were to pull it?
Erika Sharrise: I was just considering buying a wig, but now I think I’m going to attempt to make one. I’ll be coming back to this video when it’s time to make it.
Aleah Gray: Your wig turned out great! This is how i learned to make wigs by watching videos on YouTube. I love the color on you as well. Where did you get your canvas head and stand? I desperately need one.
Yanaisa Nashay: Did you use an X-large dome cap?
Make Me Up Steph: The unit is very pretty... But I really thought the editing was so good. Good job girl!
Cassandra Olivia: This color is so bomb!! Also I couldn’t even tell you were sick your voice is so nice lol great job!
Dreyya & Dre: How do i make sure i don’t sew on the elastic band?
JUST BEING UNIQUE: Thank you...the flip over methond is really smart. Where did you purchase your dummy head and stand from
Tiara Neshae: Oh I've always been curious about how to make them & the best method of maintenance & storage
JUST BEING UNIQUE: Can you give us a video on how you store your wigs. I know you have soo many now....i do you storage and maintain them.
Victoria LaShay: That red color is everything
sharon doll: nice wig wow
DivaNy hair: Nice wig
Carmen BlakeTv: awesome Ali
Klaiyi Hair: Thanks dear.Could you put our KLAIYI HAIR in the title