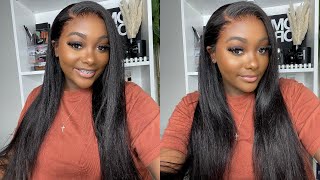
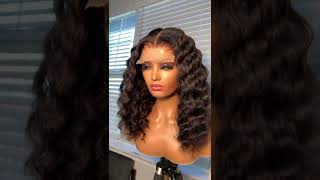
How To! Frontal Replacement Tutorial•Step By Step•(Extremely In-Depth)
- Posted on 29 July, 2022
- Lace Closure
- By Anonymous
Hey Y'all! Many of us have great quality wigs but our frontals/closures are TIREDDDDD! Nobody wants to waste great hair because our lace is ruined so I wanted to show yall how to safely remove, color & re-install your frontal or closure!!
.
.
ALL THE THINGS YOU'LL NEED!
-T pins
-Needle & Thread
-Dome Head
-Measuring Tape (Optional)
-Hot Comb
-Tweezer
-Rat Tail Comb
.
.
Here's Some Links Incase you were wondering!
Paul Mitchell Conditioner- https://amzn.to/3Q105ko
Frontal/bundes/Wig Construction- https://www.parisdaniellecollection.co...
Dome Head- https://amzn.to/3vrMcnr
.
.
Time Stamps!
00:16- Bleaching The Frontal
3:51- Color Patch Testing
4:46- Water Coloring The Frontal
8:47- Final Look For The Frontal
9:33-11:59- How To Properly Remove The Frontal
12:10- Replacing The Frontal
16:33- Updated Plucking Routine!
18:46- Final Result
#Frontalreplacement #Lacewig #Wigconstruction
I wasn't intending on doing this video for youtube, but i'm like you know what let me just do it for my girls, anybody i know some of y'all be wearing wigs and stuff like that so um. I know y'all want to replace y'all, frontals and reuse good hair, but the front two, maybe by the closure, may be bad so boom. That'S why i'm here so, as you can see, i have some glad clinging, uh saran wrap and i just put two layers one here. One day i just taped them down for extra security. I put it across my table top. If you have a very wide table space, then it's super useful, so put it to use girl. This just gives me more space to do what i need to do, because you know sometimes, if you're, in an uncomfortable position or it's not enough space, it can make the whole thing more tedious and it just could be a whole mess. But if you got a nice countertop with some space or whatever do that, you got a nice big table, use that so this is what i use for that. I use my bw2 um powder and i use my claro bleach now. I know everybody's gon na argue as far as what's the best bleaching developer, but that's just what i got so that's what i'm using i mixed it up and, of course, in a watery consistency, because we wanted to spread as much as possible. So that's! What'S pretty much going on here and now, i'm basically and i really have to hurry up because their hair is changing already, as you can see, but i wanted to stop and film this for y'all. I really don't want it to be a ombre look. So what i'm gon na do is i'm just gon na take the bleach and apply it all to every strand here, but i'm going to do it sideways instead of up and down. If that makes any sense, this light keeps going off. So i'm going to give you a better lighting in a second, but let me just get started with this bleaching before my hair come out looking crazy, so all right. So this is what it looks like when i wrapped it with a with the saran wrap again once again, i'm gon na give you a better lane, but this is what i got for right now, because i have to hurry up and finish that so y'all can See it's heating up like y'all, hear that and it's hot like i wanted to really get in there like really working and you can see the ends changing. I am a little concerned because i did take long to continue the coloring, so i do feel like the roots are going to be way lighter than the hair, but i'm always find a way to fix it, of course, but still so. This is what we got right now and we're just gon na. So all right so y'all know how i had to use these two colors to get the red. And then i wanted to take these two colors and see if i could try to darken those roots, because my roots was so blonde, like 613 blonde, which is a good thing. It'S good that you know your 1b hair can lift to a 613 color and not like a honey blonde. You know instead, and i basically just went with the mocha, put literally like a drop, and i mixed it in with the two colors, and i wanted to do a comparison because, before you even do anything major like this, you always want to do a patch test Of some kind, so of course i took some 613 bundles that i had laying around and i just did a test and, as you can see, it's not really a big difference. So the one with the brown on it is on the left and the one with the just the reds was on the right. So this is kind of a better view of how the hair looks literally. Those roots are 6 13, like oh, my god. It got so light. I didn't even expect it to get so light. So, of course, i'm a diy i'm going to use what i have and i decided to watercolor about 75 of my frontal just to get most of the work done and then i went and manually dyed the roots. Now i do this a lot, especially when it comes to certain tasks. I feel like work, smarter, not harder if y'all get what i'm saying so also by the way before i even continue wear gloves, because my nails are so red right now. Yes, i put the perfume, but the weight is saturated in there. I just stopped trying i'm not going a lot of y'all but anyway so yeah. I use that as a little bucket to do the watercolor method or whatever anywhere clearly as you're about to see. I did what i needed to do and also what i do is i take. I really get real precise with it like really really really precise. So once i did this, i took apart the front too a little bit and i tried to get it as close to the knots or the actual band of the back of the frontal as possible, without actually getting it on the lace. And i just like let it sit here for a little while, okay, so now, when it's time to cut the frontal off of the actual wig, you want to make sure you separate all of the hair, like you need a clear view of where exactly you're going To be cutting once you figure that out just separate the hair rubber bands crunchy, you know whatever a clip, i always want to use a rubber band, or something like that, because i want to make sure it ain't going to go nowhere before i decide to waste All that dye i wanted to put it to use. Oh, i literally used probably a whole bottle just to do the front two, so i just wound up taking my whole wig and dipping it in that die just so. I could get the money's worth from that dog because we're not about to be staying here. Wasting time like it. Just don't give that. I also want y'all to understand that, when you're doing a watercolor method that doesn't only subject you to getting to get um a pastel color because clearly, as you can see, i needed a real saturated red and if you do a blue, you want a real saturated Blue purple, so on and so forth, you want to make sure that that water is so dark it should. There should be no way that you're only putting enough dye in the water to where you're doing like a pastel color. You know how much uh dye we use when we do like pastel, watercolor methods or whatever the case may be, so i just want y'all to be really careful and make sure that when you're doing any color, that's this deep and this saturated to put a good Amount of dye in there, which is also why i use the little bucket that i use, because it's not so big, which means it doesn't need so much water, which means i can get done. What i need to get done so make sure you pay attention to that other than that. Of course, i'm gon na go wash. It condition it and get it. How i need it to be so once i already did the watercolor method with this, as you can see, it's very very saturated, doesn't look, pastel doesn't look ashy, it looks exactly like how the wig looks, which was colored years ago. I don't know if i mentioned this already, but this wig is two years old and the frontal is actually the only thing new about it to be honest, but we know patrick's day collection, my hair and i hate to sound like one of those people, but look The fact is, the facts: the quality is there clearly you're gon na see towards the end, but uh anyways back to what he's talking about, because i know i had to go off a little bit um once it gets to the actual frontal part. I get so precise and very very patient when it's time to get to those roots because one, not only do you not want to stain the hair, but you want to make sure that every single piece of the root is touched so make sure y'all keep that In mind, so this is how it came out, and hopefully it's picking up the colombian. I look like you're picking up the color really good, but it matches really really well look at the knots the knots are knotting. The knots are knotting as they should. Of course, i'm going to pluck it off camera. I have too many plucking videos, but i'm going to pluck it off camera and then show y'all the final product, but this was given. Let me put it up against it here. So y'all could see the comparison, because i know this is not really like that good of an angle, but this is the hair and um frontal. Next to each other. I got the colors as close as possible. I already got an eye for this type of stuff, so i knew i would get it to match the exact same, but that was the goal and we got it okay. So what you're going to do is you're going to take your wig and you're going to put it on inside out on your wig cutting you want to stretch it as much as you can on both sides, pull that frontal exam stretch that out. So this is what it should look like from the side, don't mind my ashy hands. I'Ve been washing hair rather than all that and here's this side. So we're going to pull that down too, because we want to make sure we are right on point with everything. So this is how your wig should look. So before you put your pins in. You want to make sure that the wig is straight. This is the exact same placement you're going to make when you put your frontal wig on, so you want to make sure the same place. You'Re going to put. It is the same place that it's supposed to be that the, if you do a center part right now, this is where the center part will be. You don't want your front to longer on this side and shoulder on that side. It'S going to mess up the hole. The point is literally to replace what's already here, so you don't want to throw off the measurements at all, so make sure it's straight enough, for you look on both sides. If it makes sense, then make sure you stick it down. I hope i'm explaining this right. Y'All, i'm not the best um, i guess demonstrator, but i'm trying i'm trying so now. You'Re gon na take your t-pins or whatever type of pinch, that you have and you're gon na place them in the black cap right, not right where, but almost where the frontal meets the cat, because once we cut this stitching, we need this cap to stay exactly Where it is and be very careful when cutting, because if you cut the wrong one, you might cut a tray and it might loosen, so you want to be very, very careful. My hands are so ashy all anyways yeah, stick them t-pins in once. You feel, like you got your pins secured. You want to start to cut the thread, that's connecting the frontal to the cat. Remember everything is in place, so you're good, but be very careful and use something. That'S really sharp and direct because you do not want to mistakenly cut a thread that belongs to a track and not the frontal you will be asked out, please be very careful, so we just going to be careful most of the time it unravels by itself. You want to make sure that you have all of the control y'all, so i'm not gon na lie. Let the hair sit overnight and it's dyed and i kind of got some dye on the lace good thing. It will not affect it, because this is how it looks on the outside. When you go on the inside. It really doesn't look that bad compared to the front, but yeah be very careful with that, especially black, because it will look crazy and if you want to reverse that you could dye the knots like again. But i'm not doing that right now. But just for the people who feel like, oh my god, what am i gon na? Do i got it on the lace if you feel like you got in the lace and it's gon na affect the parting or whatever the case may be, then just bleach. It again it's gon na, but anyway, so what you're gon na do is you're gon na take you're going to measure up the front tool to the center. So i like how the front tool has a certain look or a certain shape, because it's not hard to find the center, and you also want to. I didn't, do it just now, because i don't feel like getting my other hair yeah, i'm being a little lazy. I'M not going to lie to y'all, but if you want to really be very, very careful, don't want to mix the hair in whatever you could just do two braids in the frontal or one big braid. Just so all the hair is out the way and you don't go to got to worry about. Um sewing the hair, but i know how to go around it, so i'm not really worried about that. But for the girls, that's trying this for the first time braid. This hair up twisted something do something to get the hair out. The way do not put it in a ponytail, because all that ponytail is going to do that. Scrunchy is just going to make it bulgy here and it's going to make it harder for you to lay it flat. So you just want it to lay flat so match up the middle with the middle and once you feel secure and look from side to side match it up and make sure that there's the same amount on each side once you're comfortable with that. You want to take more t pens. You need a lot of t-pins and you're gon na stick it where it is and then you're gon na start. Your sewing process so see how that's gon na match up right. There perfect right and then you're just gon na sew it now when you sew it you're gon na sew it under the black cap. This is at least how i do it. I don't know how everybody else do it. This is how i do it so sew. It under the cap, you don't want to sew it connecting the cap, because if it pulls then it's just gon na be that gap there. So it has to be some type of layers. You don't want to sew the front tool on top of the black cap. Either because then, once you part it you're going to see the whole black cap, the point is to disguise that so just how you would sew if it was inside out you're going to take the front tool and you're going to sew it right under the black Cap and making it overlap just like this, i don't know if this is a good enough example. I don't know if it's enough space, but i can't even like pull it out because there's so many t-pins but sew that over that see that let me see if i got more somewhere else but yeah i feel like yeah. I could get the point. You got. Ta get it all right cool now, let's get to the sewing process. So once you finish, sewing your frontal arm back to the cap, you want to make sure you double or triple knot the thread, because we would hate for this to come on loose. Everything will come apart, so now i'm about to cut it. So now i'm gon na cut it. I already knotted it we're gon na. Take all these pins out. I'M gon na flip it around and we're gon na see the outcome when it comes to plugging my front tools. I always want to take my rat tail comb and do a zigzag motion when i'm parting it because you ever realize how you part your hair in sections to pluck your wig and if you pluck it just too much. It'Ll, bold and it'll. Bold really bad to the point where you cannot come back from that. So i like to do the zigzags just to play it safe and it really helps i'm not going to allow when y'all. Pluck your wigs now try the zigzag method and let me know how it comes out because either way you'll be saved from the front layer and it well the front parting space. I guess you could say, and you also don't have to do so many parts back yeah. I know i don't well everybody plucks their wigs different, but some people do three plus three parting, like layers or whatever the case may be y'all get choked up. When i talk too fast or when i record so just bear with me real quick, but you know sometimes people do three parts. Sometimes people do two. Sometimes people just pluck the front and just wish for hope for the best i like to just do my little zigzag and keep it pushing. Then i take the hot comb once i'm finished, plucking the back portion - and i just customize the hairline, exactly how i would want my hairline and i used to do specifically the plug skip, which i still kind of do. But i don't do the pluck skip in a way where it's literally, you can see a specific pattern. So i try to do the pluck skip in a way where the first section doesn't look like the second section, and the second section looks nothing like the four fifth and the sixth. If that makes any sense, so you see how the pattern is further down to the right compared to how it's about to look more to the left of you. So, just a little bit of insight once again, i'm not the best at like explaining things, but i can definitely show you better than i can tell you all right, y'all. So after everything i didn't laid the wig plugged that i have so many plucking, tutorials and so on and so forth. I feel like the camera is not even doing no justice. Let me get some better light for she. Okay, she has way better light, but this is the outcome. This is how the roots look. I briefly kind of styled it just a little bit because i'm about to put it on right now and i don't want to cut anything until it's on my head. Y'All know how i get, but yes, yeah. This is the final result it go. I already put it on my head and cut the side, so it fits well um. I might enter a clip of me actually wearing it here. So y'all can see like how it fit on my head, how it laid et cetera so um. Actually i know y'all gon na want to see that. So let me get ready and show y'all what this girl looks like on baby, so that is it y'all. That is how i replaced my frontal and got it to look brand new like it was never even touched in the first place. You wouldn't literally never know if y'all want more in-depth tutorials like this make sure y'all. Let me know down below in the comments. I know a lot of my hair. Videos are very repetitive or they could be kind of boring. Sometimes i just talk about it, i'm the one doing it so. I already know what it's giving, but when it comes to paparazzi collection, i'm a show out every time. Babes period, if you want this cherry unit, it is on my website, which i will also link below. This is 30 inches, so four bundles of 30 inches and yeah thank y'all so much for tuning in, and i will see you on my next video make sure y'all like comment, and i don't know subscribe now.


Comments
THE BARBIE: You know we want these kind of tutorialssss lol but nah you bodied this Paris Per Usual The consistency is giving GIVING you been feeding “Ya Loves” Ps. We are just subscribers, waiting for an upload but often we don't know all the hard work that goes into recording, editing, and uploading a single video for us to see/learn from and you've been DELIVERING & WORKING & if no one told you imma tell you it's appreciated & keep dropping these bangers we love to see it #RoadTo200k
Lola Bunny: Yess can you do more wig construction videos beginner friendly please!!
V: Yesss please would love more tutorials on hair more beginner friendly
Kirsten Elise: Yes make this a series babe ❤️
Itsmeslimtee: Yess!! It was definitely helpful !
Lola Bunny: Thank you
Janiya Tatiana 🦋🤍: Another video? Yea you most definitely the GOAT
imsaayin100: Laid!
P.A.T: ❤️