How To Diy Lace Closure Wig: Mayvenn Brazilian Straight Hair
- Posted on 23 October, 2020
- Lace Closure
- By Anonymous
#mayvennhair #laceclosurewig #affordablewig
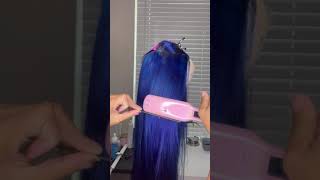
In this video, I was able to show you guys how to construct your own lace closure wig. this tutorial is very quick and easy and you guys will definitely be able to try making your wigs on your own as well. Like this video, share it with your friends and family, and don't forget to subscribe to my channel to be notified of my future uploads.
Follow Me On Instagram@: https://www.instagram.com/missuniquebe...
Follow My Business Instagram@: https://www.instagram.com/missuniquebe...
Shop My Website https://pressedbymissuniquebeautii.com...
Discount Code: YouTube25 for 25% off the Entire Website!
Shop for your favorite beauty essentials! Press-on Nails, Lip Gloss, Mink Eyelashes & MORE!
I also make and sell Headband Wigs, Half Wigs (without the headband) Lace Closure Wigs, Frontal Wigs, & Drawstring Ponytails. If you are interested in having me make a wig or drawstring ponytail for you, please send me an email at [email protected]. SERIOUS INQUIRIES ONLY!
Products Used:
Brazilian Straight Hair 12, 14, & 16 inches (for 15% off use promo code: NEW15)
https://msuniquebeauty.mayvenn.com/pro...
Brazilian Straight Closure 14 inches (for 15% off use promo code: NEW15)
https://msuniquebeauty.mayvenn.com/pro...
Mesh Weaving Cap (not the one in the video but the one I wanted to buy)
https://www.amazon.com/gp/product/B074...
Needle & Thread https://www.amazon.com/gp/product/B07N...
Scissors
T-pins https://www.amazon.com/gp/product/B077...
Headband Wig: How To DIY Havana Mambo Twist-Out Headband Wig
https://www.youtube.com/watch?v=SpJto8...
Headband Wig: How To Brazilian Kinky Curly Headband Wig
https://www.youtube.com/watch?v=r97Rrb...
Headband Wig: How To Zury Honey Blonde Afro Twist Headband Wig
https://www.youtube.com/watch?v=cNcGy0...
Headband Wig: How To DIY Faux Locs Headband Wig Goddess Locs Pink Wig
https://www.youtube.com/watch?v=9jOER6...
Headband Wig: Box Braid Headband Wig
https://www.youtube.com/watch?v=KCyt32...
Equipment Used
Cannon SL2 https://www.amazon.com/gp/product/B071...
Neewer Back Drop Kit https://www.amazon.com/gp/product/B07P...
Ring Light https://www.amazon.com/gp/product/B08D...
Rose Gold Backdrop https://www.amazon.com/gp/product/B01C...
Instagram: @pressedbymissuniquebeautii, @missuniquebeautiiyt
Facebook: @pressedbymissuniquebeautii
Website: pressedbymissuniquebeautii.com
E-mail: [email protected]
Oh hey my beauties, it's me scenic beauty and i'm building and i'm back with another video. If you are new to my channel tap that subscribe button so that you won't miss out on any of my new uploads and if you have already subscribed, what's good. What'S poppin welcome back to my channel the items that you're going to need today is a mesh weaving cap. Now this specific cap that i'm using is a u-part mesh, weaving cap. I picked up the wrong one in the store, but we're still going to make this work. The next item that you will need is a few strings of needle and thread a pair of scissors and, of course, the closure and bundles of your choice. Now the hair that i'm using in this video is from a company called maven hair, and i am a brand ambassador for them, and this hair is their brazilian straight hair and i love to co-wash any bundles that i get period from any company first before i Use them in a wig on my head. I will leave the link to this hair in the description box below now. The first thing i'm going to do is place this wig cap onto this mannequin head exactly where i want it to be. Now you want to make sure that you're putting the cap on correctly. I had it on inside out at first, so you want to make sure that you're actually applying the cap on the right side before using your t-pins, to secure this cap into its place. Now that i've got everything all situated and sitting where i want it to be, i'm going to take my lace closure and i'm going to place this at the very front of this wig cap. Now, when you place it at the front of this wig cap, you want to leave just a little bit of space in the front so that when you apply the wig onto your head, you have that gap in the front that will lay more flush onto your Forehead in the front now i'm just using t pins to pull the closure very tightly. You do not want it to sit too loose on the cap. You want to make sure that you're pulling it pretty tight so that when you're sewing it and when you apply it to your head, the lace will lay nice and flat onto your head. I'M just pulling this hair out of the way so that it won't be in my way once i'm sewing, and i can see exactly if the closure is placed right in the center of this cap. Now i'm going to begin sewing around the perimeter of this lace. Closure and making sure i'm securely sewing it onto the wig cap. Now, for this, you want to make sure that your stitches are really close to each other, because you do not want any gaps in your closure as it sits onto your wig cap and also once you get ready to cut that piece underneath the closure. You do not want to see any gaps, because then that could cause your closure to get loose and separate from the wig cap. So you want to make sure that you're making your stitches very close to each other. Now, when i am sewing this lace closure onto the wig cap, i am sewing it one side at a time just to make sure that the closure will be evenly sewn on both sides. Now, once you reach the back of the wig cap, you want to make sure that you're sewing it very tightly and close together in the back as well. But you do want to be careful that when you are pulling it down towards the back that you're not pulling the front section of your closure too far away from where it needs to sit on your forehead. But you do want to sew it taut enough, so that the lace closure will lay flat onto your head now. This is what this lace closure is looking like once i've completely sewn it onto this cap and i'm going to turn around and show you exactly what the front of this mannequin is looking like as well. Now i'm going to begin sewing on my first bundle and i like to start sewing my first bundle right by the air tab and i'm going to take this first bundle and sew it going along the whole bottom section of this cap. Now i do not sew onto that flap, that's at the very bottom of the cap. I sew right above it and because this cap also has adjustable straps, you guys want to make sure that you're not sewing on the adjustable straps, because then you will not be able to use them, because when you pull on them they will not move. So you want to make sure that you're sewing above that flat section at the bottom and also sewing above the adjustable straps. Now, as i reach towards the end of this row, i like to flip my tracks over. I do not cut my tracks because cutting your tracks do lead to early shedding and early thinning of your bundles. So i do not cut my tracks. I just flip it over and when i flip it over, i like to pass my needle through the weft of the track. Just so, i can make sure that the track will lay very flat towards the edge, and i like to sew a couple times in that same area also to ensure that the track will lace flat once i flip the track over. I do want to mention that the closure is a 14 inch brazilian straight closure and the bundles are in 12, inch 14 inch and 16 inch of the brazilian straight hair. Now, when i'm stitching these bundles onto this cap, i do like to keep my stitches fairly close to each other. Just so i can make sure that there won't be any loose cracks and to make sure that there won't be any slippage as well right here. I'M going to show you guys exactly what i mean, but when i say i flip the tracks over and i like to stitch through the weft to secure the end of this track onto the wig cap and then stitch in that same section a few times. Just to make sure that track will lay flat onto the edge of this wig cap. Now i'm just going to show you guys the spacing between the first two tracks, they're two finger widths apart from each other. Now i'm going to go ahead and finish sewing on the remainder of this bundle and then i'm going to show you guys that these first three rows are two finger widths apart from each other and then i'll be right back now, i'm going to finish, throwing on The next two bundles of hair and then i'll, be right back with the finished product of what this wig is looking like. This is what the wig is looking like once i went ahead and sewn all the bundles into this wig cap. Now, as you guys can see here, i'm showing you the spacing between each row of tracks now the bottom spacing is about two finger widths apart and as i worked my way up the cap, i decreased it to one and a half and then one finger width Apart from each other, all the way up to the top of this cap, now, i'm just parting, a middle part, because my client that i made this week for she wanted a middle part in her wig. This is what the wig is. Looking like once, i went ahead and blow dried it to prep it for flat ironing. Now she does not like baby hair. She just likes the natural look in the front, so i did not create baby hairs on this wig. This is what the hair is. Looking like once, i went ahead and flat ironed this hair bone straight. Look at this movement on this hair y'all. This hair moves so smooth. It feels so nice. It feels amazing. I will leave the link to this hair in the description box below so that you guys can go ahead and pick up some for yourselves as well. A few people have already been messaging me asking me if i do make and sell wigs, and the answer is yes, i am a licensed hair stylist and i do make wigs for my clients on the side as well. So if you guys do want me to make a wig for you, just email me at miss unique beauty, yt gmail.com, please only serious inquiries, because i do have a lot going on and if you guys want me to make the wigs for you, i have to Make time and make sure that i get them out to you in a timely manner. In this video, i was able to show you guys how to create your own lace, closure, wig using three bundles and a closure. I really hope that you guys enjoyed this video comment down below any questions that you may have like this video and don't forget to subscribe bye. My beauties


Comments
Jamaica Nice: Very nice