How To: Make A Custom Wig With Lace Closure + Review On Aliexpress New Star Brazilian Hair
- Posted on 11 July, 2015
- Lace Closure
- By Anonymous
Hello everyone, and to all of my new subscribers, welcome to my channel! I hope you all enjoy this tutorial. Feel free to ask any questions :)
Don't forget to turn your brightness up and set your quality to 1080p HD!
Check me out on :
Instagram @eekoja
Snapchat @eekoja
Twitter @patienceEkoja
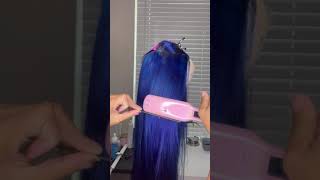
So I started off by just trying out how my dome cap would fit on the mannequin head that I had, and I decided that it was just to the mannequin that I had was just too small, so I needed to make it bigger, so it already had Papers hollow and duct tape, but I'm adding more exact tape to make the mannequin head bigger quote-unquote, so keep wrapping duct tape. I use a lot of duct tape because I just want to make sure that the wig cap, when I'm finish, is just not too small for my head. So I need the dome cap to be able to stretch wide and please excuse my mannequin. It has been used and abused through college. My siblings have just ruined, wrote on it, just it's a mess, but it works so keep wrapping. I added paper towel and I'm just wrapping duct tape around it to give it more fullness, so keep wrapping guys. There are dome heads that are bigger, but just have the time to look and purchase those, so I'm just gon na use what I have. Yes, I'm wrapping a lot. I have a really large head, so I need to make sure that's. This wig fits it's so disappointing when you make a wig and it's too tight for your head, so keep wrapping and I tried it on. I tried on the dome cup again, but I just felt like the top needed some inches as well, so I'm adding papers on duct tape to the top of the head or horizontally and just wrapping the duct tape around the paper. Towel increase attention to the bag. Now it looks fuller and the wig I know, can definitely fit me at this point. So my first thing that I am going to do is sew on a track on the inside of the cap, so that, if I do decide to wear it in a ponytail or if the wind blows or something like that, that you will not be able to See any of the wet Don securing that down? I'M just selling one track on the inside of the cap and the method I use for sew, ins or wigs or whatever is the loop method and if you guys need help on sewing or how to set a needle or just things like that, there's so many Tutorials from YouTube, I'm sorry, if you have any questions. Definitely let me know throughout this whole entire video. I'M sure that some parts may not make sense. So I finished with that and I turned away cap back over and, as you can see, it is able to pull up in a phone self there you go so now, I'm just gon na start selling down my tracks. This is really simple. Just sewing in a scene motion all around the head and this company, this hair company, their bundles, have very long West. So that's why, at the end of this tutorial, the wig is really cool. So, as I get to the end of one ear, I am want to flip over I'm not cutting any tracks. I never cut my tracks and my quote my wigs and my cell is always flat as you turn over your West's as you're flipping over your West. You want to make sure your finger is holding down the West while you're sewing it down, so that it will be as flat as possible. You can also see here that I am stretching the cap when I'm sewing it when I'm sewing the hair down on the cap, so that all the material all the dome is not squished up in one place and that will eliminate any possibility of there being tightness Around the cap so make sure you occasionally just stretching on the cap as well. So right now I did about half of the wig and I decided to instead of going all voices, hop and waiting sin to my closure, I'm just going to do it now. So I'll make sure everything is in place, so I'm just lining up the way cap to make sure everything is in place and I'm going to start sewing each side, I'm not going to sew all around at one time. I want to spray half one side and then the other side also down, so you want to make sure your stitches in your closure, I'm just starting as usual. Securing that one stitch down you want to make sure that your stitches are very, very close together. That is going to ensure that you have an extremely flat closure. You don't want any lumps or bumps so make sure your stitches are very, very close together, even though it's gon na take some time, it's going to be worth it. So I'm just going to sit down make sure you do not go all the way around. First, like I said before we're going to do half of the closure kind of like a j-shaped, and then we are going to switch to the other side of the closure. So I switch sides, I'm just doing repeating the same exact things that I did on the other side, making sure that I have very small stitches that I'm pulling the closure so that it is flat. So, while you're sewing make sure to pull from the other side. In the same side, we're done with the way we're gon na cut the black material that is under the closure. So now that I'm finished with the other side, I'm just sewing the back part of the closure and making sure that there are no lumps, as you can see. If you do go all the way around first, it creates the possibility of there being misalignment. So yeah we're just finishing up this closure: small stitches, guys small stitches, that's the key to a lot of closures. So now we're done with the closure and then it's time to get back to sewing the hair for the rest of the wig. Now I am just filling in the gap between the closure and where I left off, I'm continuing to sew in AC pattern and going in a curve when I get to the ends of the ear section so that it will fall on my face on the sides Of my face almost finished, trying to get in as much as possible. I, like my hair, really cool now cut the black spandex that is under the closure does not have to be perfect finish the wig, and this is the end result, so I decided it instead of a middle part to make it a side part it just fit. My head better with the end result of the wig, so I just push it over to the side. It'S kind of a deep side part. So I did cut some layers, not a lot of layers. It seems like a lot, but I didn't really cut much so, like I said before, this is three bundles of 18. Now I did not use all three bundles. Every single my know from this hair vendor was really full, so I barely used. I think I use a little bit decided bundle, but it's extremely extremely extremely: it's very cool, um and honestly guys for Aliexpress hair that is 200 like 3 bundles of 18 and the closure for less than $ 200. You can't beat that and, as you can see, this quality is just for the price. This is good. This is some good hair. So, like I said before, this is my size, but this is new star hair companies on Aliexpress, so yeah. I also to this closure. The closer did not come like this guys. I had to function, it garland there, but this arm is the closure. Alright, I had to do a lot of. For some reason. The closure came with a lot of short hair pieces. I don't know what that it's about, but that's a con. I bought the closure, so I had to do a lot of picking to make sure this line was kind of not defined, but just looks more natural. It wasn't, there was actually there was no line in the part when I guys to make this line. There was a lot of stray pieces and I had to cut that out, which I didn't really like um. I also had to UM. It was just really lumpy and I just had to like a lot of heat on it to make sure it was this flat. So, yes, and also so um wig, I added a bin. Apart from just the weight itself, I added an elastic band to the to the two sides of each closing, so there was a band. I sewed right here where the project starts and another one where the closure finishes. So I just measured and practically, and I will show you guys back so yes put it on it or maybe they're gon na propose it minutes my sake enjoy. This is not for anything, so this is really good, no suppose nothing and every day, I'm with coming here every other day I use it. Wait on me yeah my design. What do you tell me argan oil, and it even binds that piece on it and it makes my hair. I listen be it, but I guess it was a nice or less. There is a link which is really good, so I just use this. My iron curls really big, find Carlos to give it this type of look, I'm loving it, but it makes want some good hair um. I would think his hair that hair looks really i like, but it's nice in here here so wrong, but a college student. Anyone so yeah, if you have any question about this hair company microwave to put me out, and I will feel free to answer all my questions. Grace. Okay,


Comments
safowaa: I want that
xxPPRPLNSxx: what's the link to the hair?