Detailed Wig Install: Customizing Lace Frontal | Bleaching Knots & Plucking | Ali Pearl Hair
- Posted on 12 January, 2022
- Lace Closure
- By Anonymous
Shop Now➤https://bit.ly/3st6E6Q
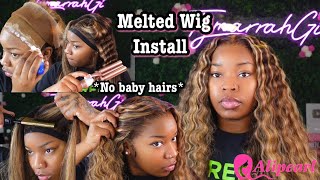
Hair Info: 28inch loose deep wave 13*4 HD lace frontal wig 250%density
❤#AlipearlHair Official Store:➤https://bit.ly/3JfghvI
1.Join FB Group, Win FREE HAIR➤https://bit.ly/3qpWzEW
2.Lace Front Wigs for Sale!➤https://bit.ly/3sx5FlV
3.Invisible HD Swiss Lace Wigs:➤https://bit.ly/32lwwH7
#alipearlhairwig #alipearldeepwavehair #alipearlhdlacewig
Instagram @alipearl_hair: https://bit.ly/34I3Oyd
Youtube @Ali Pearl Hair: http://bit.ly/2H0Gmmc
Facebook @Ali Pearl Hair: https://bit.ly/3aKwxX3
WhatsApp: +86 15890076489 E-mail: [email protected]
Hey guys welcome back to my channel. My name is natasha for those of you who are new and if you're, not new, hey guys. So today we're going to be doing another hair video, but this one's going to be a little bit more informative or educational and hopefully helpful for you guys at home. So i'm going to be showing you guys how i customize my wigs in detail and also how i install my wigs, which i show all the time, but i feel like i just be showing you guys looks. But this time i want to educate you guys, and i want you to leave this video learning something okay. So the only thing that i did not do in this video was styling because the hair is beautiful, as is, i did not have to do anything to this hair. You guys. I love me effortless moments, okay, so if you want to see how i got this gorgeous install like look at it, it's so cute make sure you guys are one check in the description box. Um all of allie pearl's information will be listed down below subscribe to. My channel, if you like these kind of videos and like the video, so that i know that you feeling it and keep watching all right guys, so we're going to be working with ally, pearl hair and we're working with this 28 inch loose deep wave texture. It has a 13 by 4 frontal and it is 200 percent density. So i'm showing you guys the knots up close because we're going to start by bleaching the knot. So personally, when i start with bleaching the knots i like to spray water on the frontal and brush it back versus hairspray, i know a lot of people suggest hairspray, but what happens is sometimes you could spray too much hairspray or this? The hairspray may be too hard of a hold and it plasters the hair down to the frontal, and you end up actually bleaching the hair and not just the knot. So i like to just spritz it with a little bit of water brush. It back make sure. There'S no flyaways, and this is how your frontal should be looking and then we could proceed to um bleaching, the knot. So, as you can see, it does come pre-plugged. It does not look bad. This is going to be a very easy unit to work with, and this is the inside, like i said it's a 13x4 and it isn't, it is 13x4 from ear to ear. So i'm showing you my nails because we need to wear some gloves. I just got my nails done this day, so i was like oh no, no, we're going to protect, protect our nails. Okay, so i'm gon na be using um 40 volume developer and also bw bleach. I personally, like i'm, going to show you guys right now. I personally, like the bw bleach the most for my knots, because it really penetrates a knot. Sometimes knots are a little thicker. These were not that thick, but whenever i've used anything else, maybe higher quality or whatever it just does not work for me and i like using ion developer as well, because i feel like it's not super harsh on the hair and does not cause the frontal to Shed so i used two scoops of the bleach and then i'm going to show you guys how i kind of measure the developer, there's no method to it. You just have to eyeball it, so i like to just like put it in there like that, like just like that and then i'll mix it and then i'll add more, it's always easier to add more it's more of a hassle to add more powder. So just kind of add the developer as you go and just mix it mix it mix it. It'S going to be really it's going to turn into like a thick paste, and this is the thing you want the consistency of the developer to be thick, but you do not want it to be unspreadable and we've. I'Ve done that in the past so like this is too thick. As you can see, it's like chunky. It'S not going to spread evenly in the frontal, so i'm going to have to add a little bit more and that's just an okay, okay, tasha dang, but also just eyeball it i'm going to be mixing it. I zoomed in so you guys can see the texture. It is going to be like a imagine it like toothpaste, but if you whipped it, so you want it thick, like toothpaste, but you want it to also be spreadable. You do not want it to be unmovable or your. Your knots are gon na bleach unevenly and it's just gon na be chunky, and it's just not gon na look good and you also kind of want it whipped so that it can kind of penetrate the knots in a sense so that it gives that more scalp-like Effect so i'm just mixing it with a little whisk. In my opinion, a whisk is the best thing to mix it with and, as you can see, it is a nice thick mixture and when i use two scoops of bleach and whatever measurement of developer, i do. It is just enough for the frontal you guys will see it's an exact amount, so you will not be wasting any product. If you don't want to use buy all of this, you can buy a packet of the bw bleach and you can buy a mini thing of developer and that should be just enough. So i'm taking my brush and i'm literally just going to spread it like some butter on bread, okay and i'm going to spread it throughout the frontal and make sure that it's even i don't want any like chunky pieces anywhere. I want it to be as even as possible, so everything can process and bleach the same. So this is how your frontal should be looking after you bleached it. I like to make sure i get high enough so that i'm covering all the strands of hair, especially in the front, because that's where you want the scalp effect all right, so i let that sit on there for about 30 minutes. You can eyeball it all. Wigs are different, all knots are different, but about 30 to 40 minutes is my ideal, like i said i kind of like to over bleach my knots because it gives more of a scalp effect, but again just watch it if you are new here. So i'm just rinsing it off and for me i have a special little process when it comes to washing my frontal area. I like to rinse it out thoroughly also make sure you're rinsing out the cap, because, as you're rinsing out the bleach it's going to get in the cap and you do not want it irritating your scalp if you're installing this wig. For somebody like me, i don't wear my wigs long, but you know if you're wearing your week for a week two weeks at a time whatever it may be, or even a day, you do not want that bleach, irritating your scalp or your hair. So i go on with the dawn soap or any dishwashing liquid. I have, i typically buy it on, though, because it's maybe getting the grease and whatever out okay, and i just lather up that frontal just to get that product out of there either that or a neutralizing shampoo should work. A neutralizing shampoo is going to be just as good or clarifying shampoo as well, but i just like to use good old dawn and it really cleans it. I know my scalp is not going to be irritated. You know you do have to apply the frontal to your forehead, so you don't want that product on your forehead as well. So i just rinsed that out thoroughly and just a disclaimer i know it looks like i am moving. So roughly with the frontal be gentle. I do this all the time, so it's like nothing to me, but also it just looks like i'm being rough, but i was not being rough, so the next step with the frontal is going to be toning, the knot. So when you bleach the knots they do have that orangey tint as you can see, which means it is bleached correctly, but you don't want it to look very brassy. So what i do is, i take purple shampoo and i will lather it up again and i leave it on for about 10 to 15 minutes. All purple shampoo is going to be different, but again just eyeball it so that it can neutralize that color out and not have that orangey brassy tint, which is going to kind of give you a way. We don't. We don't want people to know. You got a wig on, you could know, but you ain't got ta know all right so after i do that, i rinse it out and um after letting it sit of course, and then i do proceed to washing my wig. I always wash my wigs before i put them on, or i try to, because i just feel like the hair bounces a different way. It'S fuller. It has a nice smell to it, a luster when you wash it and you can see the true integrity of the hair after washing it. So i would highly suggest doing that so today, i'm using my aussie total miracle shampoo and deep conditioner and i'm gon na just lather it through and make sure you're really combing through the hair rinsing it out and all that and then i used the aussie um Deep conditioner, because this is curly hair, so you really want to make sure that the curls are bouncing back. It has a luster, it has a bounce to it and it only takes three minutes like it's like a three-minute deep conditioner. It doesn't have to sit on for like 15 minutes or anything like that, and that is pretty much the first step of getting your wig together, which i'm gon na. Let you guys know this took me um. I did this all in one day. So, for me this is easy. You can do this the day before if you want to take your time, but this literally takes me one day and also this was curly hair, so i knew i wouldn't have to style it, so it was not going to be overwhelming. I literally just have to like judge it up a little bit. You know so now it's time to pluck our wig. So as you can see, the hairline does not look bad. If you wanted to. You can really get away with this, but we like to give scalp like this giving scalp, but we want to give scalp okay. So i'm going to be plucking behind the hairline um. You can part off as much as you want. I just like to part off like a little slither, which would kind of be my baby hairs. Of course, all of this is not going to be my baby hair, but you want to pluck behind the hairline to um, avoid balding or like a receding hairline. It'S just a lot easier, so i'm going to be using a regular tweezer. These are revlon, got them from walgreens a while ago and i'm just going to start plucking. If you guys haven't noticed in this video, i have not sped anything up or anything like that. I want to show you guys in true time or sorry in real time how i'm doing this, and it is not that hard. So if you need to play back this video and do it step by step as you're actually actually doing your hair by all means, do that take your time, take notes and get it right. Okay, so i'm just plucking the hair and there's no right or wrong a lot of people like to mimic their hairline. A lot of people like to create a different hairline, a lot of people like a thinner hairline, a lot of people like a thicker hairline. This is all your preference again, i'm just here for a guide but um. All i can tell you is, do not pluck in one place and comb through as you pluck um, and just kind of like keep going back and forth. Go up up up, go down down down. Pluck you guys will see the motion that i'm doing, and it just makes it see that came out in just that plucking. So i'm getting closer to you and i like to like pull my hair while i'm plucking it so i can see it. I think it's called like the scalp method or something because you can see how your hair will basically look back. Look if you were to pull it back, which gives it more of a scalp look. So i'm just getting rid of some of that density in the frontal area, so that when i put it on my head, it looks nice and flat and very realistic. So, as you can see, it is definitely getting a lot thinner, which i love and it's not balding anywhere so a lot of times, if you pluck in the same spot it's going to get bald, so you just have to keep moving up and down up and Down you see how i'm like going down down down, then i go back go down down down. I do like to slightly over pluck my frontal as well, because i personally have a very uneven hairline and a thinner hairline, so it just makes it easier. So even now you see, i pulled it back, it's a lot, less dense and it looks more realistic, but to make it look a little bit more realistic, i'm going to start plucking the front, but when you pluck the front of your wig, you don't have to Plug as much because you've already plucked behind the hairline, if we were to do as much plucking as we, i just showed you without pulling out those baby hairs. I promise you, your wig will be bald, so just try to pluck behind the hairline and just take your time. This takes me about 30 to 40 minutes to pluck it correctly. I take my time. I don't rush it because you don't want to rush, because you can put holes in your lace and you don't want to like rush it because you might not pluck enough. So i do that throughout the whole hairline. But i like to work in sections. I do each side and then i do the front the front of the wig. You typically don't have to pluck as much you want to keep that um density because of the. If you wear a middle part, you don't want it to look balding or anything like that, so look at how it's just starting to give scalp and also i forgot to mention this - you have to bleach your knots first. Do this in this order, because when you bleach your knots, it loosens it up and it's easier to pluck. If you pluck your wig without bleaching it first, it is definitely going to um rip the hairs instead of actually plucking the hairs out so you're going to have a lot of short hairs. If you do not bleach your knots first, so just pluck pluck, pluck and comb and it is giving scalp honey. I was so excited. I'M like this is going to be a look. So when i pluck my wigs personally, i don't make it even my hairline. Naturally. Isn'T even so, like the other side i did, it was not even at all. I was giving a little ball moment: okay, but um yeah. This is the. This is the wig before plucking. So it doesn't look bad, but you can definitely, if you you know rewind, you can see the difference, but i'm just going to go ahead and pluck it, but that's it after it does have a little bald. You know moment, but i promise you it's going to look so good on my head, so you know it's up to your discretion on how you want to do it. So all i'm doing is adding some serum to it and some nairobi foam and i'm letting it air dry. I'M going to show you guys how i let my hair air dry. I like bend my um wig head all the way back, so that the water can drip and the hair could be fuller when you like bend it back, you guys will see it in a few clips. The hair is just a lot fuller. So now to the part, a lot of you are probably very familiar with. Is the install i'm gon na be cleaning my hairline, of course it just gets rid of any hair products, dirt oil. Anything like that and helps my wig installs last longer. So this is how it's looking honey, it's giving scalp it's getting very realistic. I told you guys it was not going to be even, but my hairline naturally is not even and has dips and curves. So i'm fine with my frontal looking like that. I don't need a perfect hairline that looks weird okay, so i'm cutting the ear tabs, which is going to be another story for another day. That part is so problematic for me, so we're just gon na um skip through that. Do what you do boo and then i'm just kind of measuring it to make sure it's where i want it to, and i am doing a glueless install. I do not use glue, maybe once or twice a year i use glue, but typically no. I don't like to keep my wigs on. I don't really like to sleep with them on, and this is the easiest way to take them off and i feel like it's just better. So just do what you do, but i do not like to use glue. So i'm just spraying my hairline then applying that i like to comb the lace into the product, so it can really melt down and i use an elastic band and that's it so this install is actually going to be a lot easier than my other ones. That'S why i decided to do a very thorough, in-depth, um video with this particular hair, because the hair speaks for itself. It'S super long full and the pattern is gorgeous. I did not have to style it. All i had to do was create a part and lay my baby hairs and call it a day so like we don't have to deal with the layering and the straightening and the hot combing. We didn't have to do all that today, which i did hot comb. My edges a little bit, but it's curly hair. I did not really need to do all that, so this is how it's looking you guys see. What i mean with the hairline is popping, so i'm just cutting the lace and i'm still not speeding anything up. You guys, because i really want you to see everything in real time, because i don't want you to be intimidated or feel like i'm going too fast. I want you guys to really learn from what i'm showing you guys so so now that the lace is cut, we're going to pull out those same baby hairs that we did earlier or even less. Now that the wig is installed - and i wanted just soft baby hairs - i didn't want anything crazy. The hair again is already very long and very full, so i didn't need all that. But if you like that big baby hair fluffy, look that would be very cute with this too. I just was not feeling that this particular day. So, even though i'm pulling out this much baby hairs, that does not necessarily mean i'm going to use all of that. It is again just creating a hairline, as you can see, and i typically do not add any baby hairs in the front. I do not really know how to do that. For some reason it never looks right and i don't really know how to do it. So i'm just cutting off some of that extra lace and then i'm going to spray my lace down again for an extra melt, put the elastic band on and i'm going to continue to style. My hair. I wanted a side part today. So that's what i did, but it's not a super defined um side, part kind of like a flip over, but not as a flip over yeah. I'M i'm confusing, but y'all get what i'm saying so and if you guys see steam um coming in my face. It'S because my hot comb is like so hot, so look. How laid my wig is, as you guys saw in the beginning of the video and you're gon na see at the end of the video, my lace looked a little darker. It was because my bronzer, but prior to that the melt is amazing alley pearl has some of the best lace it always melts. It always looks good. It always is super realistic, but my bronzer really played me that day. So that's why i was looking um a little darker, but just disregard that so i'm just cutting my baby hairs. I always like to flip them now because it makes it a lot easier for me to swoop soup. I don't care if i have two strands of baby hair, i'ma flip it and then sweep it with some nairobi foam, and i do that on both sides. One side is always um a little wonky, but luckily you know the other side. I covered it up a little bit because girl and i just um your baby hairs again to each its own - is your preference. Sometimes my baby hairs are easy. Sometimes they give me a hard time. We just got ta, see it through okay. So, honestly, this is pretty much the completed. Look, the hair is gorgeous and long honey is diva, vacay, hair, okay, not even just vacate whatever you want it to be hair, and i'm just smoothing it out some more using my wax stick, making sure i have a scalpy moment and then i continue to lay Everything down - and i beat my face um my face - looks very harsh. You know i'm saying, but i've been like taking pictures and getting content and a very beat face. Just looks a lot better in pictures. It translates a lot better. So that's why it's looking unwell, but i think i look amazing with the hair with no makeup like look at that look at the scalp. It looks so good, so i'm going to talk to you guys at the end. All i'm doing right now is refreshing. The curls with some foam and that's it y'all, so you guys that is all the tea on how i get my wigs laid and slayed. This is going to be for now my go-to video, if you guys ever, need to know how i bleach my knot. Any tips and tricks i will be linking and plugging in this video, because this is what i'm doing currently the only difference between this wig and, like my other wigs, i did not have to style this one, because it's already textured, typically after customizing installing i would Have to style it layer all that, but that could be a different video for another day. Let me know, but this is pretty much the gist of everything i kind of wanted like a flip over, but i also didn't want to be too big but, like i didn't want a middle part yeah, so you guys this completes this video make sure you guys Check out the description box and check out allie pearl hair, i will leave all their information down in the description box per usual and thanks so much for watching i'll, see you in my next one bye.


Comments
Ebonibuttafly Soaring: Tasha...thank you. I have been watching you for a while. I appreciate this video step by step tutorial. I was clueless about how to bleach and pluck. ❤ your sense of humor, fashion, intelligence. This soon to 50 year old that feels 30 will be slaying in this streets with my first wig.
Ali Pearl Hair: FLAWLESS INSTALL! Thanks for sharing such informative video~❤
Super girl 84: I love how consistent you are with your videos. I am so afraid of messing up a wig, but you videos give me hope. You look good. Keep inspiring sis
DaGreatKy: You are one of the few YouTubers I trust. You seem so genuine. It'd be nice to meet you one day. Thank you for this video. I messed up my other wig a bit but have this for next time.
Angel Granderson: I’m feigning for a new wig so I can use these techniques
CrystalA Mundele: Yasss fave!!! You always look so pretty!!!
Linda Hartsfield: Hi Tash . Great video as always wish you could do a wig for me and my makeup . . Smooch - smooch
Sherrillyn Lee: We need this makeup look, Tasha
BE Beauty: I know you have mentioned this in videos prior but what is your flat iron and what barrel is your Foxy Bae wand?
Official Healing the Wounds of American Slavery: Great video! What kind of hairspray and stick did you use?
Alyssia King: atp you’re the only person i trust w/ hair reviews , do a best hair review! i wanna know your absolute faves!
Joslyn Thomas: Tasha! Girl this is
Kalisa_143: Hey I’m sorry if you’ve already answered this but will this channel primarily be geared towards wigs going forward and your other channel for other content? You’re beautiful as always ❤️❤️❤️
Sky McCreery: Fabulous
Cortney Ro: Gorgeous
klynng: Yes yes yessss ‼️‼️ needed this video
Ashley Hart: ❤️
LaceMyLife Batten: ❤️
Saira food master: Wow very nice video my sweet friend god job keep doing god bless you
Shay baby Hughes: Just came to like the video cuz I like u you but not long hair I’m short so wigs aren’t my thing! All love tho
modelchiic17: ❤️❤️❤️❤️
mercedez freeman: Love loveee the wig but what about the makeup Gurwls
Ali B: You’re not doing makeup tutorials anymore?