Favorite Curly *Must Have* Hd Lace Front Wig | Step By Step Install
- Posted on 14 October, 2022
- Lace Frontal
- By Anonymous
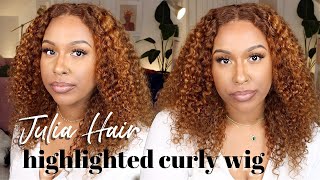
Watch and Learn! Get into this deep wave curly wig! We are about to learn how to install our wigs together step by step. This is a lace front beginner friendly wig install , quick and easy and you will get better over time with your lace front install. This wig came out better than I expected for this to be only my second install!
enjoy this video on how to install a HD lace frontal wig install
This is by far the best curly wig install y'all that I have done. I think I did a really good job on this hair. So if you want to know how to achieve this, look or you need a beginner friendly, wig tutorial - I got this for you. So stay tuned for the video, so the first thing you want to make sure is that you have a forehead that has no oil, no residue. Anything like that. We are learning how to do our wigs together, so bear with me bear with me. First thing: first get a light cap that is lighter than your complexion, because you're going to use Foundation to get this to match your skin. This is beginner friendly once again, so we're going to use our got to be glued spray. You already know about the spray if you're trying to get into wigs. This is the spray that everyone goes to right now, just spray around your forehead, I'm gon na. Do it twice and let that dry take your blow dryer on cool, and you want to just get this to really freeze, that's why it's got to be glued, because this is supposed to melt melt, melt melt, so this lace cap can stay on your head y'all. I don't know why I was so happy to do this dance, it's just because I'm excited, but you want to cut started in the middle. That'S what I learned that works the best for me. I cut in the middle and then I start working my way outwards with the razor you're going to see me use that because it gets very, very, very, very tricky around here, because you don't want the lace to peel up and then it won't be given y'all. We are not professional hair stylist at all, but this install still did come out good. So you see me cutting more excess of the cap off because it was very, very thick around my ears and then I'm gon na use my Razor just to go over it. It won't be perfect every time, but just make sure you want it to be no extra cap if it doesn't have to be dirty foreign, I'm just putting the wig on my head to line it up with my head to see. If it's cut enough to see, if I want to place it here, if I want to place it there, I love how this wig looks dry y'all now it's time to take your foundation, the shade that you use for your face and put that all over the Cap y'all, if you want to you, could use the lace tinting spray, but this works pretty cool too right. Now, I'm in the stage of figuring out what glue I like to use for the best hold, because I use a different one in my other tutorial. But today I use the ghost Bond glue. This was the original glue. Everyone was using, so we're just going to put it around our forehead and apply the wig. Once this turns clear, you're going to see me using my finger to smooth out the glue you ain't got to do that you could use a popsicle, stick, a straw, anything the back of a comb, but I just wanted to use this because I had nothing around Me foreign now when it comes to placing the wig down you're going to see me adjust it to my head, but I'm not pressing anything down yet. Okay, if I am starting to press it down, it's just me trying to see you know where it's going, but it's not really secured yet okay, so I put it right there and then, when I feel like it's right, I will really start pushing it in with The comb I love these ragtail Combs because they literally do so many different things. They part you can push it down. You can literally only do two things with this comb, but I just love it because that's how I get the glue to stay and then I'll spray it with some got to be good stay and we're going to tie that flat. So we can lay at the top of this lace. Foreign having a wig band has definitely changed. How my wigs turned out like using a scarf, is different from using a wig band. The Wig band literally will have it melted into your skin. So we're going to tie that down. I probably do it for five to ten minutes, just to make sure that everything is flat and melted. So it depends on how you want your wigs to look, but this wig was already pre-plucked, so I did not have to do much to it. I, like my wigs to look thick in the front like I don't want it to be given too much scalp, but I feel like it already looked natural, so I just start to cut the lace already. All my tutorials are always going to be beginner friendly, because what you saw was me just cut a big chunk of the lace off and then I leave like about two inches to just use the razor to get a more. You know precise cut, that's what I just did just so you guys know also invest in some cuticle scissors y'all, because that's going to get everything off that you can't get off with your regular scissors. Just be very careful because I did myself before and my other wig tutorials, so thank you so to me the wig doesn't really need any extra makeup, but in reality I'm going to add some more Foundation because it is a little light. But that's the whole point about the foundation and the tension spray. This is beginner friendly, like I said so, your wigs will give more scalp as you get better over time, foreign to do our baby hairs. The hardest part about doing a wig is the baby hairs. Y'All, so I cut about that much a little bit under my earring, which is extra. That is extra, long y'all that's longer than normal. But I really don't know the exact increments that I do yet, because we are still learning together and then I take a little bit around my sideburns just to part it. The Wiggles are. The pre-plucked, like I said, use my baby flat irons and then I curl away from my face now. This is the new method I'm trying so y'all gon na see me try this together and see how the baby hair is turned out foreign, because if your baby hairs don't look right, the whole wig does not look right. So you see, I cut way too much. Y'All, that is a lot of baby hairs and I'm trying to still play around with it. I like to use my comb to part it. This hair was super soft, so I was putting some foam on it to see if it can get a little bit more. You know easier to hold, but this is how it ended up coming out. You'Re gon na have to play with your baby hairs. It'S gon na take like 10 20 minutes. I didn't want to put that in the video, because y'all would be bored here. Is the time where we add the foundation to give a nice precise part, I love using the foundation because it will give you scalp if you didn't bleach the knots right, if you don't like how the knot is looking, if you don't like how the laces look In the foundation is going to save your day, use as much as you want to and then dab that in with your hand and your finger, that's what I do to get it to give scalp


Comments
Raven Symone’: You did a great job ❤