How To Bleach Knots On Lace Closure Wig (Part 1)
- Posted on 08 June, 2020
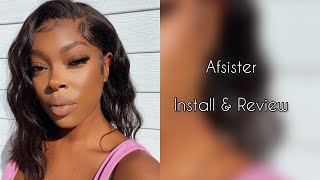
- Lace Frontal
- By Anonymous
!!!
, !!!! ’ & !! , , . In today's video, I will be showing you how I bleach my 6x6 Lace Closure Wig Knots. Love you an I'll see you in my next video.
I hope you enjoy the video!! Please Comment on what Videos You Would Like to see next.
Disclaimer-
I am not a professional hairstylist this is how I bleach my knots on all my Lace Wigs, Frontals, and closures. Also, this is just how I personally use these products. This video was created for informational and entertainment purposes only.
:
BW 2 Bleach Powder
Ion Purple Shampoo
’ , , , . :
@.
DON'T FORGET TO LIKE, COMMENT, AND SUBSCRIBE
I hope you enjoy the video!!
:
Silk Press On Natural 4c Hair
How to Dye A Synthetic Wig (BLUE) Water Color Method https://youtu.be/QGfFIRfRSMk
Coronavirus (COVID-19) Impact on the Beauty Industry
How to SLAY an ugly wig!
JOEDIR Lace Front Synthetic Wig Review
Water Color PLUM CHERRY!! 99J/ Perfect Burgundy!! No Bleaching!!!
Connect With me
https://www.instagram.com/senyabella/
https://mobile.twitter.com/senyabella
Snapchat: Senyabella
#howbleachknots
#howtobleachknots #howtomakeawig #beginnerfriendlywig #howtoproperlybleachknots #laceclosuresewin #howtobleachfulllacewig #howtobleachlaceclosure #bleachknots #bw2powder #sallysbeauty #howtobleachfrontal #howtocolorfrontalwithoutstaininglace #howtocorrectlace #howtofixcoloronlace
Hey fellas, it's a girls night little where's family's Grace and I'm so excited to have it. You should ever want to be here. It'S all my new subscribers, the belly gang from our former subscribers lovely, welcome back so in today's video I'll, be showing you how to first start off by bleaching tear knots. So the very first thing I'm doing here is I'm showing you my 6x6 closure and I am showing you what it looks like before. The grits are actually bleach. Well, the knots. Actually, you can see the grits a little bit more when it's not bleach, so we're gon na go ahead and flip the wick inside out and after we flip the wig and set out now we're gon na go ahead and get our bleach and start mixing. Color corrector, but unfortunately I did not have a color corrector for this video, so I just worked with what I had you're gon na go ahead and take like two scoops of powder, and I am impatient. So I use 40 volume developer, which makes it go by a lot faster. However, if I, if you are a beginner, do not do this to your waste tryouts try starting off with a 30 volume developer, it doesn't go as fast. However, it's just a little bit more on the safer side, but because I am a more advanced person. I use the 40 bottom developer now. The trick to getting the perfect bleach nice is to use a knife that you can obviously dispose, because it makes it so much easier when you start from the back up into the front. So the technique that I'm using is it as if I'm buttering my toast. So if you're buttering, your toes just think about, if you push your toast a little bit too hard, it'll break it. So it's the same process. If you push your bleach in too hard into the closure, it would then seep through the closure, which is not what you want, because then you would end up with bleached hair and if you weren't, planning to bleach their hair or turn the hair or dye their Hair then, you really have to put in some work to color correct it. So what I am doing here, I'm starting from the back and making my way to the front, because the front is always easier to bleached in the back. I always lean towards using the knife more than I do the brush, simply because the brush always seems to push in the product a little bit further than what I really wanted to then always end up having to color correct it. But most of the time I dyed my wigs anyways. So it's not such a big deal for me, but that's just a quick tip as to why I'm using the knife and not the brush optional. I do this only because once again, I don't have any patience. Use a blow dryer and blow dry for about one minute, so I blow dry for about one minute because it cuts the time in half. So, instead of sitting here waiting for a 15 minute bleach dye, it takes it about 5 to 10 minutes. Instead, once again do this only for one minute and then once you're done you're, you can take off the aluminum foil and look at your hair pause. What is going on the so y'all? This is what happened? My daughter decided to want to be a hairstylist as well, while I was away literally for like a minute, and this is why my closure came out the way that it did cuz she lifted up the aluminum, foil and press down on it. So that's why we have this chunk here. I literally was trying to figure out. Where did I go wrong and then, after watching my footage, that's when I found out daughter was doing things while I was oh wait. So what you're gon na do next is you're going to rinse the bleach and a downwards motion, because you want to rinse it away. You don't want it to rinse into your hair. You don't want the the dye to go anywhere else, but down is the very first thing you want to do is get some coal blonde eye on purple shampoo, that's the brand that I prefer to use. Only because when I do my platinum wigs, I have found that it does not turn the hair as purple as the other purple shampoo. If that makes any sense, so you wanting to go ahead and rinse it off the very first time, and now I'm gon na show you what my knots would have looked like perfectly without it running through. So that's because it ran through the hair, because my daughter decided to press down on it. That'S what we're looking like! That'S what we have here, but because I'm gon na dye, the hair - it's no biggie for me! So now, I'm gon na pour some more. That purpose shampoo in the closure, then I'm gon na. Let it sit for about five to ten minutes, just depending on how you feel so that I can hopefully turn it a different color, because, right now it's looking really really brassy so about after five minutes of letting the purple shampoo sit on the hair. I went ahead and blow dried it and sprayed it with my gut to be free spray, because now we're gon na go ahead and dye the hair. So he could be the color that I really wanted to be also to cover those blonde roots, because I was not about to operate this hair. This hair is actually here that I wanted to keep jet black right Bella's. Thank you so much for watching the video. It'S always don't forget to Like comment: subscribe share the video love you and hope you, two never


Comments
Mindjy Pompilus: amazing video ✨