Lace Closure Wig Series: Part 1 | How To Properly Bleach Knots | Beginner Friendly
- Posted on 14 November, 2019
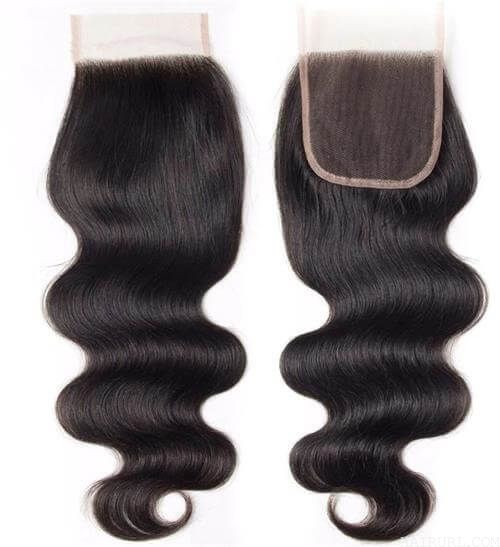
- Lace Frontal
- By Anonymous
#roadto500 #bleachingknots #closurewig
Thanks For Watching JMobb ❤️ I hope you enjoy content like this. We are all beautiful in our own ways !
Positive Vibes Only ❤️✨
MAKE SURE YOU FOLLOW ALL MY SOCIAL MEDIA
snapchat: xxx.jalicia
instagram: The.jaliciamonaa
Facebook: Jalicia Mo’Naa
Twitter: @Jalicia_MoNaa29
TURN ON POST NOTIFICATIONS
From: Alabama
Age: 17
Camera: iPhone XS Max
Editors: iMovie and Etc
My business email is [email protected]
Subscriber Count:316
Latest Video: https://youtu.be/dL5_4d9vCRk
** I DO NOT OWN COPYRIGHTS TO THE MUSIC **
Octilary - Chill trap beat
Ain'T trynna Y can be wait nope. No, you can't touch this right. Try to reach deep. What would a lift? What is okay, my buddy, I'm back with another video and for the next couple videos you would have a lace me, a close, your lace series. We do so on this first video, I'm going to show you how to bleach and pluck your knots. So I know this kind of is a. We were positioned, but hey, you can still see so, I'm already part of a style part in the middle part. In his hair, so this is so knows you're his hair and I have a got a four by four legs. Close. Your free part 20 inch resume your body wave yeah, so it came with baby hairs. So, of course, our students are cannot see it. They can't wrap your hair, so I'm gon na spray - or I have already sprayed my baby hairs for us to be blue, free spray and comb them back and, as you can see, I attempted to twist the hair all the way you can't see. What is it? The hair up and I put a clip on it when I take it off, I realize that I no longer needed the clothes. So now that you see, the closure is back on the other side and I used to TP Institute to pin it down or to my dumb head. So now what you're gon na do is grab a bowl and grab your gloves. As you see, I got one glove on and you're gon na get bleaching powder, w-what call, vw2 and developer. I use once complete shakers buddy you'll see soon. I realized that it's not enough and you use a little developer, not a lot a little so you're gon na when you mix it up. You wan na make sure it's a nice, a nice like paste, not very like watery and not too chunky. You need to make sure it's all mixed up and, as you can see, I did no measurements and that's two to two loops. So what you're gon na do is add more developer. I mean shoot, not the villain, more be divvied Zulu powder and you're gon na mix it, and I just show you or you just see having some god-dd it's he you get the right consistency and I know you're probably wondering what's there brown stuff everywhere, it's from My bum here I kind of broke it and I need a new one, so mind your business and, as you see, I put more bleach in it and it was too thick. Well, I really realized that it wasn't enough. So I add a little bit more or I just use this, but you will see what I do so now I'll take a butter knife to spread the bleach on the closure. So what you do is you take your butter knife and you slightly and lightly spread it on there. This is my first time bleaching to closure. So if this video is very beginner friendly, so it's very easy to follow. You just take your bleach. I said. Oh no what'd, I just say you take your bleach, you put it on. You can get a spoon or a knife, but I prefer you not to do it their brush because they will bite leak through, because you can see little like a page like you're, spreading butter, cold butter on toast, so you're gon na spread it all over. The closure and don't press too hard, because if you do didn't it will leak through and go into your hair. So that's all I'll do it for here and when I keep doing a lot will be done, is what you're sure is sick, making sure the lace is saturated? Oh, my god, I cannot talk making sure the lace is saturated in bleach and I would get so. I'M gon na fall and put it on there and turn it over and put it on for 10 minutes. Now you check to see you after your first ten minutes of attendance, haha, two minutes to see if your knots are still black on my closure, they were so I let the bleach sit on another ten minutes. I did not press it into the little before just Ohio is here okay, but I didn't press it into the alumina four. I just put it back on ten minutes and check again, so I wash the bleach out. I had the hair upside down, so the bleach won't get on the club on the hair. So, as you can see I put on my skin, it was very natural, of course, on the nuts are still black but, as you can see like, if my skin turned on its leash - and it looks very nicely so after this I will wash my hair watch. The closure with shimmering light shampoo and then I will condition it with some conditioner, so nowadays we're down to the plucking part. You will let your closure flat or you're down here, make sure you can it down. So you can space the all up, sweetie why your blood came. This part is probably the longest part, but I didn't put much because I did not want this week to cool to be like a pencil style. I just wanted to look very natural, so this is not a frontal style, because if it was a frontal style, it would be plucked way more, but it's not a frontal style. So this closure already had baby hairs and I'll show you that I had already plugged a part in the middle, and I had already cooked a part on the side that you as soon see okay, that right get that party. Well, here I go now you see the part on the side that I have made so mostly what you're going to do is I'm going to show you throughout the video slower yeah, I'm going to speed it up and yeah. So what you're gon na do is part a little section off in the front. As you see, I'm cloning, the hair back now you're gon na part, a section off in the front of your hairline, so that you can pluck it and make it less thick. Because if you look at your natural hairline, then you'll see that it is not as thick as closures. Oh I'm su, but yeah, it's okay! So what you're gon na do, since the hair is already red which, if your hair's not wet being make it wet and pluck so what you do, is you take from well what I'm doing is taking away from those part that I'll part it out and that's The best part, but the part that I parted out and as you can see their hairline right, there is getting thinner but don't make it too deep. Do not pluck in the same spot. And once because, if you do, you will have bald spots. And you don't want pause fuss, so you see I'm making the hairline thinner and you cut out and expect shading cuz you just put their hair out. So where is it going so bone? My shedding and the rest of this video is very self-explanatory. So now that you have seen how I plugged in bleach wan na closure, I'm gon na show you how to look on my skin. I appreciate was hard for me to show you that this is how it looks, but practice it makes perfect so keep practicing and practicing long with me, because I know I'm far from perfect. I just started this hair business stuff, so yeah make sure you like come subscribe and she turn another vacation bill, because notification mob is the best mob in the nation. Here we yeah. I hope you guys enjoyed this video make sure you follow me on all of my social medias and then the best written guide below so go friend it up yeah. I love you guys, bye, okay, bringing nothing beats trying about from his he gon na come when I call I keep it in my money. Did you know I


Comments
IamZadyiah •: Period