Detailed Wig Install(Beginner Friendly)Step By Step|| The Ultimate Melt|| Feat: Princess Hair Store
- Posted on 02 December, 2022
- Lace Frontal
- By Anonymous
Hey Babes! Welcome back to my channel! In this video I will show you some key pointers steps in installing a wig! If these steps are followed correctly you will have a nice clean install!
------------------------------------------------------------------------------------------------
L I N K S
If you are interested in having a wig made or customized by me email: [email protected] or send me a message via my website! Www.lijaeluxe.com
Exact wig from video:
HD Transparent Lace Front Human Hair Wigs PrePlucked 13x6 180% Brazilian Body Wave Lace Frontal Wig With Baby Hair Remy Princess
https://a.aliexpress.com/_mspKP5w
WIGS
LUXE ULTIMATE MELT PRODUCTS:
○ https://lijaeluxe.com/products/luxe-me...
○ HOT COMB:
Andis 38330 Professional 450ºF High Heat Ceramic Press Comb with Dual Voltage and Auto Shut-off, Black, 1 Count https://a.co/d/fdpzyQW
------------------------------------------------------------------------------------------------
S O C I A L S :
♡ Instagram: https://www.instagram.com/kci.xox/
♡ Tik Tok: https://www.tiktok.com/@kci.xoxo
♡ Snapchat: kci_kocoa
I N F O:
Camera: Iphone 13 Pro Max
Editing: SPLICE
WEBSITE : HTTPS://LIJAELUXE.COM/
Want to send me something?
SIMPLYKACY
PO BOX: email: [email protected]
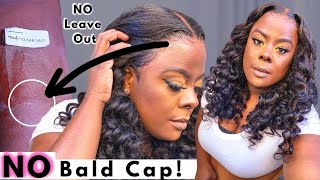
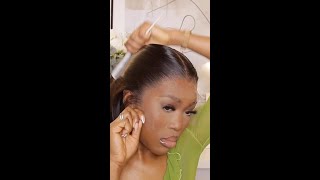
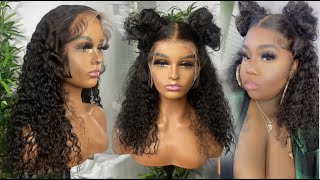
Baby baby, hey Beauties, my name is Casey and welcome back to my Channel today I'll be working with some hair from beautiful princess hair. In this package it comes with a wig cap and a edge brush, and the hair is 24 inches 13 by 6 closure. The lace is advertised as HD lace. However, this is more like transparent lace, that is a parting space inside it is six inches in the middle. Most of the space is in the middle for parting, not much parting space. On the side, the hairline does come pre-plucked as well, so I bleached the knots and I plugged out the hairline some more off of camera. I really had minimal shedding when it came to like washing it out and combing it through. So that was good. So, let's get right into the install, this is my beautiful client and we did the bald cat method so right now, what I'm going to do is take some of my Luxe melt glue and I'm just sealing the ends. Sorry sealing the tips I should say rather of the cap down. I did go in with my mouth spray and already do the process, but this is just going to seal that that just give that extra seamless look around the hairline before I even apply the wig. So we're just doing a really thin coat just to seal the ends up the seal, the ends of the the cap down. I can't talk today, sorry guys, but if you guys want like a detailed um, bald cap method, the way I do it um you guys just let me know in the comments - and I will definitely do a a more in-depth ball cap method. But for now I just wanted to show you guys how I do my installs, so that's what this video is mostly based on, so just keep watching. I use Ruby, kisses cream oil free foundation on her wig cap. I also took some of that on a makeup brush and put it all inside of the wig on the lace as well. So what I like to do before I actually put the wig on my client's actual head. I take the wig and I and I just use my hot comb and I pull all the hair back, so it's all pulled out. There'S no hairs like hanging that can get into the glue or anything like that. So I just use a Halcomb and brush all the hair going back so that it's just easier for me to see her hairline see where I need to put the glue. So I'm making sure that the wig I'm pulling the wig over the cap. So you can actually see the cap through the wig and that's a good guide for where you need to place the hair, so the cat, the wig, actually needs to cut the hairline actually needs to come over. The cap slightly maybe like a very slight like very, very slightly just just to cover it like basically you're just covering the cap. So what I like to do is I like to cut the tabs around the ear off. First, what that is is just the extra lace that goes over the ear that isn't needed. Sometimes there's hair on it. You just have to part it around the the client's ear and then cut that off. Sometimes it cuts off a little bit of the hair. But that's okay like sometimes that extra hair is not needed, but you got to be very careful not to cut through the wig, like don't cut through the cap, that the wig is actually made on. That'S what I mean, because that that can happen if you're not being careful you're, not looking I'm sorry, I didn't get this angle. I didn't realize that I had the cam like I wasn't facing her to the camera, but I did get the other side so keep on watching. Thank you, so you're, basically looking to see where um it's covering her their client's ear and you cut it from there. That'S it that's how easy it is, and then it just gives you more flexibility. The wig becomes a little bit more, looser and easier to to maneuver and manage so now we are ready to glue her down. So I'm going to go in with my Lux melt. Waterproof glue this glue, I'm just going to use about three or four coats around her hairline, the more coats you use. Honestly, it just helps the wig adhere easier and it lasts longer. She'Ll have a long wear on her install and she won't have to worry about anything lifting or anything like that. It just holds it in place. So that's what I like to do at least three or four layers of glue sometime, even five, depending on how I feel um for that day or how I feel about the lace. So that's why you see me doing here for every layer that you put on you make sure it's smoothed out and you make sure that it dries clear before you add another layer to it, because what happens is if you continuously add layers when the glue is Not dry it'll become very gunky and it'll show through the lace, if it's all gunky and like like curdled like it's, not smooth, so just watch closely just watch closely to see how I'm doing it. I do one side at a time, so one side gets a chance to try and then I'll go in and do the other side, and that's just how I get all the layers on beautiful foreign. So the pink applicator blush that I'm using to put the glue on that actually comes with the glue that you can purchase on my website as well foreign foreign. Once that last layer is dry, I'm going to take the wig and carefully I'll start in the middle and pull it down, pull it down slightly over the glue. So I don't want the hairline to be directly placed onto the glue. I want it to be slightly over the glue. What that does is it gives you more control if you have to go back in and add more glue, but if it's on the hairline, it could be possibly that when you cut the lace off and you cut the lace off you'll be able to see the Glue because it's too close to the hairline, so this gives you more flexibility to add glue, but you cannot take away glue well, technically, I guess you can take away glue, but the process is so tedious and messy, and it's just something that you want to avoid Altogether so right now, I just have my blow dryer on the heat setting to warm up the glue to tack it down. I'M using my finger and then I put on the cool setting to then cure the glue a little bit before I put the Melt bat on okay, so the Melt Bun. It presses the lace into the skin to help it cure and melt into the skin. That'S what it's for so I like to leave it on for as long as possible, at least 10 to 15 minutes. That'S how long I leave it on so, while I have it on, I just go through the hair blow dry. It out make sure that it is sewed down, so I just pull some of the back of her hair up and I just take some thread and I don't like to make the thread too tight together. So it's hard for her to take out. So I kind of just make it snug enough so that the wig is secure, but not tight enough. So it's hard to take down when she's ready so like I'll part, the I'll part, the wig at the back, like three rows up and the space between the track, where you can still see the cap, I'll, pull the wig down and I'll sew that to her Braids, oh foreign, just getting some of the Kinks out some of the Waves out of the hair. Before I go into style, I just want to make sure that some of the waves are out just a little bit more straight. It gives us a neater, a neater look once you start curling up the hair foreign, so I'm cutting the lace into three sections. So I do this because it gives you more control and it just helps you make less mistakes um, and you could just take your time instead of trying to go through the entire lace, with with just one motion so right now, I'm parting out the hair. That'S not glued down now, when you may not be able to see it on camera, but standing this close to your client. You can actually see the the sheen the glue kind of has like a shiny, look to it once it's not fully dried and you can kind of see what hair needs is not glued down and what hair is glued down, and so the hair that I'm cutting Off right now is not glued down and it's not needed because it goes far past your hairline and it's just an extra hair - that's not needed, so I'm cutting it off now. This is just my opinion, but I personally believe there should always be a tiny bit of hair that small bit of hair that's cut off. That means that your lace is far enough over the glue so that the hairline will not be messy and full of glue. Residue like once, you cut the lace off, so even if it's just a few little hairs. At least you know for sure that it's not I'm going to leave the glue on your client's face, because that is just messy and it doesn't leave a nice finish for your client and she's they're going to have glue on their face like nobody wants glue on Their face, the key to a most natural hairline is honestly the plucking. Now my client didn't want too much to be plucked out for the sake that um she wants to re-wear the Swig a few times and when it's extreme pluck out like it makes it harder for you to have longevity on your wig, because every wash hair will Come out in any case, if you guys do want to see a more in-depth, an actual plucking video, like of me actual plucking. Just let me know in the comments and I'll I'll do my best to make a plug-in video, where I show you how to pluck and show you how to tell if it's plucked out enough or you should go back in and pluck a little bit more and Things like that, you guys, when you're cutting the lace off, make sure you're cutting in a dragon motion. I prefer using scissors than an actual eraser. I find the scissors give me more control. I want to mention. Please take your time when you're doing this. There is literally no rush you shouldn't feel nervous. I remember when I first started doing installs like this um. I was a little bit nervous. I used to get anxiety if I felt like I was taking too long, or I had the client sitting too long, but if they want their hair done like really well, they will prefer you take your time as opposed to rushing it believe me, so don't and Trust the process, even if it looks crazy to begin with it'll work out for you, so I got all the lace cut off right now, I'm just cutting the final bits off that are still not that I feel like, though, are not needed, and then I'm gon Na go back in and actually add some glue to keep down the hairs that I do feel like are needed still, but they're not fully glued down. Yet so that's what you're going to see me do the next I'm going to stop talking and you could just watch foreign. Thank you. I am so sorry you guys that my freaking hand is blocking me doing this part right now, I'm actually putting some glue on top of the lace, the lace - that's not um glued down just on that side, because the the hair itself, like that, the part - that's Actually, lifting up is a very tiny, tiny space, so I couldn't lift it up high enough to get the tail comb under it. So I just put the glue on top of that part of the lace and it will dry don't worry about it. Trust me, it will dry. Do you see it's already drying invisible there? It'S actually going on top right now that that little tab that I'm putting the glue under but by her hairline. That'S that's big enough, a big enough gap for me to fit the tail comb under to put the glue on, but the side right there right above right above her her um, her ear that portion right there. I couldn't get under far enough for the glue not to be messy around her hairline, so I had to put the glue on top of her hairline, which is perfectly fine believe you me like it will dry clear. Do not worry about it. You could see around the hairline is still a little bit lighter than her skin. So there's a few more steps that need to be taken before you put them out back melt band back on to do the final job you live in the moment carried away foreign. I'M going in and parting out the baby hair. My client wants dramatic baby hair, so that's what I'm parting out right now so that she can have that effect. So that's what you see me doing currently. Thank you, foreign. You guys want to make sure that your part is clean, so there's no hair in between the part, the space for the rest of the hair and the baby hair just make sure it's a clean part, just a very clean part. Now I'm going to go in with my Luxe melt, wax stick, and so this is just to help me mold that push the hair back. Just to make sure that my I can have the part between the baby, hair and the hair stay remain clean um through this process. This is Ruby, kisses oil, free, clean Foundation, the same Foundation that I use on her wig cap and on the actual inside of the wig, and I'm just tapping a little bit more on the hairline to blend it out further, because I said it earlier, it was A bit light, and then I'm going to go in with a spray this. This I'm going in with my Luxe melt, melt spray just to further melt the lace into her hair. Before I tie it down um, you can also use another hairspray. Whatever hairspray you have um, you can use, got to be free spray, just a free spray, a hairspray that is tacky, but not too too thick. Well, not too thick. I shouldn't say thick: I mean like extra hold like too firm of a hold um, because then it's kind of makes it too stiff and hard to maneuver. In case you need to fix anything when you're laying your baby here. So I just use my melt spray. I think that does the trick, and now I'm just parting like cleaning up the middle part, just make sure it's in the middle and it's parted to frame her face properly. Foreign foreign foreign wanted a middle part with curls, so with curls. It is very important to cut layers through their wig. This the layer is what it does. It adds body. It adds more fullness to the wig. It makes your curls look more full and last longer as well. So what you see me here doing is cutting layers into the hair, I'm taking my my comb um, just to part out some sections and the first section I'm going through with the front and I'm going to cut layers closer like the first layer, I'm going to Cut as near closer to her chin length and then just zipping through with my scissors, so that's what you're going to see me doing right now. I also trimmed the ends of the hair, so I take about take off about maybe a half an inch so that length of your hair, like the bottom part, is very thin and stringy like so I just like to cut it cut it to a point where It'S all even um, and so it's very thick at the ends instead of stringy, because when you have stringy hair at the ends, when you curl it, the curls look kind of messy and stringy. So it it's not a really good look, and it's not worth trying to keep the length for that it. Doesn'T it just it's just quality right now over quantity for sure. Thank you all right, foreign. Thank you very much. Now I'm preparing to start curling. So I'm just going to do some final touches mold down the top a little bit more, I'm going to go back in with my wax stick once again: um just to get rid of any flyaways, make sure the top is nice and clean before it starts styling For curling, I like to part the back into two, so I part right down the middle in the back um. That'S how I like to style a style for curls I like to do one side first and then I'll curl, the other side. Instead of going all the way across, I find it a lot easier and I like to curl going to um away from the face on opposite side, so curl going in. Unfortunately, my battery dies before I could show you the full curling tutorial. I'M so sorry guys. I will make sure it will be my point of Duty to make sure I film a curling tutorial. If you guys need one a helpful tip when curling is make sure that when you knit do your curl you'll use a pen and you pin it up so that the curl has time to um to to cool down when the curl cools down it'll make the Curls last longer, when you comb them out and my battery dies around here, but this is the finished results guys. I really hope you enjoyed this video. I hope you learned something today. If you did, please give me a thumbs up and subscribe to my channel where I'll be posting more videos like this to help you guys out. Thank you so much for watching later, foreign

Comments
Chinoi Baba: Thank you so much