Omg!!! Fire Auburn Curly Hair Tutorial For Beginners | Klaiyi Hair
- Posted on 01 December, 2022
- Lace Frontal
- By Anonymous
●▬▬▬▬▬▬♛#KlaiyiHair Black Friday Sale♛ ▬▬▬▬▬▬●
Biggest Discount of the year/48-Hour Fast Delivery
Get 36% off Use Special Code: BF36 (only for Nov 25th-26th)
Get 28% off Use Special Code: MY28 (daily code)
Direct Hair Link:➤https://st.klaiyihair.com/difin
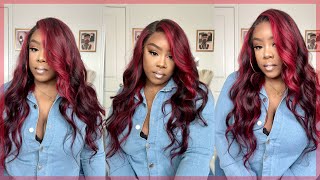
Hair Info:13*4 lace front wig, kinky curly, 24inch, 150%density, reddish brown color
Black Friday Sale:➤https://st.klaiyihair.com/difip
Klaiyi Best Sellers:➤https://st.klaiyihair.com/difis
Affordable Natural Density Lace Wigs:➤https://st.klaiyihair.com/difiq
Klaiyi Hair Official Website:➤https://st.klaiyihair.com/difiu
Aliexpress Klaiyi Hair Store:➤ https://s.click.aliexpress.com/e/_opNA...
Amazon Klaiyi Hair Store:➤https://amzn.to/3OLRlhL
YouTube "Klaiyi Hair": http://bit.ly/2zpjQhu
TikTok"@klaiyi hair": https://www.tiktok.com/@klaiyihair
Instagram "@Klaiyihair_no1": https://www.instagram.com/klaiyihair_n...
Facebook "@NO1KLAIYIHAIR": https://www.facebook.com/NO1KLAIYIHAIR...
Contact for Wholesale: +8618337492297 Email: [email protected]
#klaiyiwig #lacefrontwig
-----------------------------------------------------------------------------
PRODUCTS MENTIONED:
Shop Bedeck Beauty: https://bedeckbeauty.com/
-----------------------------------------------------------------------------
Hey Girl Become a Love Bug ✨ by subscribing here: https://www.youtube.com/c/AshleyBedeck...
Email: [email protected]
Monthly Wig Sale: https://ashleybedeckhair.com/
My Amazon Store: https://www.amazon.com/shop/ashleybede...
Let's Stay Connected:
Instagram: @AshleyBedeck
TikTock: @Ashleybedeckofficial
Twitter: Ashley Bedeck
Facebook: Ashley Bedeck
My P.O. Box:
P.O. BOX 52103
Irvine, Ca 92619
COUPON CODES:
FETCH REWARDS:
Your Referral Code: QXQMDP
#ashleybedeck
-SMOOCHES
Hey love folks, welcome back to my channel, I'm Ashley for tuning in for the first time, and I got my hair done except I did it myself today we're going for an Auburn Vibe, we're going for curly black we're doing the Instagram baby, hair Vibe, and you Guys know I got you covered, I went ahead and filmed a very beginner friendly tutorial, a step-by-step tutorial on how I went ahead and installed this wig straight out of the box. Now this one did come from Kawaii, hair and she's absolutely gorgeous. She had so much definition and so much Vibe when we started - and this was the end - result super beautiful now, if you don't like the baby hair, especially the drama, the Instagram baby hair, you can definitely opt out, but of course you guys know I love it. I'M gon na go ahead and jump into the tutorial, be sure to check out the description box before you head out and also subscribe and like this video for more content. We are two days away from vlogmas and I'm kind of nervous, but I'm excited and I'm up for the challenge. So I hope you guys subscribe. If you haven't already, you guys have been waiting patiently for the Vlogs and they are definitely going to be coming in by the boatloads during December. So let's go ahead and jump right into the tutorial jumping right into it. This is the wig straight out of the box, she's a beautiful auburn color. This is the inside construction of the cap. Look, and this is what she looks like on. The texture is Kinky Curly. The length is 24 inches and, as I mentioned, there is four inches of parting space going back she's 150 density, and this is what that looks like on this wig hashtag shrinkage is real, so here I am just deciding how I want to style the hair before I even start my first mindset half of half down, but I do want to show off the curls in their full entirety. So let's go ahead and pull the hair back and start the install process. So, typically, if you want to customize the wig, as far as like bleach, pushing the knots testing the lace, anything like that twisting the hairline, I recommend all those steps to be done before you do your install. I skipped out of all those steps because you didn't need to bleach the knots and I'm going to Tin delays at the very end of the install process. So just stick with me and you'll see how beautiful this one comes along so step one for me. The only process I did to my natural hair was just to pull my natural sideburns back with a little edge control from beadek beauty.com. I cut off the excess lace and now we are going in to install the hair pretty much glueless. I use two products. I use the got to be glue in Black. I allowed that to get tacky and then I applied a liquid holding spray on top. Let that get a little bit, tacky put the lace on top, and then we blow dried on a cool setting. We are repeating those steps on the sides to make sure that the entire wig is laid. Now, after you do this, it's a great idea to apply a wig band, AKA a melt belt to really let that lock in and set. I don't feel the need to do that if I ruin anything or anything lifts, I'm always able to just go in and touch up, but if you really really want to get a good install, allow it to set and completely dry before you move on. So for this one I did opt for some baby hair and we did go extreme. We went with the Instagram inspired baby hair, where there's like this swoop right at the arch of the eyebrow and then a swoop at your sideburns. I pretty much sectioned those pieces and then I curled them away from the face and then cut them down to a length I felt comfortable with now I'm going in with that same edge control. I use on my natural edges with the actual baby hair, and you want to focus that product, mainly on the lace or like the root of the hair and kind of leave the ends with no product. You just drag the product through, as you kind of like form, the baby, hair and swoop it, and this will allow the edges or the ends of it, to kind of be a lot more fluffy, which pretty much is the way of the Instagram baby hair. Hopefully, that makes sense also, I don't want to forget to mention that they always have sales and Deals and coupon codes, and all of that so be sure to check out the description box for links, and you know all the details on that. Also, you can find them on social media, so you can find direct links to all of that as well. Now I'm going in and as I mentioned, I did opt for a center part, so once the wig was completely bonded down and the baby hair is taken care of we're going to go ahead and take care of that parting. So a center part is what we chose. I went ahead and made sure it was straight as possible. Then I went in with the dynamic duo, which is the wax stick and the electric hot comb from beadekbitty.com. I really like to get in there and just make sure everything is straight along the hairline. Yes, this one is a curly texture and, yes, you want, to, you, know, preserve those curls, but when it comes to lace, I don't like it to be too puffy along the hairline. I like it to be as straight at the root or like the direct front of the hairline. This just is what looks best on me and I did add that same product Along The Parting which flattened it out now we're going to go in with the mousse and we're going to do the Instagram method. For this, too, which is pretty much just Nairobi mousse and I'm just going to go in and completely saturate the hair, please feel free to save or conserve your product by making sure the hair is wet. First, I always recommend going in and co-washing your curly wigs with a Moisturizing Conditioner and getting it damp that way that way you can lock in the moisture at the sink, and that way you will need less product. But of course I like to do everything straight out of the box, so this is pretty much one of my favorite techniques, but you guys know sometimes I'll switch it up and do other things. But today this is just what I was feeling check out. The curl definition once you go in with that Denman brush and you can see here the difference between straight out of the box and also when it's styled with mousse and a Denman brush, and it definitely gives versatility. So you can have it one way one day and then the other way another day. So we already went in and flattened out the hairline, but I did want to add a little bit of a holding spray along the hairline. This is going to give a little bit of lift and pull the hair back, naturally, so that you can pretty much show off the baby hair, and I loved that for me just going in and touching everything up and making sure it's perfect and voila. But we cannot forget to go in and conceal, so I use the 420 concealer or the 420 color with the Fenty concealer Along The Parting, as well as this Ruby kiss Foundation powder. I think this one is a shade or two darker than my complexion, and now we have the perfect look feel free to use a lace tint that is designated for your complexion. I like to go in with things that I already have that already blend in with my skin tone, and I think this was a perfect match, but again you know to each his own. If you like something different, I highly recommend you use what you love happy girl, let's go ahead and beat our face and then we're gon na put on the Melt belt. While we beat her face that way, everything can set beautifully and then we'll come back for the final result. Okay, love bugs, so we are done with the look. I want to head off camera and beat my face. You know it always just brings the look together when your face is, you guys haven't been seeing the Melt belts, but these are from beauty.com Shameless plug. I do sell these. This one is old and beaten up, but I wear them literally every day. I just forget to share them here because a lot of times, if I'm doing an install once it's done, I just kind of show you the end result and whenever I let my wig like set, that's what I use or like when I get in the shower. That'S also what I use different things that I do like sweat. That'S what I use so I'll have that in the description box, but this one here obviously is from Kawaii hair. It'S like here, wig clayhair.com. This is the box and they did give me a generous package. So when I received the wig, it was like a nice sturdy happy package inside I did get a green robe. You guys have seen this green rope many of times, because I always um shared on this channel. I actually should have wore it today, but um. I didn't even think, and then the Box itself was nicely folded or closed and put into this beautiful dust bag. I love the way everything coordinates so like, even when I see the girls um review wigs from Kawaii. When I see them in that green robe, I already know it's a kawaii tutorial. Then this is the box here and inside still more stuff, so the wig itself, the Box, isn't it so fancy. So the box was in this desk bag, but inside the Box the wig was in this dust bag, so I literally got spoiled massage bag. The wig was inside of this. She also get your green milk belt, super nice and fancy, and it does have their name on it, and then you also have the wig caps and then last but most certainly not least, you also will get another goodie bag, which includes a cheetah leopard print style. Meltdel wig band, another pack of wig caps, some beautiful, mink lashes and then you get like this little Kabuki brush. It'S a rose. Gold color super nice. Now, as far as the hair goes, the hair itself, the color, you guys already know. I love a good color switch up. I love my natural brown, but of course, when you wear brown hair every day you get bored with it. So I love the fact that this one came in a beautiful color here. It says this one is a 13 by 4, transparent lace, wig, the texture is Brazilian and of course the wig was disinfected. So I did my famous technique with the Nairobi. Mousse no water and I love the way it came out now that it's dry since doing my makeup and stuff. It does have a slight crunch to it, which of course, when you add a little bit of water, it'll loosen it up instantly. But I like the crunch, because it helps me to define the curls and also to set the curls and then also for the curls to last longer, if you're, a curly girl with natural curly hair, you kind of know, sometimes everybody's different, but some everybody desires. Nice. Soft curls, but sometimes the process of um getting those soft curls and making them last a long time is like going through the crunch. First, the 360 of the hair. I did opt for the dramatic baby hair on this one, but you guys can see when it's pulled down and forward like you can barely see that. So, of course you can explain you can, you know, hold out on that option, but I love it. So much now this one is perfect for fall, but you guys know I'm not a like seasonal type of girl, so I'll wear it year round. Let me know what you guys think I'll have a direct link to her in the description box. With all of the details, also everything we used in this video, including the little tiny flat iron, is listed down there as well. Thank you guys so much for watching. It is about less than a week about four days. Three days, two days three days until vlogmas starts, so I hope you guys already I'm actually gon na start filming tomorrow, so that should be fun. Thank you guys so much for watching subscribe. If you haven't already and as always I'll see you in the next one smooches
Comments
Brit Dean: I have this exact wig . I can’t wait to style. Looks good on you.
Jackie Randolph: I just love this color on you it's beautiful and I love the curls ❤️
Luli Mau: Cute!
BAMI TV: Lovely hair, I order same hair for my customer. Am waiting for it to arrive.
Luli Mau: Nice color!
ladetra paul: