Step By Step Melted Lace Frontal Wig Installation | Ginger Hair With Highlights | Wiggins Hair
- Posted on 12 December, 2022
- Lace Frontal
- By Anonymous
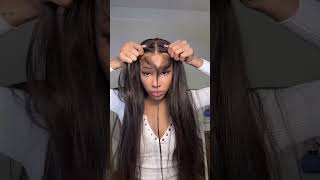
Hair details: 26 inch Ginger brown 13*4 frontal wig 200% density
Direct Link➤https://bit.ly/3LpCFEb
#WigginsHair Official Store:➤https://bit.ly/3RT6AHj
More coupons!Join In Facebook Group➤https://bit.ly/3pzwi8e
You may also like:
1.Skin Melt HD Lace Wig➤https://bit.ly/3Seamuv
2.Top Selling Lace Frontal wig➤https://bit.ly/3QQgUyy
3.NEW V part wig! More Natural➤https://bit.ly/3f0jBA8
#wigginsloosedeepwave #wigginshdlacewig #wigginshairreviews
Follow Wiggins Hair On Social Medias:
Instagram @wigginshair ➤https://bit.ly/3ILWwdL
Tiktok @wigginshairbest ➤https://bit.ly/38krOfq
Facebook @wigginshair:➤https://bit.ly/3IQd84f
Wholesale WhatsApp: +86 18339906150 Email: [email protected]
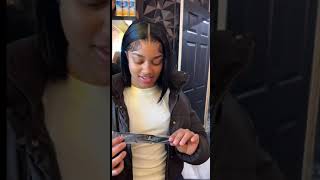
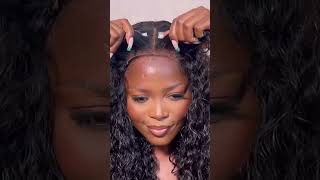
What is up Africana fam if you're returning welcome back and if you're new welcome to my Channel. Please Subscribe for the algorithm and your edges. If you want to see how I achieve this beautiful, install from start to finish, then keep on watching all right, y'all. So, starting off with the install, I have my ball cap method already done off camera, I'm going in with my alcohol, my 91 alcohol and I'm using just a rubbing pad just to remove any of the excess gel that I have on my forehead as well as Any oils or dirt that I have around my forehead. You want to make sure that it is nice and clean to prep. For your install today's hair sponsor is Wiggins hair. I have their 13x4 26 inch, Ginger wig and a 200 density. This wig is dense y'all. It is thick okay from root to tip all right, but right now, I'm just putting on the wig the wig that come pre-plucked and I went ahead and just tinted the lace off camera. If y'all want to see how it tense my lace, I do have a video that I posted recently and how I made my own homemade tent well onto the insta, I'm going to go ahead and cut the lace at my temple areas. Just so, I could have more leeway to pull around the wig and stuff. As I can see, I just have some more leeway to pull on the wig when I cut my temples now on to the adhesive I'll, be using the urban kitchen homemade down adhesive skin guard and the actual adhesive, and now that I have my wig into place. I'M going to go ahead and pull it back and then spray the skin guard on my forehead and then go into the glue once the skin guard is dry and I'm going in with two layers and two layers. Only. I only really do two layers and honestly, you only really need two layers. If you're, looking for like a good week hold and I'm gon na, go ahead and just use the metal part of my rattle comb just to smooth out that glue, and you want to make sure that the glue dries completely clear before you apply the next layer. Foreign and now I'm going in with my second layer this time, I'm going to do it in sections, because the glue dries really fast. So if you're kind of slow at smearing down the glue just go ahead and section start with the middle first and then go down to the sides now, once the layer dry completely clear, I'm going to go ahead and place the wig in front of the glue. Not behind not right on top of it, but in front of it, so we are going to have some excess lace once we cut off the lace, which is okay, because we're going to go back in and glue it down - and this is just makes the process Foolproof so that you don't have any glue to clean up in front of your hairline, because that is a nasty job that is nasty Works y'all. So I started off with the middle part first to put down the wig, and then I started off with the sides. I'M just kind of pulling and tucking making sure that there's no bubbles or lumps inside the wig and then place it down and just hold it down with my hands and now on to cutting off the lace. I am using. My eyebrow Rings just to cut in a jagged motion. You want to cut as close to the hairline as possible and you're just going to repeat this step on every side foreign to go in with my hair shares and I'm going to cut off the excess lace that is around my ears. Please be careful when doing this, so you don't snip your air by accident, but I just kind of lift up the lace where it's not glued and then just cut it off. Now I went ahead and just kind of freestyle with my hairline. I am cutting off some more excess lace and I am cutting into the hairline now I just kind of wanted to have like that widow's peak effect. I didn't want that shape up type of hairline y'all, so I just went ahead and just cut up a little bit more and I feel like this made. It look a lot more natural now on to gluing down the excess lace I'll be using my rat tail comb, and I have some glue on my hand and I'm just you know, using little dots and just being very precise. This just helps with precision and just making sure that everything is nice and laid without having excess glue in front of your hairline, because, again, cleaning up glue is not fun, especially when you already have your wig laid down, and you have glue to clean up. It'S just not a good look and most of the times you have to do the entire install all over again, but I did do two layers once I was doing the detailing and then I'm gon na go ahead and just smear it down with the back of My comb and now I'm just repeating this process on each side, now that we are done with laying down the lace that was on to styling, I'm gon na go ahead and just um do a nice C curved side part I'm just using my comb just to Kind of curve in a diagonal and then kind of curve it like a c then I'll, be going in with my character, wax stick just to apply that on both sides of my part, and this just helps tame any of the flyaways and also just makes the Hair a lot more flatter when I go in with my hot comb and now I'm using my hot comb on the hottest setting just to make sure everything is laying down nice and flat and after I've part the C curve. I do go in the back and kind of just you know, cut some hair off from the frontal and a horizontal like I'm doing right now, and this just helps cover up the tracks in the back. Now that we're done with the parts now it's on to the baby hairs and I'm using my comb again, my trusty comb and I am going to carve out my baby hairs. I'M doing four baby hairs overall, so two at the temple and then two at the tendrils. So I'm just using my hot comb once I have it parted down just to kind of train it into place and making sure that it is nice and flat. Now to further melt this lace, I'm using my Spritz, my Fantasia Spritz Mega, hold spray and I'm just going to go ahead and spray. The hairline, and this could get really messy so sometimes I'll use my hand, but I feel like it takes a long time. So I just use this spray and just kind of spray lightly, because the Spritz will just come at you like bam. And then you know it's all over the place. But yeah just make sure that you spray that all over the hairline and now I'm using the Wiggins hair melt belt that they supplied for me and I'm going to let that sit for 30 minutes and once the 30 minutes is up. I am taking it off and now I'm going back in with my hot comb and just pressing out my baby hairs, because they did get a bit crunchy from the Spritz and I'm just pressing out my hairline as well too. So everything is nice and aligned before we go ahead and start designing our wavy hairs. So I'm taking some nail scissors and I'm cutting my baby hairs as you guys can see the temple ones, I'm cutting an angle upwards and then um for the tendril. Once I'm cutting and angle downwards, and now I'm just using my tvx flat iron from Amazon and I'm going to go ahead and curl, the temple baby, hairs outwards and then the ones at the tendrils and words. So now I'm going to go in with my Nairobi setting lotion and a baby hair comb and I'm going to go ahead and form my baby hairs as I'm forming my baby hairs. I just like to hold the root and then kind of swoop at the bottom. Just so that it's not you know going all over the place, foreign and I just go ahead and do my makeup off camera, let it dry and then I just combed them out, because I hate crunchy baby hairs. I, like them soft, I didn't get them on camera, but these are the finished results. I hope you guys enjoy this video. Give me a big fat thumbs up and comment down some orange Hearts. If you enjoyed this video subscribe to my channel, if you have not and I'll see you guys in the next one later foreign

Comments
MsKneshaC: gotta follow this video for my next install u make it look so easy ♥️
Wiggins Hair: OMG~So beautiful!!
brown_ skin_lover_queen: This color is so beautiful
Tanzy The Glow Up Guru: Slayyyyys for dayyyys!!!! Yesssss girl love the look
Dee Luther: Great Video As Always Lovely thumbNail Tho U DiD a Wonderful Job U DEFINITELY Slay This Look Natural Beauty Love iT Beyond Gorgeous You Are Ur Makeup Always Look Good Have a Marvelous Week Too Stay Bless N Be safe Always
Dee Burton: Yaaaaaaaasssssss hunnae the gworls love a good ginger !
Zainab Jimoh: Gorgeous gorgeous girls
Mckee Gardner:
Zainab Jimoh: Yeah because where have you been we’ve been waiting girl
BRUVS: Hi