Installing My First Affordable 360 Lace Wig From Amazon * Must Have *
- Posted on 07 December, 2022
- Lace Frontal
- By Anonymous
Special thanks for our all subscribers. We are back to release our new Video Installing My First Best Affordable 360 Lace Wig From Amazon * MUST HAVE *. Please watch our video and do likes, comments and subscribe.
Subscription Link: https://cutt.ly/01pnolC
In this video, I'm demonstrating how to install my first affordable 360 lace wig from Amazon. This wig is perfect for women who are looking for a natural look without spending a lot of money.
---------------------------------------------------------------------------------------------------------------------------------------------
☑️ Shop at my Amazon store: https://cutt.ly/91sTiCv
☑️ Shop at my store: https://cutt.ly/E1sTx67
---------------------------------------------------------------------------------------------------------------------------------------------
In today's Video, I'm just showing you guys exactly how I will be applying my first wig. So watch this video Carefully. I hope you will have a good time here.
➡️ Shop my hair oils on Amazon.com
☑️ S-Secrets Growth Oil: https://cutt.ly/t1sYwlB
☑️ Carrot Growth Oil: https://cutt.ly/h1sYo21
☑️ Coffee/Caffeine Growth Oil: https://cutt.ly/81sYkO5
---------------------------------------------------------------------------------------------------------------------------------------------
➡️ Look out for more product reviews on my channel to help you live your natural life in the most frugal way possible.
✅ Promoting a brand, Modeling, and Acting only ✅
[email protected] (✳️Fans Email Only)
If you have any problem with copyright issues, please contact with me directly before doing anything, or question please write to me email.
Visit our website: https://s-secrets.com
---------------------------------------------------------------------------------------------------------------------------------------------
- Follow Me On Social Media
✔️ Instagram (Personal): https://cutt.ly/41pnRtv
✔️ Instagram (Business): https://cutt.ly/41pmh6n
✔️ Facebook: https://cutt.ly/b1pnFgd
---------------------------------------------------------------------------------------------------------------------------------------------
▶️ Checkout My Other Videos:
My ICL Surgery Experience
✔️ https://youtu.be/4A7r_vlrFpg
How To Get Rid of Cellulite Fast Naturally Within 14 Days
✔️ https://youtu.be/NFxIj8_9yoQ
HOW TO MAKE YOUR HAIR GROW FASTER & THICKER in 30 days
✔️ https://youtu.be/izyUQ4zfODg
MY EASIEST WASH Day ROUTINE EVER
✔️ https://youtu.be/G-Dek6aN4rg
---------------------------------------------------------------------------------------------------------------------------------------------
“I am glad that you are here. I publish videos each day. If you are still looking for videos on #lacewigs #amazon #lacewiginstall #amazonwigreview #lace, 360 lace wig install, best wigs from amazon,Hair influencer,best affordable curly wigs on amazon,AMAZON LACE FRONTAL,most natural wig install no glue,HD lace wig,natural hairline and more, please stay connected with us. Subscribe to our channel, so that you do not miss our upcoming videos on these topics”.
☑️ Hair or products shared are my OWN personal and honest experience. This video may contain sponsored content and affiliate links, which I get a small percentage that helps invest back in my channel to continue to bring great content! Thank you for your support!
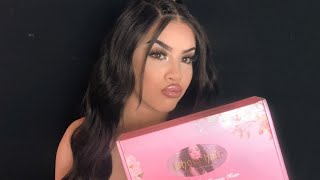
Hi family welcome or welcome back to my channel in today's video. I will be applying my first this week. This is by no means or tutorial, I'm just showing you guys exactly how I will be applying my first wig, I see on YouTube. A lot of girls know how to select their last week, and I think it's time for me to start learning all the things as bad from just doing: DIYs and natural hair, and I'm also into wearing wigs lately, because I'm on our protective side Journey nowadays, I Wash my hair only once a month and then after that I put my hair in protective star. I take it down every two weeks, re-moisturize it and put it right back in braids. So yes, this is the first try. You know how the girls they can cut around their ears and then it just looks like my did not turn out well for me, I had to cut about three to four different stockings before I was able to get it somehow. Okay, yes on! I think this time we are on like number three stocking so just watch me and see how I installed my first list week, but at the end it turned out to be really really great, really pretty spoiler alert, but it wasn't easy getting there as you guys Can see I'm still trying to see how it goes? Normally, it goes over the ear. That'S what I saw on YouTube. They put it over the ear, but for some reason, when I put my over the ear to cut it, it just didn't feel comfortable. It just did not look right, but before getting to this part, as you guys saw at first use alcohol to just clean around my hairline and then I'm using my God to be glue again, something that I saw on YouTube. If you guys know the right glue to use for this, please let me know, because I love my edges and I want to keep my edges. I don't want to do something that would damage my hairline, but, but I saw that got a big glue is very popular to use to lay your wig down, so I just decided to go with it and after that, I'm just going to use the blow dryer And then I had to go on camera to cut this, because I was afraid before I cut myself and as you guys can see, I think I put it a little bit too close to my forehead. It'S gon na look a little bit weird, but anyway, this is the wig I will be using. I got this from amazon.com. This week is very, very affordable, but when I tell you this week is amazing: I have used this hair multiple times it have little shedding. I also use this to do or 1940 1960 hairstyle. I got a professional hair status to do it on celebrity hairstyles to do my hair and it came out so great I'll leave a picture at the end of it, for you guys to see how it turned out. So this week is amazing for the price. If you guys are interested I'll leave the link down in my Amazon store, this video is no sponsored. I saw it on Amazon, I fell in love with it, and I am so glad that I bought it because it feels so great, and it is very, very very soft. The texture is just amazing now another trick again, I saw on YouTube, is for you to use your makeup or concealer or something to just make sure you cover the hairline, so it can look natural. So this is what I'm doing, I'm also just going to do it on a week, so that it can look as if to say it's my own scalp, something closer to my complexion. Unfortunately, this week was a little bit too big for my hair, just a little bit around the ear area, so I will have to go in and cut some of it up, but for now I'm just trying to see how it looks the hairline looks so natural. So this is going to be easy to do and again I saw that you have to put about two or three layers of cut to be glue. Yeah, I'm spilling it all. I mean as well for it to be able to hold properly and then you have to go in again with the dryer, not for it to be too dry, but a little bit sticky like so that's what I did. I did some of it off camera and now I'm just going to put the wig on. I also cut the lace of camera, because this looks so easy what these girls can do about. This was my first time, so it wasn't that so easy for me. Also to get it to stick on to the glue, I wanted to lay it down perfectly, so it can just look so natural as if to say the hairline is from within my skin, but to get it to lay down. It was a little bit difficult because it was a little bit too big, so I have to go and cut that part out and once I cut that part out and frame it towards my face, it looked it looked better. But again I got to know that the wig was just too much on my forehead, so I'm just going to cut that part out and then I will take the glue and lay it down after I lay it down. It looked good, but it was looking a little bit too weird. I put it in front too much, so this is just how it looks. I went back. I took it out because it wasn't looking good. I wasn't going out looking like that, so I went back, took it out and redid it, but so far this is. How is looking. Let me know what you think. Did it look good like this, but to me I felt like it was just way too close to my forehead so and also this week is very easy for you to lay it down. I use a little bit of mousse, but I found a new way for me to lay it down what I've been doing lately. I would just condition: use conditioner to wash it I'll add secret conditioner. I will use that. I will wash it and then I would just take some of my leaf in conditioner or some of my crawl smoothie and then I will just mix it in water. Let it be running and then I'll just spray it onto the hair and let it air dry. I notice, when I do like that it just have these soft bouncy really bouncy cross, but all you know so this time, I'm just using mousse to be able to lift the curls down and it's looking okay and then I also tried to do baby hair seriously. She has to bring it in front of my forehead more but yeah, but I Lay My Baby hair down and I parted the other way and I'm adding in more mousse on it and it's looking okay, but I wasn't really comfortable with it. So after that, I just went and tied it down with my scarf for me to see how well it would turn out, but at the end I look at it. I came closer to the mirror and it was just not good at all. I didn't feel comfortable with it and I think I put too much moves also, so it just looked like wet. I had like the Jerry girls wet, look but yeah, so I went and lay it down and then this is how it is looking, but the next day I took it down and I redid it and now look at this and the next year. I just had to do little work. Oh I did I didn't cut this socket. I just put the stock in bag and then I put the glue around my hairline and I took my time and just did the hair on it and I am loving it. I'M loving it. Let me know what you think about it, the first way or this the second way I love the second way more and then I'll use some of my makeup also so just make it look exactly like my skin color. So this is it family. I love it, and this is my first this week. If you love this video, please do not forget to give me a like leave a comment down below and subscribe, and I will see you in my next video bye bye. I will also leave a short clip of how I use this Wii to create our 19 40 50 60 hairstyle. But I've known you too long. It hurts to watch your blue eyes Fade to cry. It'S your fade away as you fade away, yeah, I'm about to fade away cause every time I wake up. I feel like it's Monday, something's going wrong with all the chemicals update, my brain, all of a sudden. I don't look at anything. The same way got ta build up on my thoughts sitting in an ashtray. I'M sorry that I'm so inconvenient, no


Comments
Georgette Thorne: The next time you should put the wig cap on the same way but you need to spray the glue to the side of your ears on your face, then dry it before you cut the cap. The glue that you used is the best one because you can spray water afterwards and it loosens it up when you want to take it off. Well done the second way is better.
Linnea Moody: Love it very nice
Nicole: Hi, I come and go. I’ve came across your Channel i ordered your carrot growth oil. How I use- after I shower I put it through out my hair I just put it in my hair but in the bottoms and on top. Maybe I’m using it wrong but I love it and going to order more
Devin Fane: Love how it was styled at the end. That was super cute!
Tosh Tosh Rodgers: Keep trying the more you practice the better you’ll get
mary briggs: Very pretty
Letha Jackson: Very nice
Love Yourself: I love the second way. You did an amazing job and the hair is really pretty this texture looks good on you. Have a Blessed Day “Therefore, since we have been justified by faith, we have peace with God through our Lord Jesus Christ.”
Sandra Farrell: Second was best, you will get the hang of it… you are on your way to being a pro
glenda armstrong: Love the 2nd look
mymysharkable: 2 was much better. Good job