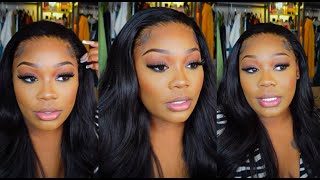
Watch Me Install + Review This 26 Inch Straight 13X6 Frontal Unit Ft. Isee Hair | Kayla Monet
- Posted on 14 June, 2020
- Lace Frontal
- By Anonymous
***WATCH IN 1080P FOR BEST VIDEO QUALITY!***
DISCLAIMER: THIS REVIEW IS NOT SPONSORED, HONEST CUSTOMER REVIEW AFTER HAVING THE UNIT FOR 6 MONTHS!
Hey loves!
I hope everyone is staying safe + blessed during these times. Today I showed you how I install my frontal units at home. I've had this unit for about 6 months - worn in rotation with my other units, and when I purchased it ISEE HAIR was having a huge sale so I got it for $160, but now it has increased in price. I am not a professional and I know there's always room to improve, this is just the method that works for me right now! If you have any questions or video suggestions, please leave them down below! Or if you just want to chat comment below as well, I love to chat LMAO.
Stay blessed + much love,
Kay
UNIT FEATURED IN VIDEO:
ISEE HAIR Straight Hair Lace Front Wig,Pre Plucked Natural Hair Liner with Baby Hair, 100% Human Virgin Hair Wigs Indian 13*6 Lace Frontal 150% Density 26 inches
https://www.iseehair.com/isee-hair-str...
LET'S BE FRIENDS!
TWITTER: @KAYLAXMONET
INSTA: @KAYLAXMONET
CONTACT ME!
EMAIL: [email protected]
FILMING + EDITING EQUIPMENT:
Ring light + Tripod Stand: https://www.amazon.com/gp/product/B081...
Camera:
iPhone 11
Editing:
iMovie
TAGS:
13x6 wig,13x6 frontal,13x6 lace front,26 inches,26 inch hair,26 inch curly hair,how to tone 613 hair,26 inch brazilian hair,iseehair,glowprincess,glow princess,iseemalaysian,amazon hair,aliexpress hair,aliexpress wigs,amazon wigs,lace frontal install,glueless,isee hair,isee hair aliexpress,isee hair unboxing,isee hair review,longqi hair,longqi hair. aliexpress,aliexpress,aliexpress wig,straight hair,straight wig,black hair,frontal wig,isee straight wig,makeup for darkskins, indian straight, new youtuber, small youtuber, small youtuber support, kayla monet, dark skin lace tint, dark skin frontal
Hey-Yah welcome back to my channel. It'S a girl, Kayla mone! If you new here, welcome, welcome and if you're not thank you so much for coming back and check in on my new video, isn't so mom, but I'm happy to be back. I just wasn't in the headspace to be filming with everything going on with the murder of George Floyd in the black life matters man. I felt that needed my attention, I'm a firm believer that all lives do not matter until black lives matter. So if you think otherwise, you can just exit out this video because there's no space for you and I on this - you don't even want you on this video in all honesty, but yeah today, I'm gon na be showing you guys how I install this unit. How I got this hair, not a professional. This is not sponsored. I purchased this in my own claim, I'm a hard-working girl who's, not rambling and don't forget to Like comment subscribe to my channel and let's get started with the video see y'all at the end heyo. So you see the construction of the lace front right here is a 13 by 6 place right by. I see Beauty here, it's the 26 inch Indian straight unit. It'S looking kinda crazy right here. I washed it and I let it air dry and I'm just brushing it out and I'm gon na begin to lay the lace. I use a combo of two products. I use that even forever ultimately glue and they got to be freeze blast. Before laying my lace, I use alcohol to make sure it's clean and then I start off with one layer. I'Ve got to be than one layer even and then I'm going to use a blow dryer on cool and until it gets tacky in between each layer. Also, I don't use the ball chat method because I'm lazy, as you can tell, and normally use a wig cap - that's near my skin color, but I couldn't find it and I was being lazy. So I just lazily put some foundation powder on top to match. My skin, it's gon na, have trouble blending as you see later on in the video, but I'll fix it and you'll see how I do that if you keep on watching after the glue has dried now, you just want to go in and melt the lake slicker. Oh, so all we're gon na do is just take your rat tail cain't comb and just push it into the legs and just push and melt like pushing melt. As you see me doing, I go in sections to make it easier. I start with the middle first and I do the sides also a tip is to cut your leaves in zigzag motions or with the razor, so it blends easier. You don't want a straight cut across because it'll be easy to notice that its leaves, I mean Lisa's lace up end of the day, but if you cut into the exact it's more harder to notice so now all the pieces I get in mail, I'm just going In with it got to be to just push it in and then next I'll be using my scarf to lay it down, while I straight in the unit also another thing I do, I just used my blow dryer on high heat to help aid melting. The lease in the front, while the skirt is on so I've, had this uniform unthe. Now I have little to no tingling, it's great and straitens very, very well. I love to have a nice silk rest look. So, as you see, I go one or two passes with the flat iron and then I follow like the chase method with the hot comb, and it gives me the best results ever like my hair, be flowing and swaying six months later after purchasing this hair. So I definitely recommend everybody should definitely check out. I see here calm also, you can see how the ends look after months of having it. It'S not brittle, it's still full its thick and that's quality here right there for the price that I paid, I paid about $ 160 for this unit. As you can see, I kind of went a little overboard with the glue. So it's okay girl, we're going to fix it. Just see some alcohol and an old rag to just clean that up. Next, I'm going in to perfect the middle part, so I'm just taking my rat tail comb and then I'll be using the mousse to just mold and set my part in the hot comb. I love a sleek middle part. So that's what I'm doing here so now. I'M just gon na take the moose and my little edge brush and I'm just gon na be doing. My baby here is um. I just do like a little swoop teaspoon. That'S it nothing special, nothing extravagant so yeah. I like the baby. Here is what straight units cuz it makes it look. I don't know kind of like a fresh perm once I finished the look, so that's what I'm doing so. A key to a nice install is one bleach nuts. I bleached these nods myself. They said the knots or bleach, but I went back in and did some myself and also plucking your friends'll. They said it was pre plucked as well, but I went in a little more and plucked it some more. So I can definitely film a tutorial on when I order know that unit, how I do that, but that will make the key difference you have to go in after and do it to your liking. So you got, we got pluck a little and beat those knots. I know y'all was looking at my wake head look. I know this girl's not about to leave it like that Chuck y'all thought I was finished nope. So what I'm doing is I use my bronzer because it's smeared to my skin tone is darker and I just kind of like take the lace with the bronzer. That'S what I do, because I'm darker skin, so it's harder to make, leaves match. So that's what that's a chip I use trick. I use I use bronzer to tint the leaves to match my skin to make it end up like my scalp, so they see me going in and then I'll be using like a lighter powders. The Maybelline 360 fit me powder and I'll be using that in the part to define my part, you see. Stereophonic sound for the home is recorded on two separate tracks, each one giving special emphasis to certain sections of the orchestra diary from those positions. Now, when played back simultaneously on two separate systems, I love there's my six frontals. It has so much party status. I just chuckles, like I just love the Spartans me so much now, I'm just using my gods needed to kind of like keep my baby here and paste, and then I'm going to use my scarf and tie it again for about five to ten minutes. Just to melt it all in okay, I'll say I'm back with the finished wood. This is the final result, I'm not a professional. I don't work in this at all and I just went to YouTube. So this is as good as I could get it yeah with more practice I'll get better but yeah. This is what it looks like right now. Overall, I give this unit a 10/10. I had it for about 6 months and it has done me no wrong doing good singles like it's just a little. You know normal tangling with the unit as it gets older, but it's nothing crazy. I don't get a lot of shedding like this is quality hair for the price I paid. I pay about 160. This is the I see here, Indian straight unit and 26 inches, and this is where it's all hugging and I am I'm about 5'4 and this apiece is to straighten in the back zone. Don'T judge me but yeah. I really love this unit and I also watercolor to jet-black, because I always water, my water color mine is just but because I just I love jet-black hair, I mean so yeah. This is the final wood. If you have any question by commenting soon, leave them down below and I'm gon na see you guys on my next video. Thank you guys so much for watching, don't forget to Like comment and subscribe bye. You


Comments
Shirneya Day: I like the fact you have decided to do a review after 6 months of having it, to let the viewers know how it holds up after time
KePlus3: Turned out beautiful
Charlotte Hopper: You’re so stunning❤️
Life Of WavyShen: Loving this look sishope you can like my new vid
SorasGirl: How has the hair held up for you?
shabop shebop: You're pretty
spammy Pagey: how tall are you ?