How To Measure And Secure The Elastic Band On A Glueless Lace Frontal Sew In Weave
- Posted on 29 April, 2019
- Lace Frontal
- By Anonymous
Hey love new video on How to Measure and Secure the Elastic band on a Glueless lace Frontal Sew after cutting the elastic band
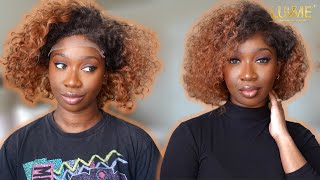
Hey guys, this is Caroline, and this is my beautiful climb, miss Bonita. She is here to get a glue last lace frontals. So in all my last video of my glue Leslie is furnished so in I did a full video on it. I will leave the video link in the description box, but I got so many views on that video. So much love in that video and I also got so many questions on how I cut the elastic band, because I did not show that part in the video. So I figured since my client wanted another lace front of clueless. I figured I will do a video now and show you guys how I cut the elastic band in the back off the glue, Leslie's frontal and how it stays put and stays on my clients, hair. Without lifting so let's just get started alright, so I did went ahead and already braided her hair all back, and I also went to hear it so use the got to be glue, Jo and Slade down her baby hairs in the front just to remove her baby Hair out of the way now, I'm gon na take my ten stocking cap and put it over her hair. I'M going to be doing a ball cap method. This just helps the stocking serves like a scalp on the delays. It also helps protect her edges in the front from the lace frontal. Okay, so I'm just securing it over here, I'm a host inner ear project so that the stocking sits directly on her hair, especially around her ears that it fits nicely when I get ready to cut it next, I'm just taking some got to be glue gel and Got to be glue spray and I'm going to slick the cap down in the front, just making sure that that is nice and firm. When I get ready to cut it and then I did pull her on any dryer for a little bit, so she can get dry and then I'm gon na be ready to cut the stockings off you all right. So I did for her running a dryer for about ten minutes now, she's completely dry in front of the second, a pair of scissors and cutting off the extra stockings in the front after Carina stockings in the front. I did went ahead and use my needle and thread, and I saw on a weaving net in the back over here and I attached a weeding net with the stockings there just helped my bundles have a good base to be soon onto once. My stocking is in place, I'm just using some foundation to tent the stocking so that the stockings matches her skin tone. I'Ve talked to three her stockings on her head. I also wan na hear intent at least four, no all right. So once my stockings is tense and my lace panel is 10, we ready to go starting with my elastic band. I always used a big elastic band house of more firm and secure. Oh ho. This is how I measure the elastic band. I started by measuring at the client's temple behind the clients ear and I passed midway past the NIP area I stopped and then pull and scratch the elastic band behind my clients, other ears to the other temple, and then I hold it and ask my clients does If you scratch and tight enough - and I accent if it's secure enough once the set is secured and feels tight enough, then that would be my measurement. I take my scissors and cut my elastic band. Once I have my measurements for my elastic band, I always take my frontal and I measure it on the clients, hair, making sure the exact place on the temple where I measure the elastic band. I measure the exact placement on the lace frontal before I saw the elastic band on the lace front after measuring exact placement, I went ahead and sold elastic band on the front and you can see how the elastic band is sewn down on the front, because that's Exactly how I measure the elastic band on her temple, so now the elastic band is on the frontal and the frontal is ready to be installed all right. So once the lace runner is over our hair, you can see how tight that lace frontal is secured to her head without any glue. I just placed the frontal on it. It is really tight and secure and I just went ahead and put it in the front and position it right over her hairline. Now, I'm just taking my eyebrow shaving razor and cutting off the extra lace in the front. Are you guys so the front is on? Okay, you guys can see. I have absolutely no glue on this front. Oh, but I need this front no to stay in place. The elastic band helps the frontal stays in place. Why I do the sole in so the first thing I do to secure this frontal is, I start with a middle part actually has started slightly off the middle part. I Part A roll on one of the braids and I go ahead and take my needle and sew a thin line of thread, starting from the back of the front and work my way to the front of the front. This one helps the funnel stay in place and I'm going to do couple stitches throughout the front all right so once after sewing the first row in the middle, I move on to the sides right near the temple, exactly where I measured the elastic band. I'M going to part another hair row on another braid exactly at the temple, but when I do this side, I'm going to ask my clients to hold down the side. So, as I sew the part, that's flipping up doesn't shift back. Then I'm going to part the hair row and then I'm going to take my needle and thread again starting from that back of the lace front. So I'm going to start sewing on the braid on the road that I poured and I'm going to sew and work. My way to the front of the hairline, all right so after our second stitch is time for our third station on the third stage is gon na be near the airport. Now, for most clueless lace, frontals install the placement of the band makes it very hard for the ear tabs to be securely flat without the glue. So this part makes it hard for the lace to be flat near the ear with any glue. Let'S install so you have to slick down your baby hair every night to make sure that is secure or every morning to make sure that the list is laying down flat near the ear. But this is an ethic that I do to eliminate some of that, so that the ear tabs can be a little bit flatter and you have less um to deal with with your install. So what I do is one of the reason why I used a big elastic band to cuz. It has a little bit more scratch and have a little bit more space. So what I do is I'm able to sole or third row right near the ear on a braid over the elastic band. And I so starting from the back of the lace working my way to the front and so a thin line for the third row. And I saw it on top of the elastic band. This one helps eliminate most, not all, but most of the part that's near the ear. So you don't have a lot of lifting near the ear and you just have a little bit to do with. After your install now, once I have my three stitches on one side, that is pretty much it for securing one side: okay. So now I'm going to move on to the other side and do the exact three stitches the exact same way and my clients gon na hold the front exact same way and I'm going to do all three now. But I'm going to move this part really fast. So we can get through to the next step of the video, so you find your way back all right, so once my three stitches is done on the other side, you guys can see. I have no clue on this frontal just that my elastic band is nicely scratch that it makes mine for no snug and secure and firm on my clients hairline. So now I'm ready to move on to the back of the frontal, I'm just making sure that the band is comfortable around here until I get ready to cut it, but before that, we're gon na see killed a frontal in the back. Okay, so starting off with the middle I'm going to take my needle and thread starting from the middle and I'm going to work my way down, and so the frontal down go into was one side of her ear and I'm gon na come back up and sole. The front down from the middle and work my way to the other side of her ears, all right so once I have the funnel secured in the back in the front, is not shifting that last step in and secured the funnel is settled. This is the question I get all that time. How do you get to bend to still see kill if you cut it and how does the lace frontals stay down on the clients hair? This is the million dollar question that I get all the time from my last video, so once the frontal is to kill in the front, I take the elastic band and I pull it on the weaving net. I see, kill it on the weaving net and I make sure it's positioned nicely in the back of the clients hair near their ear part, and I take my thread and needle and I sue from one end of the band, so the other end of the band. I saw about three to four stitches on the steam spot going from up to down down to up up to down down to up up to down down to up, I do three stitches of each on the elastic band. This is the part that makes the elastic band stay, secure and flat, and it does not shift and move once I cut the band in the back, I'm taking my thread and my needle and I'm sewing from down to up down up down to up on the Elastic band and I'm going to do three different stitches in three different sections. This is what secure the elastic then and make the frontal stays in place without moving until my client is ready to take out her install once I do one side, I move myself to the other side and do the exact same steps with the three stitches, and I work my way from one side of the elastic bed and work my way up over to the top of the elastic band, and I do the three stitches over and over in the same spot, all right. So now that I have my extra stitches off the elastic band on both sides in the back of my clients hair, my lace front of my knee glueless lays front row, so it is completely secure and completely in place. Now it's okay! I'M going to take my pair of scissors and cut off the extra lace around their ears. Alright, y'all, you guys can see how beautiful around her ears looks. Okay, my size is cut off is securely around her ear. My lace front is in place, and this is my million dollar question answer: do you cut the elastic bit? Can you cut the elastic bit? Did you cut the elastic band? Yes, I did I cut the elastic band off the lace front. O is in place. It did not move, it did not shift is not going to shift it's not going to move its going to stay in place. This is my full sew-in, glueless lace: frontal install she's, not gon na get a headache from the elastic band in the back of her off her neck, because the elastic band is cut and to tell you that this is a glueless. Do you see the scratch glueless? The scratch I can pull it out and it scratches right back and snap right back in place. This is what makes my lace frontal glue, less stays in place after I cut the elastic band. So that's my million dollar question for this video. I hope it answers your question. The only part you got ta worry about is those little ear tabs, that's flabby, and that is when she's going to have to flick her baby hairs down just to make sure every morning or every night to make sure that those ear parts are sticking down. All right y'all, so this video is already long, so I'm just going to run through the rest of the video just to finish the hairstyle she brought in her own hair. So is she nice enough to? Let me have the links I will put the links in the description box. I did not get this hair. She brought in her own hair in the back of her hair, I'm going to start to place the bundles and I'm going to use my thread and needle and sew the bundles in place and work. My way to the top I'm going to fast forward. This whole part, because we just want to get to the styling, so the video can be over okay. Now, you guys can see in the back of her hair. She has no band she's not going to get a headache from the bed. She'S, not gon. Na get tension, headache from the bed, she's not gon na, be uncomfortable in the back of her head or on the back of her neck because of the band. The band is cut off. Okay and don't go for my clients for the back of her hair. She actually had a hair style cut where the back of her hair was completely shaved off and now it's starting to grow back. So please don't come for her and talk about hair short in the back. Okay, that's just hot hair because she had a style originally that was shaved off okay, so I'm going to run through the whole video for the rest of the video. So you guys can see the finished. Look all right! You guys! So now we add a tap of the bundles installed in the back. I saw on all three bundles, I'm adding the last track, and that is pretty much it for the install okay. I'M just going to, like I said, fast-forward the rest of the video styling curly. Mickey baby here and all the other nine yards, if you want to see for detailed tutorial on how I do baby hair, styling and other stuff, please check out the other video. I will leave the link in the description box, so you guys can see it, but you can see how that closing is perfect. This is my perfectly blue, less lace frontal. So in install okay,


Comments
Toyin Veljko: Wow , you explained so well . Thank you ❤️
Ericka Colden: Omg I just love watching you work with those blessed hands keep teaching and preaching I'm "HAIR" for it sis.
The Madam Of Motivation: Excellent work her hair came out so pretty!!!!
Synaca Gilmore: Love, love, Love... best technique I've seen so far. Thank you for sharing... just beautiful
Charmaine Brown: Lovely you did it again
MsTina'sEverything: Great job great video well explained
Deidre Rilry: I really love watching you work you inspire me so much
BB fashions: Great job always sis.
Marcelle Dupont: Vous m’avez manqué FabbulousC !!! J’étais impatiente de vous revoir ! Très belle coiffure ! Magnifique ! Magnifique ! Géniale ! A quand une nouvelle coiffure avec la 360 ??? ❤️
barbara slater: Excellent tutorial!
Miss Meta: I enjoyed watching this video so much. Thanks.
afoua mensah: Great job!
kezia king: This was amazing
Georgia Browm: Professional a and complete , I am loving it
Itavia73: excellent technique!
Marie Abissé: beautiful technique. when you do this method, how many months does it last on the head?
Angela Arebanmen: Please I would love to know how you did the styling
Amin Brenda Ashu: U re a game changer ❤️❤️❤️❤️❤️❤️❤️
Shelley Rivers: Good job your funny saying "dont come for her" love your accent
•red_pepper•: Beautiful work! What kind of hair is that?
Amin Brenda Ashu: ❤️❤️❤️❤️
Evabless Crystal:
NITA RAINE: Beautiful babe
GiGi Mobley: ♥️
Yatta World: Come though sis come though
madotisss: Great job!