How To: Set Up Your Wig Stand | Affordable Wig Stand/ Tripod Option | Headmistress
- Posted on 21 May, 2020
- Hair Accessories
- By Anonymous
HI Loves
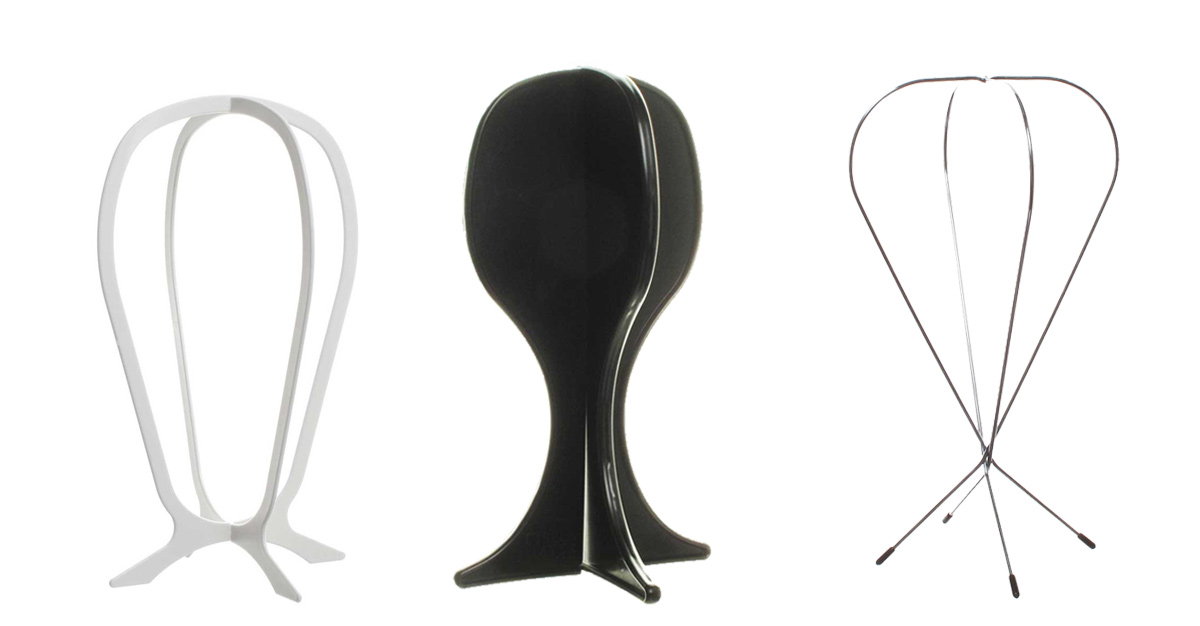
in this video i show you an affordable wig stand/tripod option you can get as a beginner wig maker and also how to set it up as well. Enjoy.
___________________________
️️️️️️️️️️
Purchase Tripod here at $1.95 ONLY
https://shopheadmistress.com/collectio...
_______________________________
Wig Making Supplies
https://shopheadmistress.com/collectio...
—————————————————
OFFICIAL HEADMISTRESS WEBSITE
http://www.shopheadmistress.com
----------------------------------------
E LEARNING WITH HEADMISTRESS
Learn how to make and Style Wigs
https://shopheadmistress.com/collectio...
————————————————
How to Transfer Head Measurements and adjust Cap COURSE. Click Below
https://shopheadmistress.com/collectio...#
For PR/Business (I make wigs☺️)
—————————————————
Hello guys welcome back to my channel, if anything you so much for decided to subscribe to my channel. I meant a lot to me now in today's video. We are going to be talking about this alternative. This option that she can use him in please overextend. Okay, now I have talked about this thing in my affordable, with making static a for beginning as a part two of it, and I decided to show you guys how this thing looks when you just get it out of the package and how to set it up And how to use it so if this sounds fun or something that you think you're interested in and definitely keep on watching, okay now, this is how the whole thing looks like now. It comes in four different different pieces in the package. Now what you want to do is that this is the main, the main clamp, so you want to unscrew lit, make you lose and then fix this. How do you color this rubber thing? I think this rubber thing here make sure that you know the surface. I didn't cause any form of friction or something like that. So that is what this rubber thing is for and yes, you can see I'm trying to set it up and show you close-ups over. So that's if you purchase it, you can, you know easily set your stop. Okay, now the part that I show you is where you're going to attach to your flats. You know flat surface and this is going to be added to, but before you put this this part at the top, you have supports that lever. The lever yeah. This is where you're going to insert it into the wick, like the cup itself, the mannequin here. So this one goes inside, okay, the Sun goes inside and then the ball, the ball part roots and okay. So this is how it looks like this is what you're gon na put into the hole that comes with the mannequin head. Okay - and this is the top part, so you're going to put that. Okay, you see the player I'm putting they're gon na pull that inside and then we are going to. You know manipulate its now. I'M also going to show you how you can easily manipulate it, and you know how you're going to fix it on the main clamp. Okay, so you're going to put so the ball part is supposed to be at the top and then you're going to you know screw the pads on the main clamp. Now what you want to notice is that um, it depends if you want to make your wig tails to a particular side. That is how you're going to school it. If you want the screw to be very loose so that you can move the other part around, then you're going to make it very very loose. Okay and if you want to have a very like balanced straight strong, you know holder, then you're going to make your screw very, very, very low 20 fasteners really tights me, then. With that, your stand, the powder goes into the wake up, is going to be very, very steady, like very, very tight and secure, and it's not going to move anywhere. So that is basically how to set up your clamp or your mini wig stand. If you want to move the part that goes into the wake up around very freely, then you're not going to make that's. You know back up very, very tight, I'm going to make it that's very loose so, depending on how you want to position your wig, your mannequin head, your block head. That is, how you're going to screw that I'm also going to show you how to fix it. On your flat surface, okay, now, if you have any flat surface like a table, a chair, anything that has a flat surface, that's kind of fits that kind of space. You'D want to. You know, set that up there. So this is a table. I'D normally set this up. Now, I'm going to put snacks, they have to unscrew late and make sure that that space between the rubber pads and the bottom part you know is enough to go there so that I want to show you see the space okay. Now, if you want to make it tight, if you want to know that it's as tight and secure enough is going to be very small, so now look at how big the spaces at the end of you know me screwing it and making it so tight. You'Re going to notice that that pads will become very, very smaller, that's an indication that the clamp is securely. You know fitted on whatever surface you're, trying to put it on okay, so you can see that's the space between the rubber pads and the surface is getting really really small. Do you see that? Yes, it's getting really small as compared to you before we started this whole thing, so you keep screw and screw until it becomes secure extra frame yeah now. The reason why all the table is shaking is because it has very, very, very, very small and thin legs. It'S a decorative piece, so that's why it's? You know it's moving around, but everywhere to be like a wooden structure, then ordering machine like that back then the clam or the meaning stand or the mini tripod is securely fitted. So you can see there is no extra space, and this is how your clamp should be looking on your flat stuff is being it's a chain, a chair table, whatever that you're trying to set that up. Now, I'm also going to show you so you see how steady it says because of how the screw was. I want also demonstrated see so in the moment I unscrew this, you can see. How is the the paddle goes into the mannequin or the style foam looks like it moves easily, so yeah also puts that's at the back of your head. If you want to tilt it unscrew it if you want to make it very, very steady, very, very like strong the yeah, so this is stifling fear. I'M also going to show you this is my heaviest mannequin and I'm going to put that on top. So there's a patter goes in yeah, so this is my heaviest mannequin and you can see that it is steady as well. Now, if you want to tilt like movers, it is sometimes is you can see. Pictures of you know wigs on mannequins that are tell Ted yeah. If you want to do that, you can easily do that and it's because it's fitted on a table you can easily like adjust it with the help of a table. Okay, so yeah. That is basically that's. I use this particular mannequin to show you guys how strong the mini tripod. Can you know how strong the mini tripod also is so, if you're on a budget initially looking at something like this and I'm not going to give a specific price, because it depends on each offender, but I'm going to put in links in my description book so That she can, you know, try for yourself, and this is this: head is from the headmistress luxury double during a collection. I'M also going to put this thing on a mannequin, so you guys can see what I'm talking about so most times. You can see tilted works like this, and sometimes it's just tilted to the left to the right see out. So that is basically it if you enjoy this short video demonstration, don't forget to Like and subscribe to my channel and also share this video. This hair is available for sale. You know the hair, you want to buy the hair or the wicked, so you guys can see how beautiful these things I'll see you guys soon in my next video bye, guys


Comments
Brie Phoenix: Thank you for this! I just bought a wig making kit and it came with no instructions haha ty❤❣
Arianna Alexandria: Thank you for this !! I just bought my wig canvas at a local beauty supply store and it came with no instructions , just literally saved my life
Nyeja Nyeja: Easy and simple instructions. Thank you !
Mane: Thank you so much! Very simple and easy when you know how to do it, but I had no idea how to put the head wig holder in the cup. WOW thanks to your video it was easy!!!!
Life with Christy: Girl when I tell u I needed this I was struggling
Sophiat Ibraheem: Thank you so much for this tutorial I couldn’t get a hold of installing mine and this helped❤️❤️
A.: Thank you so much! The instructions were easy to follow!! :)
Narinder Kaur: oh thank you so much beautiful, this is exactly what I was looking for
Mogaji Oreoluwa: God bless you my sister, I just got back from the market and I was just thinking of going back to the shop tomorrow This was a life saver God bless you Subscribed ✔
Dymin: I was just struggling putting my stand together & came across this thank you
michelle Barnes: Thank you I was so confused on what went where lol. This helped
Grace Elengård: This video came in handy-thank you!
Kimone Outside: Thank you so much! Just what I needed
THE RWBY FANDOM FREAK: Thanks for this had no idea what those were for but now☺️ this will come in handy ☺️
loveinspired7: Thank you so much for this video. I just received my mannequin head yesterday and there were NO instructions!
Afiong Okwong: Thank you. I was just wondering how to fix it. The video really helped
Elan Mackey: Thanks for the instruction!
Frances Bailey: Very helpful! Thank you!
Foxx Central: THANK YOU FOR THISS super helpful!!!
Renka Kanaya: Thankyouu so muchh this helped a lot now I can practice
Beautie Treats: Thank you so much for this, I am glad I found this video.
chisom sylvia: Thank you very much. I just got a mannequin and was literally lost as to using the wig stand
Chinyere Edeh: Thank you for this video ❤️
Queen Amy: Thank you for this !just brought a wig making kit i couldn't fix it
philly york: Thankyou for this!!
joshua muwanguzi: Thanks darling for teaching I was struggling
Shantana Redman: Thanks for the help hun
LaCoya Quinn: Thank you I had no idea what goes where.
fatou l: thanks this really helped me
Nyeisha: Very helpful thank you
Rizo babe: Thank youuuu so much ❤️❤️❤️
Joyce Amoako: Thanks alot....so helpful
Proud Mama Chrissy: Thank you. Saved my life. ☺
Theresa Murphy: Thank you also just brought one of these & no instructions . I Appreciate your help,
Ncumie Velentia: Thanks girl
Jacinda Greene: Needed this
voka45k: Thank you very much
esi onomen: Omg thank you very much!
Ayuze FBaby: Thank you!!!
Jasmine Shorter: Omg thank you
Tayla Wright: Can u do a video of how to take it out as I accidentally put it in the wrong way
Charlotte Zebonga: Thank you mom
Lisa A.: thank you for posting...my overthinking brain was coming up like huh?!!!
Marion Mason: Thank you
jaay channel: thank you❤️!
Justina: God bless you for this video
Aminat Bakare: Thanks for this
SHAM GGUCCI: Thanks so much coz I have it right now but
Suesann C: Thank you
oluwatomisin adedamola: Is it normal that the hole in my styrofoam head is bigger than the stand... Like it's not tight fitted
Beautyfulldrey: Thanks !
Sparkle Williams: What is the name of this wig stand?
Deshun Drisdles: Thank you
Abiola Babs: Thank you
Juicy Intuition: Thank you
Jacinda Greene: Thankyouuu
Lisa Mabombo: Thank you I wa struggling
iiam.tasiaa: Thank u
KaeBunk: Oh my gosh I’m so stupid thank yiu
lkssss111: How to French braid