New! The Most Realistic Hairline? | No Work Needed Kinky Curly Baby Hair Wig?| Nadula Hair
- Posted on 09 January, 2023
- 6D Hair Extensions
- By Anonymous
●▬▬▬▬▬▬▬▬▬ ◆ #NadulaHair ◆▬▬▬▬▬▬▬▬●
❤All the hair can be paid in 4 installments
★$10 OFF for $99/ $20 OFF for $199/ $30 OFF for $259 Code: YTBGIFT
————————————————————————————————
☛Video Hair Direct link: https://st.nadula.com/eh1rs
Hair Info: 13*4 Lace with Curly edges 150% Density Kinky Curly Wig 24inch
https://www.nadula.com/ ➤ Top Sale wigs: https://st.nadula.com/eh1rt
New Protective Style V-Part Wig: https://bit.ly/3p5yOkS
Invisible 13*4/13*6/5*5 HD Lace Wigs: https://st.nadula.com/eh1ru
New Arrival Fashionable Wigs: https://st.nadula.com/eh1rv
Top-selling bundles with closure& frontal: https://st.nadula.com/eh1s0
Perfect install tutorial of Kinky Curly Vpart wig: https://bit.ly/3QldiF1
Nadula Customer Service Email: [email protected]
Aliexpress Nadula Hair Website: https://bit.ly/33oOx83
Aliexpress Nadula Hot Sale Wig: http://bit.ly/3068Mlt
Amazon Nadula Hair: https://amzn.to/38ttXlC
#Nadula #Nadulahair #Nadulawig
☛Youtube: https://www.youtube.com/c/NadulaHair
☛Tiktok: https://www.tiktok.com/@nadula.com
☛Instagram: https://www.instagram.com/nadulahair/
☛Facebook: https://www.facebook.com/groups/nadula...
-----------------------------------------------------------------------------
PRODUCTS MENTIONED:
Curl Cream https://amzn.to/3ZlsHu5
Spray Bottle https://bedeckbeauty.com/products/fine...
Adhesive https://amzn.to/3Zluyzd
Lace Tint https://amzn.to/3Qtl4hh
Concealer https://amzn.to/3vOhyV5
Edge Control https://bedeckbeauty.com/products/edge...
Wax Stick https://bedeckbeauty.com/products/wax-...
Bling! Hot Comb https://bedeckbeauty.com/products/elec...
Shop Bedeck Beauty: https://bedeckbeauty.com/
-----------------------------------------------------------------------------
Hey Girl Become a Love Bug ✨ by subscribing here: https://www.youtube.com/c/AshleyBedeck...
Email: [email protected]
Monthly Wig Sale: https://ashleybedeckhair.com/
My Amazon Store: https://www.amazon.com/shop/ashleybede...
Let's Stay Connected:
Instagram: @AshleyBedeck
TikTock: @Ashleybedeckofficial
Twitter: Ashley Bedeck
Facebook: Ashley Bedeck
My P.O. Box:
P.O. BOX 52103
Irvine, Ca 92619
COUPON CODES:
FETCH REWARDS:
Your Referral Code: QXQMDP
#ashleybedeck
-SMOOCHES
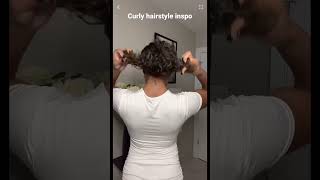
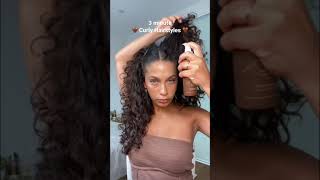
Okay, girls welcome back to my channel, I'm Ashley for 28 for the first time and, if you're an OG. Thank you guys so much for watching with your girl into the new year. Today we're going to be doing a start to finish beginner friendly install this one. Does come courtesy of nadula hair? This is over this beautiful Kinky Curly textured wig, and it came with those natural curly baby hairs that are trending all over social media. I went ahead and did my own take on them, but you'll see how they looked in the Natural State and you'll see the transformation. That is what this is. I feel like every time I work with a wig like this. I kind of do something a little bit different to find my perfect Vibe for the natural curly edges, and I really like this one. I think it's perfect because it's a little untamed and it goes with the vibe of the hair - we'll be doing two french braids together too, just to kind of give it a Vibe. And, of course, you can pull them back for a little boho chic action using Cantu on the ends. Nairobi, mousse here also the makeup by Mario Foundation. As my lace tint, this is the New Foundation. It also is trending all over social media, so you'll see my take on that as well. All of that is included in the video. So let's go ahead and get started. Okay, let's jump right into it. So this is the wig straight out of the packaging. I did go ahead and take it to the sink and just wet it down really good. I was trying not to get the lace wet, but just more so the ends to kind of just pull it out and really activate those curls. All I used was H2O. I didn't wash or condition it at all. Here'S a look at the inside construction, the cap, I'll, have the dimensions and all of the details in the description box. They did include an adjustable elastic band. You guys already know this is going to add just a little bit more grip and hold to your wig, so you can kind of just you know not fall off as easy. If you don't want to bond it down here, I am cutting off a little bit of the lace in the front, but more so focusing on the excess lace around the ears. It'S extremely important that you cut this lace off with the wig fits like a glove. Now I'm giving you a detailed shot of what the hairline looks like this is like a kinky curly, baby hair. It'S like kinky edges. I absolutely love this. This is like a new thing on the market and I've. Definitely, you know had an experience with these before I'm going to show you a different way to go ahead and install and style them, something that looks really really cute here. I am showing you what this wig will look like as a center part we're actually rocking a center part today. So I wanted to make sure I show you also what it would look like as a side part. Now this one did come with a little Dimension and I love that board volume um they added layers, so you don't have to do it at all. The layers honestly look best as a center part, but if you do want to Rack it as a side part, it kind of will give that little height. So you know when you do that messy flip over and it kind of just like it's in your face. A little bit, that's definitely the vibe. Now I'm just pulling the hair back and cutting off the excess lace be sure to not cut too deep into the actual um new baby hair, because you want to keep as much as that as possible. But if you do, you know if you cut a few strings here and there you know, you'll be all right. Now, let's go ahead and bond her down. I did go with an active solution. This is the even um. I don't know exactly what it's called, but I'll have it listed in the description box. You guys have seen me use this in yellow the black, and this is the red. The red is active and I love that because it helps me to have a stronger hold without the residue of a traditional wig glue. I can go ahead and bond it down and it gets me through my showers, even if my hair gets a little bit wet um. You know with my shower cap on, I can work out, I can sleep in it and I am good to go. I can just add a little bit more when it lifts now. Let'S do the dynamic duo you guys already know. This is a step that I don't care if I'm wearing wet hair dry hair, no matter what the texture is, I'm gon na go in and do this dynamic duo, so you guys can see I'm using the hot comb, but I'm going sideways. I'M not combing the waves out, but just more so flattening the top out. I'M going to repeat this step along the hairline, except I'm going to actually use the Combs of the hot comb and, if you rewind and then come back, you'll see the hue huge transformation that happened in the front with it coming out super flat. Even at the top, you can see how flat it's gotten many heat passes, but it's definitely worth it because I don't like a bulky parting or hairline. I like it to look like it's coming out of the scalp. So now, let's pull the hair back. We want to go ahead and focus really well and take our time on the hairline, since this is the start of the show, I'm just kind of combing them out it's kind of inevitable when you're using a spray adhesive a little bit of it, will get caught In the hairline - and you can just comb it out and a lot of that will um kind of relax and come out and that way it makes the hair a lot more fluffy again, I'm also going to go in and trim it down. Now. Take your time with this step, if you are a beginner, you don't want to cut it down like all the way down at the first step, so I just kind of cut it down to where I felt comfortable. I really added a generous amount of mousse to kind of help the curl to naturally activate from there. I decided to go ahead and tweeze it out just a little bit to make it a little bit more thin. This is just an optional step. You don't have to do that, but I kind of wanted to give a little bit more scalp and just you guys see how well the lace looks and blends with my scalp. Now I'm going in with a comb side of the edge brush and I'm just pretty much pretending, I'm forming baby hair, except I'm not adding any additional products. This is going to like have the hairs going in different directions. So they look a lot more natural and I love the way that came out now, let's go in with the makeup by Mario Foundation. This is something new that I've added to my collection. I do have a tutorial on me using this here on YouTube shorts, and you guys can check that out for my review on the product, but I really do like how it blended into my hairline once you press it in with a little dry, towel, it'll, oxidize And that definitely was the key. I'M also going to repeat this step Along The Parting to just make it super perfect, and I did use the 420 concealer by Fenty, which is my favorite for the partying. Now I'm just pulling the hair apart with my fingers, and you guys can see how big it gets. Also, it's getting pretty dry, so I wanted to just go in and play around and see what would happen if I added product to the hair, I'm using the Cantu, which literally, is my best smelling cream product that I have ever and I love love love how It smells it smells so good that I definitely get compliments when I pass people you know in passing, once I added the product, I did want to go ahead and stretch it instead of using too much product, so I am going in with just a little bit Of water in my 360 spray bottle Linked In the description box, and then I'm just going to go ahead and repeat this step on the side. If you want to see a difference in the actual curl pattern, I highly recommend a Denman brush, it'll Clump, the curls together to give you a different look, but for here today I really wanted that big, like boho chic, look and the reason I wanted. That is because we're going to do French braids in the front, so I'm just taking a little piece. I didn't section it perfectly. I just grabbed what I felt comfortable with and I began the braid. The first few parts of the braid are gon na like be like cornrows, where it kind of like presses against the lace and then once I get to a comfortable um point, I kind of will pull the rest of the hair behind or you can like clip It up to separate it and then I'm just going to braid the rest of that hair down. You don't have to use a rubber band with this texture of hair, because it's so curly it kind of will coil on its own and it won't unravel. But you can definitely use like hair products or like um rubber bands or whatever you like, and this was the result. I did the other one off camera. Look how well these braids and these curls complement that hairline. The hairline is absolutely Flawless and I love the way everything came out. Let me know what you guys think of this in the description box and also be sure to check out all of the dimensions and the details in a direct link on this one. Here is what it looks like from the back after adding a little bit of product. I love the body movement and cut also, I wanted to share with you all of the products they provided for me in the Box. This is a milk belt that says medulla a wig cap. These are some press on nails that are absolutely beautiful and then there's this goodie bag that has your wig cap, another wig cap, your mink lashes, a kabuki brush and, I think another melt belt. This is the dust bag and then this is the robe, absolutely gorgeous. Okay, really quickly, I'm going to speak, so I don't have to do a voice over for this part, but I'm done with the look. Obviously, as you guys can see. Maybe here was the star of the show, I love the curly edges and I love the fact that they're, versatile and you can do whatever you want with them. So you guys kind of seen. I just cut them short and kind of tweezed it out to make it a little bit more thin. I want it to be as natural as possible. I did go ahead and just use mousse and kind of just like mess them up or like rough them up, because I didn't want to like slick them with the edge control. But I also didn't want to leave them completely just untouched. And I like how? Like unmanaged and like natural, it looks, I did try something different today, which was the makeup by Mario Foundation. This one is a little bit too dark, so I do have a lighter shade and I mixed these two together to get my perfect match. Hope you guys seen my YouTube shirt that I posted. I will be posting more tick, tocks reels and YouTube shorts. Now I'm trying to get with the times and I actually enjoy it, but yeah - that's pretty much touch it and then I used my concealer in the powder everything is listed in the description box. The braids are super simple and easy. Hopefully, you were able to follow along. You could push them back like this, and I think that this is even cuter, but I'm just gon na. Let them hang for now. You can add beads to them or whatever you like. The hair itself is a beautiful curly. Texture, we did go ahead and wet it in the sink before to kind of open up the curls and help it to pop use Cantu on the leave-in conditioner, and that's it and that's it. So I hope you guys enjoyed this video. Thank you. Nadula for working with your girl and as always I'll see you in the next one smooches


Comments
kallahari: Beautiful, can't believe its just a 150% density looks very full. Love your make up too
Jazmine Gardner: Beautiful Ashley as always slay it Queen ❤❤
Nichole Florez: Nadula hair is always beautiful.
rac Gillett: Love, love
pamela moore: Nice so pretty.
ladetra paul: