K-Tip Hair Extensions Full Installation Tutorial And Station Prep Tips With Stacy From Hairlocs
- Posted on 13 July, 2021
- 6D Hair Extensions
- By Anonymous
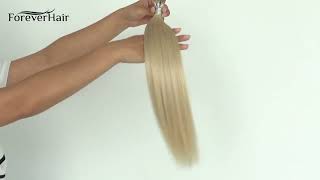
K-tip is a strand-by-strand individual extension method, applied using a heat tool. K-tips are ideal for clients with fine to medium hair density. K-tips are the most customizable methods and provide maximum movement and versatility and BEST OF ALL Hairlocs K-tips can be re-tipped, a first in the industry.
Join Hairlocs for free: https://youtu.be/lg9esxcIEBI
See more videos: https://bit.ly/3AvqShN
Hi guys stacey with hair logs, i'm here with my model katie today and we're going to be doing a full head lengthening with k-tips prior to her appointment. We did a consultation and we talked about her lifestyle and what she wanted as an overall look from her extensions. What we decided would fit her best is k-tips, so we're going to be doing a blend of three colors and give her the length that she wants. With the density and also a seamless blend, to give her the blonde that she desires without a chemical process follow along for our process. So what i like to do, prior to starting my client, is having my tray or station completely set up with all the necessary tools. All of these that i'm going to show you are available on hairlock's website for the k tips we're going to be using the heat tool. You'Ll have your hair locks crimper and your solvent we'll talk about that later, because this will be for removal. Your scissors and this will be for customizing the k-tips if needed, heat shields, your double pronged clips, sectioning clips, velcro, hair separators and a sectioning comb. Now these tools will all get us through our full installation of k-tips. Today, okay, guys now, i have katie all sectioned. So i want to talk to you guys a little bit about what the next step is and that's going to be turning your heat tool on so it's nice and hot. Whenever you get started, but also customizing, your k-tips there's a couple different ways. You can do that, but i'm going to show you what would be best for my install today. First, i'm going to cut a k-tip vertically and that's just going to match the density of the section i'm using of her hair to make it makes the k-tip skinnier, but also more lightweight. So i cut down into the k-tip. You never want to cut up because that can damage the hair. You can also take your k-tip and you can trim off the corners. What that's going to do is customize it to be a little smaller on the edges and then, when you heat it up, it'll have a nice tone effect. Okay, guys we're going to jump right into our installation. So first thing you'll want to do is always stand directly behind your client. You don't want any over direction or elevation by where you're standing. So i'm going to take a small section. You always want to mirror what you are putting in. So the section i need is a skinny section, because when i customize this k-tip it was vertically cut. So i'm taking my small section, you can measure it to make sure it's not too big. The hair is a little finer at the nape. So that's why i've customized these in half to make them skinnier. So i'm going to place that k-tip first you're going to add your heat shield after you get your section so making sure that you have nice clean sections, no cross hairs, you're going to mirror the section to the density of the k-tip that you're installing so you'll Use your double pronged clips make sure that heat shield is secure. You can use about two more if you need when you're holding that natural hair, you want to make sure you have no elevation, no over direction, because you want that to have a nice clean, grow out and no cross hairs in the way. So now i'm ready to install my cake tip. I'M gon na take my custom k, tip placing it on top of the section. You don't want it too close to her scalp. You want to bring that down just a little. You can almost use that little section of the heat shield as a guide, i'm going to take my heat tool, i'm gon na hold it on top of that k-tip, making sure it's evenly heated, i'm going to tap roll, giving it a cone. Like finish, i'm going to remove that heat shield and continue on through the row when you're color matching your client. You want to make sure you go off the ends of their hair and if you can see she is blonde, but she has some warmth in her ends. So i'm going to start with the darkest color on her nape, which is her first row and color block. As we go up so i'm taking my small section, i'm going to apply the heat shield, securing it. Okay, i'm going to take my small section, making sure i'm mirroring the customized k-tip i'm going to apply my heat shield using my double prong clips, make sure that's secure. I don't want to over direct or elevate that section of natural at all, and i will take my customized k-tip, placing it on top of the section, use your heated tool to make sure that that's heated throughout you're going to tap and roll that section into a Nice cone making sure these are side by side no space left in between taking your small section and going throughout the row. So i'm going to the next no space left in between taking my small section, i'm going to apply my heat shield, securing that with my double prong clips. I'M going to place my k-tip on top of the section using my heat tool heating that through and you want to tap roll that into a nice cone shape. So this one didn't heat all the way through. So what i'm going to do is replace it with a new one. You'Ll want to make sure those are heated all the way through, so they adhere to the hair before you make that nice cone shape so you'll place that heat tool on top of the section tap and roll it into a nice cone. Okay, guys i'm just going to keep working through my sections, i'm using still the customized k-tips on the bottom row. Now this one i'm going to reheat just a little tap the top and i'm going to roll that for that nice cone shape. I'M continuing on throughout the row making sure that my sections are mirrored to the density of the k-tip that i'm installing. Then you won't want to over direct or elevate that section at all, placing the k-tip on top of that natural section. Make sure, when you're using your heated tool, you put it completely over that k-tip heat it up little tap and roll that onto the natural hair, remove your heat shield and go on to your next k tip now that i've finished row, one we're going to go To the next row, we're going to keep that same horizontal section, the only difference is going to be i'm adding in some of my lighter blondes. As i go up through the install now that i'm finished working on the back of row, three i'm going to start introducing the sides in so i've sectioned a piece from her front and i'm going to continue on to finish out row three in the front and Then also with the same on the other side, okay, guys we're finally finished with katie's install, we did a full head lengthening of k-tip hair locks, extensions and we blended three colors to give her the seamless blend. She'S got a full head lengthening all the volume and length that she wanted. This is her final. Look. You


Comments
Broad Topics: Looks like the nails make this much harder. I'll make sure t take mine off lol
QueenOfQueens: You probably shouldn’t have your nails this long, I see the struggle trying to do her hair with them on
Anabel Garcia: How much space do you do in between each row? How many packs/bundles did you use for her hair? How much of her natural hair is left on the top to cover? We need a follow up!!! @hairlocs
Chantel.Cuts.Up: Ty for sharing! What temperature do you reccomend to use? Great tutorial
419spyda: How many tips did you use? Im trying to see how many i need to buy, one bundle is 25 tips in it
T Scott: The hair was partially connected several times....not good...
Helter Skelter: Does it damage the hair during removal
Miss Cupcake: I'm sure you would be able to go a lot faster and it would be so much easier without the nails, it was frustrating watching you struggle with your nails, and the tips do not look very well attached or clean looking
PaulaDoingHair: How much space is left in between each row?
stacey brand: Where you order hair and product.