Zbrush Hair Tutorial Part 2 - Installing And Using The Hair Brush
- Posted on 17 August, 2017
- 6D Hair Extensions
- By Anonymous
1. Brush is included in Bonus package Gumroad:
Bonus Package include:
-All tutorials in series
-Hair Brush
-Hair Mesh
-Reference Guide
+free updates
Note: Patreon is not yet fully launched
Part 3 next week!
Instagram: https://www.instagram.com/danny_mac3d/...
Tumblr: http://danny-mac.tumblr.com/
Twitch: https://www.twitch.tv/danny__mac
Artstation: https://www.artstation.com/artist/mcca...
Facebook: https://www.facebook.com/danny.mac.des...
Twitter: https://twitter.com/Mccabe86
My Drawing Tablet:
http://amzn.to/2hN5A5Z (US Store)
http://amzn.to/2gA4Kc2 (UK Store)
Note: the product links are affiliate links, meaning if you use them to buy the product I’ll receive a small commission. This is to help support the channel and allow me to continue to make videos like this. Thanks for your support! :)
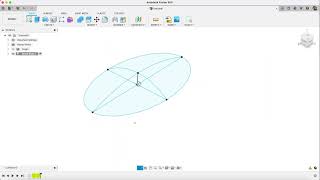
To follow along with this tutorial, you will need to download my hairbrush, which is available on Gumroad, using the link below. There are two options you have for using this Bush in zbrush. You can either log in as and when you need it or you can have it so that it loads each time ZBrush does. I will show you how to do both to load it as a one-off hit B and then click log brush, navigate to the brush and load it in and that's all there is to it. However, if you want to have it so that it loads each time you launch ZBrush, navigate to the folder pixologic zbrush, 4r7, r8, whatever you're running, z, startup and then brush presets. You just want to copy the brush file into there and now, like I said, the brush will load up each time. Zbrush starts in this section of the tutorial. I will teach you how to use the her brush with the her brush selected. I will make a stroke notice that the straw goes from thick to thin. You can change the settings of this thickness using the graph in the straw menu the higher. The point is on this graph, the thicker it will be when it's drawn out. I like to use three points so that it doesn't tape it to uniformly from start to end. Just so you're aware you can edit a stroke without having to redraw it. The way you do that is by first making the change you want to make. So let's say I want to change the overall thickness, then tapping once on the curve line, and I just want to point something like ear, because this is something I personally struggle with for probably over a year, if you want to make it thicker like I just Did don't resize your cursor, while it's blue that won't work resize it away from the stroke while it's red and then click on the curve? Another handy thing to know, particularly when doing her is this hidden button up here on the picker depth. You can see that it says once said and continuous set. The difference between these two is important, because continuous said is going to follow the form of the underlying mesh like this. However, this is not always what you want. So if I switch this to one side, you can see how the curve maintains the depth at the point at which it starts. You will see me use this for the strands of her at the front shortly, but for now I'm going to keep it at continuous set. The her brush is a multi mesh brush in ZBrush for a you can access the different meshes at the top here, but in previous versions you'll want to use the hotkey M. I will explain what the other meshes do later, but for now I'm just going to use the multi brush. Ok, so now I'm ready to make my stroke on this mesh and I'm going to go off from root to tip it's worth, knowing that you don't have to make the stroke all at once, because if I move the brush close to the tip like this you'll Notice the cursor turns blue, which indicates that I can continue my previous stroke. All learning to do now is tap on the base mesh to confirm the straw. Once I have my stroke in place and will now come to polygroups, Auto groups, this will give each stranded so on poly group, which means I can come off to brush auto masking and turn Artemis bipolar groups all the way up, which means I can now move Each strand individually, you can achieve the same effect by simply moving the move topological brush, but by making each strand its own group, you assign them different, colored wire friends. This becomes really useful for differentiating the hers when there's a lot of strands to deal with now. You'Ll see me click this autonomous poly group button up here which basically toggles this slider between 0 and 100. This button is available in a set of plugins called nix tools, which you can find links in the description below before moving on. I want to split the hose away from the base layer and to do this, I'm going to ctrl shift click the base polygroup to hide the her strands. Then I'll ctrl shift drag to invert the selection and come over to sub tool, split and then split hidden. Ok, so now we're left with our first group of her strums, which I'm free to move around at will, but not is that the best of the hers isn't right. So, let's fix that first I'll turn off ours on mass polygroups, so that I can manipulate them all together, then I'll unmask, the end and control click to blur the mask a bit. Now I can use my gizmo to position the base into place. This is the basic idea for using the herb brush. However, I'll go into a little bit more detail when creating the secondary shapes later to this week's video. If you'd like to get a headset on next week, then don't forget, there's bonus goodies for sale. These include all four parts of the herd tutorial, plus some extra bonus tutorial, an e-book guide which works well for a quick source of reference. The home model created in this tutorial and, of course, the herb brush used in this tutorial, which you can also get hold of separately by visiting my patreon page, you


Comments
RosieDesigner _1: I love how calming his voice is, I don’t feel rushed or pressured. Great tutorial by the way. ✨
Sean: Fantastic tutorial, specially like how you explain your tool usage as you go! New subscriber and Patreon supporter coming your way!
eng.student ma: Beautiful sculpting :)
poro: Thankyou for another wonderful tutorial! c:
John: Thanks Danny! The Curve Modifier trick for tapering is great.
random_youtube_commenter: Thanks Danny! Looking forward to the next one already!
Riz Pineda: Hi Danny! I love your tutorials and sculpts and I purchased the tutorial pack from gumroad but I can't seem to import the brush that came with it...
Cherylynn Lima: How would you make each strand flatter, more like paper?
Çağrı Burçin Gökahmetoğlu: Hi Danny, first of all thanks for the tutorial(s), also towards the end of the video, i noticed that you use an ugee display&tablet. I am considering buying one nowadays (actually stuck between buying a intuos pro or an non-wacom display tablet) would you consider making a review video for your equipment?
Claire Monaghan: Hi! I have a question about your tablet. I also have a Ugee drawing tablet, but I cannot get pressure sensitivity to work with ZBrush at all and I cannot afford to upgrade. Have you found this problem and a solution at all, or am I just unlucky? :)
Ro Co: Hi Man! Thanks a lot for this. It's super helpful. I just bought the package, but I can't import the brush. I think it's because I have the 4R7 version. Can you help me? :(
Dragon's Den Miniatures: Danny Mac ive been following along but when you go into poly groups and make the the strands separate mine all stay the same color and not separate. what could be wrong, using zbrush 2019
KensyFTW: Hi Danny ! I wanted to know if I can use the brush for Zbrush 4R7 version before to buy it ? Thanks !
디모: OMG I really need it. TY!! i like your video and your work :D))
Whxtever - r: this is amazing is this an app or is it on a special app that on a art iPod
Cherylynn Lima: Also, is there a way to delete a curve?
BottleOfCandy: this is the best hair tutorial ive seen
Polik Zaicheva: Здорово, но как жаль что я мой английский не такой хороший чтобы понимать тебя(
Polik Zaicheva: Where can I download this brush? I don't have much money, it's very expensive at my rate(
Luis saire: thanks for the brush, I'll do the test
David Walz: Is your hair brush a variant of one of the curve brushes?
Chaosium: Sure wish people who did these tutorials would at least give a simplified version of the brush they use so we dont have to pay more money only to find out we dont like the brush in general or it doesnt flow well with what we actually want. that said, still love your stuff.
\MoOn Di: WOW
Ivan flores: Is this 3-d software free???
周日成: Unfortunately, I can't afford it.
Whxtever - r: and can you get it on a go computer
Phoenix Creations: wasn't nice to start a tutorial and don't tell there is something need to buy .. some people does not has money or even a bank account
周日成: Poor me, want to that brush
Rem Jericho: Clever) "I'll teach you but buy my brush" )
공개미: I have some Question Will you help me?
Eugenio Aguirre: Dylan Ekren made it first for FREE, your charging 12 what a ripoff
Joako Remix: Hi ! ♥
Malek Mahadeen: NO THING FREE ALWAYS U ASK FOR BUYING STUFF !
Whxtever - r: hp I ment sorry tip to fast