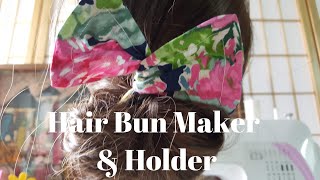
How To Make Diy Fabric Hair Bun Maker And Holder (Easy)
- Posted on 12 June, 2021
- Clip-in Hair Extensions
- By Anonymous
How to Make DIY Fabric Hair Bun Maker and Holder. All you need to sew it is some fabric scraps, craft wire and some free time!
WRITTEN TUTORIAL: https://hellosewing.com/diy-fabric-hai...
The Fabric wire hair bun maker is fairly easy to make and so simple to use you will wonder why you haven’t used one yet.
Our video shows you how to make one step by step, and in case you miss anything, the step by step article fills you in on all the details. The magic hair bun maker really is like a magic wand for anyone who has ever had to make a bun in either their own or someone else’s hair – slide, roll and twist and it’s done. Don’t miss out on this classy look – watch now.
And make sure to watch to the end to learn how to use the hair bun maker to achieve a different look!
#deftbun #howtomakehairbun #diyhairbunmaker #twistabun#rollabun #chignonmaker #howtomakechignon #howtomakehairbunholder #easyhairstyles #howtouseabunmaker #magicbunmaker
Diy Hair, bun maker and holder You'll need Cut 2 pieces of fabric 4.5 x, 15'', ( 11.5x38cm ) each Fold. The top piece in half and fingerpress Mark along the crease Mark 4.5'' ( 11.5cm ) in from each side of the crease. This creates the 6'' ( 15cm ), opening in the middle for your hair, Draw a line between the marks 1/8'' below the center line And another line. 1/8'' ( 3mm ) above it Round out each end to a point, make a mark 1'', (, 2.5cm ). In from each corner, Sew Snip along the center line through all 4 layers, Cut an opening along the center line between the two points Clip the curved edges on both sides of the opening Fingerpress. The seam allowance Push the top layer through the center Align all edges and press Make sure the unstitched side of the opening is facing away from you. Roll the top edge halfway Grab the bottom edge and pull it over the roll Lift. The roll and flip. The underside piece then match the wrong sides of the loose edges, Pin Stitch using 1/4'' ( 6mm ) seam allowance, Open the rolled fabric and start stitching the other long edge Stitch about an inch (, 2.5cm ) With presser foot and needle down pull out the rest Of the fabric and stitch to the end Fold, both seam allowances along the stitch line towards the center of the fabric, Repeat for the other short side, turn the fabric right side out by pushing it through the center slit, Push out all corners Press To make the Wire channel start stitching on the side of the unstitched opening 1/2'' ( 1.3 cm ) away from the edge Next you'll need 19 gauge ( 1mm ) craft wire Cut a 39'' ( 99cm ) long piece Use needle nose pliers to curl in both ends so that They won't pierce the fabric Insert the wire in the channel through the center opening, and the small opening Continue threading the wire until the whole piece is inside. The channel Both ends will overlap about 5'' ( 12cm ) Stitch. The diy hair bun maker Push the wire away from the needle Reinforce the ends of the slit with a backtack How to use the magic bun maker, DIY, HAIR, BUN MAKER PATTERN AND TUTORIAL HelloSewing.com Like and subscribe for. More


Comments
ANDREA DIMASSI: Excelente trabajo.. Muy bien explicado. Gracias
Oksana Germakovski: great explanation!
Sherri Marston: Wow i want to try and make some!
P. Long: Great tutorial, but I'm confused. In your written tutorial you say 9 gauge craft wire is needed, but here in this video it says 19 gauge.....which is it??
Natasa Mitrova: Bravo❤️❤️
Jemina Reina Rutherford: What kind of craft wire are you using?
Hello Sewing: Written tutorial HERE: https://hellosewing.com/diy-fabric-hair-bun-maker/
Elizabeth Davila: What type of wire are you using.
Audrey Spann: What guage is the wire?