Removable Hair Wrap Tutorial
- Posted on 14 June, 2017
- Clip-in Hair Extensions
- By Anonymous
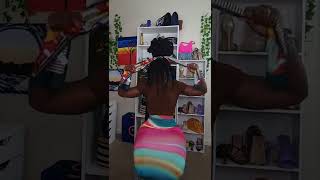
Hey guys, so I had a few requests or more than few requests to do a tutorial of how Aaron and I make our hair wraps, because we make hair wraps not on our head and then we attach them in our hair. I don't know if you can see I'll show you guys when I take my hair down in a minute, but I've got two ticker ones that are a little bit thinner than my dreads, but we make them before we put them in our hair, and we do That by using some kind of base cord, so you could use a lot of like embroidery, floss or waxed cotton cording, and that would make it thicker, but that's kind of a waste of expensive floss, the colored stuff. So what we have is we just have cotton cord and even here's some. This is like a shiny, spool of it, but you can get some. You know that's just regular on waxed cotton, cording and what I did was. I have dreads that are about as thick as my pinky finger, so I took about twelve pieces of this cord and put it together to make before Erin used about six so that she could get a slightly thicker hair up. It'S basically just mimicking the hair. That would have been in the center and it also is easier to do the hair wrap when it's not on your head, because you don't have to constantly look at a mirror. You can like attach it to your toe. Okay, pick your leg away from you or tied to a chair or something that doesn't move. So what you basically do is, since you're not really doing anything with the white cotton cording that can be about six inches longer than you want. The hair up to be - and the only reason you make it longer is because you want to be able to tie the end of it to something and then, of course, you want to be able to tie the ends of it when you're done, and we just Let our ends kind of dangle like fringe, but you can do whatever you want with that. So cut your cotton cording or whatever you're using twine even works. Fine, any kind of thicker yarn might work fine, although a yarn is kind of squishy, so something a little bit more durable and you can braid it or twist it first, but there's really no need to so. Could your cut recording and then get your colors ready and the thing about the embroidery floss or the waxed cotton cording, whatever you're using? That does definitely need to be longer. That being said, if you've run out of cord, which tends to happen to us, you can always attach more. But what I do is I start with my colors and I've already tied it here. Imma show you how I did that in a second, but I start with the colored end. So here's what the white cotton cording ends and my colors go almost another length and a half so they're about two and a half times as long as my cotton cord and I usually just measure really quickly by taking measurements of my forearm. So, for me, here's my embroidery floss by holding burger sauce. I measure to my elbow grab it measure to my elbow. This was not knotted grab it, and so for my long dreads, which go almost to my waist. I take six of those measurements per quart and for me you don't have to, but what I usually typically do is do two of each color. So I pick about four to five colors, this one I'm going to gotten a little excessive and done six, but I'll do two cords, so two threads for each color and that's so that we can do some of the more funky creative stitching stuff, like the criss Cross but totally not necessary, and if you do pick something nice like this white cotton cord for your Center, you can also use it as like an accent cord. So that's kind of nice. If you use twine or something like really weird and colorful, you might not want to but yeah pick your colors and gather some beads that are easy to thread and then once you've got those you. Basically, you have to have a way to get this into your hair, so this looks a little bit messy up here, but we're going to cut and trim it later. But what you want to do is first, you can tie your white cords together and just a messy knot. That'S whatever these are just going to end up being trimmed off later and that's kind of trashed. We just have these extra ends that I can tie it around like the legs of a chair, so that I could pull on it and work at it. But then this knot will eventually get cut off anyway. It'S a tighter than that and then, when you tie your colored cord in a knot, you want to tie it so that you end up with a loop, so you can just look into something else. To do an example of so this is my colored cord. This macrame here and I had a bunch of ends of this all together a band I would just cross it over with enough space or when I tied it just making one little knot. I end up with a loop and you can have all the threads be the loop. That'S what I usually just do to have a thicker tie on, or you can just make it so that a few of them are little to me. Other ones are just long and stringy and you can trim those and the reason that we do. That is that's how you attach it. So if you have stress it's pretty easy, because we just end up sticking this through the root of the dread and then feeding the hair right back through here and pulling it taut. If you don't have dreads, you can still easily get these into your hair. You can do a small micro braid, maybe a third as thick as your pinky and then towards the top. You just do that same method. You would kind of pull the braid stick the loop through weave the wrap right through there or, if you want to, if you don't like the loop idea, which you can do, is leave about six inches of some of the cord and then you can actually braid That in that will make the hair wrap a little bit longer and it may not stay as well and I'd be more knowing. So those are just options, but so once you have the loop with your colored cord, I just use an extra junk piece of string to tie them together right below the knots and that's just so that they stay together. And then I'm going to tie this to something like a chair or even just make this into a loop and put this around my toe, so I can pull on it here. I'Ll actually show you guys what Aaron is fearing. So Aaron is actually just adding some details on terms finished, hair up, but she's got her extra and she already took off her cotton cording, so she's just using the loop, but she already made and she's just got a list around her toe so that she can Work on it and he could see she's already attached some bees and stuff. So this time we're going to show you guys how to do yeah and she just played the end. She wanted some more deck over here. He had it in her hair, but she took it out. Hey easy to put in there take out so show you guys how we did it. Okay, friends! So we've got our white cording and I've tied my loop color q-tip. I'M going to tie it at this chair, my tie first boy. These are long enough to just tie. If you were on the chair. This is just so that I can pull on it and then dump Neeley. Okay, this nice hot place to making hair up, and you can genotype energy. You could off the safety, pin it to something, but I'm just going to separate out my colors to see what I'm looking at. So I've got some 12 pieces of cording, which I will use for some decorative aspects and they're shorter, then tie down on non colors. So I'm going to decide what color should do with at the beginning. There'S there's multiple stitches that we can use here, but it's basically a figure. Four stitch so usually like to use a brown at the top, just kind of soak blends and with my hair. So I'm going to pick this kind of Sienna lighter brown and I got two of them and I'm going to pull them separate. This is the hard part. It'S like not letting your colors get tangled because they're so long so trying to separate out and then of course untangle my bottoms, so they never get all screwy and then I've got all the cording and all the colors, except for my to brows. So the stitch goes something like this: I'm going to hold my cording in my central part, taut right and I'm going to make a four and then I'm going to cross it under pull it through, and this is the part we have to pull the whole length Of the one cord at the two quarters, you can do more than two cords. If you want you can do ten boards at a time. If you want is to pull it all the way through once it's there, it's kind of got this little knot and you're going to push it all the way up. Now it's up to you with you. Have these little strings here at the top from doing the loop? If you wanted, you could try to work those into the cord so that they're kind of woven into the hair up or you can just cut them and do the hair wrap around them. So I'm actually going to try to work them in there. So I'm going to redo this it's just because I like to have it a little thicker at the top undo. This put all of these cords together, including these little bit, you might say a mini figure. Four pull it through and this will get easier as this cord gets shorter right, I'm going to push that stitch up to the top, pull it taut as one stitch. I'M going to do that again and this part at the top is a little bit messy because of these little fringes, so just be patient with yourself and know that you can always take scissors to it afterwards and trim off the fringes. Take this stitch, pull it up and what's going to start to happen, they're just going to start to keep putting those digits one on top of another. You know and you're forming is as long of a space as you want for this specific color. So that kind of thing is really up to you if y'all just trim that little little guy off later, okay guys, so I did like an inch or so of the brown and kind of trimmed off some of those little fuzzies. And but now I want to do something more exciting because that's not very exciting. So, like I said, there's multiple things that you can do Here. I am feeling this kind of Baloo a dirty green color. So I'm going to pull that one out and there's two of them and it's difficult I'm going to find them. If your weird noises in the background, this air and making her next hair up and I'm going to add the Sienna back into the bunch and again here, we have this issue of detangling ourselves so trying to keep my ends from turning into its giant tangled mess And then what I think I'm going to do is I'm going to do is like a strike, so I'm also going to pull the mellow yellow' this kind of gold colors. They look good together. This bluey green and this yellow and first time just come separate it out, but then I'm going to put it at the front because I actually do one it wounds in. I don't want it to be an overlapping stripe right now, but I want it easily accessible. So I'm going to do that same stitch a few times with this green thread, so this figure four for my four wrap pull right in and you can actually use this with a little string. Let'S travel tight right there, but you can actually use your hands. That kind of push it up, tighten it thank your for get that through there push it up, pull it tight and when I'm going to do is I'm going to do for this? That was three here is four and then I'm going to leave this on top and I'm gon na grab the yellow and I'm going to do that four times, one to the raid. For now what I could do is I could go back and forth and do that kind of dirty, Bluegreen and then a yellow or if I want to do something a little bit different. I could do one with both of them, so it's kind of good. Maybe the striped appearance, so I've got all four cords here and I could separate it and just do want to be color. That'S fine too, but I like it to use more because then it takes up more space and it goes a little bit faster want to. For my figure four and I'm going to do a few stitches of size one to three four. So I'm going to do four like that and that kind of gives you a little bit of a striped appearance. And then I'm going to go back and forth and do four more just the green, blue and then four more of just the goldenrod and then again for them together and a tha nice packaging. Okay. So I did that a few times I did the blue and the yellow and then the combination is the two to give a stripe. Just as far as I wanted to, and then I put those back into the pile and then I pulled out this little salmon. Color both threads and they also pulled up to the white cotton cords and what I'm going to do with so actually, no, it is a white cotton cord. I want something a little less dramatic, so I've got some cream color embroidery claws in here. I'M going to take that out, and not only am I going to take this out of the pile, but I'm just going to top it up to the side, because what I'm going to do is I'm going to use that for a crisscross or later, some reducing Beadwork and some Criss crossing to kind of just show you what you can do and then I'll work down the length of it. So I'm just going to first give myself a little bit of this color to work with. So it's not a sudden transition and with the beads you got ta find something to have a big enough hole where you can get that embroidery floss through it, which can be challenging. I'M just continuing the same figure forces now people have asked if you could just make hair ups is like twisting the thread around this, and you can, but it's much more likely to stay locked with this little figure. Fourth stitch so giving myself this little space, and if I was being rather thinking about this, I would be like counting how many stitches I did so that I could do the same number between beads and then I would put a bead on and what are you Doing and Aaron's looking for things, so I'm going to pick one of these little gold beads and I'm just going to thread it through connect both strands, so I'm going to start it through both and they have nice big hole. So it's easy both of my figure for stitch course and I'm going to put it on the end or middle ear there and I'm a continue stitching is normal. So it's a bead on it. We have to help push it up there, but you know a handsome baby. We gave it a chance, okay and then I'm just going to continue threading and you can see the little bead is right down there are these circles is that I think I was brand new, so public swimming. So it's up to you how much space you're in between games, but I like to have a proximal even and eyeball it from such an account so that these white cords off the side because you'll be using those mega. It'S about right for another bead to dig around in there for one get it through continue stitching, pretty simple, but this is really fun to do like if you're just like hanging out chatting or watching a movie. That'S because you see lawyers, if you think something sounds good you if you have to like give your like stuff on the phone and to somebody that you know yeah. I want to talk to you great conference, coughing yeah yeah, we're talking about perfect you're waiting for dinner, to finish it's great, so that you don't start jacking and ruin dinner when with that and really good at that and a big hindrance. Okay, look this next bean and just you know like you, don't have to use embroidery floss! You can use yarn, that's hot, cheaper um! You can all see use fabric scraps, especially if you want thicker ones. It can be really cute to use ribbon fabric straps little pieces of leather or fake leather. What else could she is really anything twine and even like we said macrame that kind of been twine, sometimes things yellow danglers that work with it? Okay, so I'm going to finish it this speed and then I'm going to show you guys the crisscross, which is a little hard to do as it feeds on there, but you can imagine it without the base as well. If some people don't like these, for me, it doesn't matter because the dreads don't really catch on anything, but if you've got fine hair or your hair gets tangled really easily be careful what beads you're choosing to put on them, because you don't want to be constantly Like tangling, your hair up and ripping your hair, so a lot of people put like seashells and stuff on there and just be difficult to it's already difficult enough to brush your hair with a hair up much less when you had a bunch of these on it. So see if I case three little bees just pick it on the side really cute and simple. So this is my crisscross, throw it up here, I'm going to take it down and I'm literally just going through crisscross with it, and I'm gon na have to work around the beads as I do so, but I'm just going to take it in the front, and I want the Cross nuts aligned on the beat, so I'm going to kind of move it over to the side and then I'm going to wind it on the back. This is just for added deck or I'm going to cross it again cross it behind the bead and again, like you can use that thicker cotton cording and then it would be more dramatic. I just wanted to really light effect for this one. You could use two different colors. You could use four strands two of each color to make it thicker, whatever you want to do, criss cross once you get to the bottom of the criss cross. What I usually do is just kind of tie it into a knot. So if this doesn't no that's not necessary, you can just keep on if you keep it taut enough. So you've got these little X's, so they're a criss cross all the way through my beads and then I'm actually not going to tighten not this time. I crisscross it put it back into the pile and I'm gon na take my next color, which is going to you, know easily use that cream color. This is it's already out and that's going to help lock the criss cross in place, and I will just move on for this so from here. You know you can do a variety of these stitches. Anything you want so just keep working down the length of your hair and then secure the end when you're done and can you sew, the hair up is all done and got some dings. I based on the bottom, because why not and then you know you can trim all the little wrestlers to Keanu and I'm just going to cut it off right here at the top and trim out this white piece here, I'm going to leave this loop, so I'm Going to catch it in cement and then I'm going to show you I can put errands before her hair for her to show you guys have to do it in both a dread as well as just regular, hair. Okay guys. So I put the last one in the dread and I'll show you what I did with when I put it into Aaron's braid. But basically I just found the root here and my roots are a little bit loose. So I could stick my finger through at the root and I just pulled the loop of the hair wrap through there and once I had the loop pull. I just pushed the rest of the hair wrap through the loop and pulls it tight. So then it's just clamped around and basically when I do the same thing for Aaron was a tiny braids and then you can just take it out whenever you need to I'm you wan na wash your hair, I'm probably gon na leave mine in there and just Let them get ruined, but yeah I'm gon na do one more, maybe reduce to Becca stop and I sweat it. Okay, okay, so we're gon na put Aaron's in her braids. Can you show me this bridge here she put braids dirty into her hair and she put a little tiny, rubber band and like one of those ones, to use free braces in twos right and so then already she already kind of loosened up. This top of the braid here and it's almost the same as my dread rent. I can stick my finger through the top of the brain and that's all I'm going to do is she's going to give me the hair up. She specifically wants on the side. That'S this one, which has a little loop already and I'm going to stick the loop through the braid. This is what it helps our friends so you're, not tangling your hair and I'm just going to take the end of the wrap and stick it back through the loop. You just want to make sure you get through the middle of the braid, so it's not just around, like a few strands of hair connect lens a big heavy hair up like this, it's going to rip the hair. If you don't have enough to secure it and I'm just working my way around all the beat, do I have enough? Okay yeah? So don't you know, don't you know when we say micro braids use more than like physics as a hair, but I think I'm pulling your hair daughter. That'S okay, you're my way around the so I'm doing it slowly making my way down the length of the wrap and then yeah just pull it Wow yeah I'm came down a little bit, though oh he did cuz you're yeah. It was a little bit loose as far as the very good, alright, okay, so different and are tight. You make this. It can be close to the skeleton, probably by the rubberband. You can also rubber bandage to make it a little bit tighter mm-hmm, okay, exactly well. I don't need that right now, a tougher choice and then the hair they serve that we're gon na do the other one. Okay. Here I can chip. It sounds cute. My ears are a little bit thinner because she doesn't have dangerous with her q-tip. In this case, you want to eat okay, so up here a path towards the root as possible. We'Re just going to take it push it through. I did a big cargo, your challenging me. This is a tiny loop. Really it is yeah. Okay, gosh! This one makes it jingle. Oh my gosh Steph she's gon na giant leaf speed. I got to work I'm getting to Chris, please shoot okay, it's gon na be fun, it will listen and then these might feel really stiff at first like the simple just if, but if they're soft and over time, especially if you wash them with your hair working. My way up, I, like this fabric in there is brown women, shiny yeah. I did you two hiding a little bit, so it was really hot. Do you know him yeah? It was really aggressive. Okay, Jordan. She must move Titan missile at this. One thing: if you make them a little bit softer, they will be easier to put in. Oh, my gosh. Look at these speeds yeah. I really like this one, so we just around you're good, so they're her and then what is Hera? It'S just there's some other big stuff. Then there we go. That'S it. She looks super cute mother. Bear maintain


Comments
LeJean Dennis: Probably already know this but just incase:tip- in macreme we wrapped "butterflies" at the end of all long strings/cords (wrap up, tie each section with hair wrap- bundle) then use as paddle to weave/tie your knots. Keeps things from tangling as bad at the ends. I smiled when I seen the toe, I used to do that all the time in macrame. Great vid thank you. stay safe
Carole Carrick: I love both of your energy...really positive happy good energy you give off. Thank you for the tutorial.x
Jennifer Cook: I have been making hair wraps and wearing hair wraps since I was a little girl!! I wear them till they fall out and I have dread left!! I still have some of my favorite ones or ones that I got at favorite shows. great video!! I can't wait to buy some of your guys to help your proceeeds!!
Meags Daelmans: Love love this video! Thank you for explaining it so clearly xxx
Cassy Barfield: Any suggestions for actual embroidery floss, or the beads would be so helpful :) Love this!~
nicole: Bless your soul for making this video! Much love your way girl!!<3
Mightiest Mouse: micro beads for hair extensions work really well too Steph!
Even Angels Cry: Can you do a tutorial on how to do the ones made out of fabric instead of string please? I see everyone making them but no videos on how to make them.
Theresa M Elliott: Please do more videos. I really love them!
Jay: this looks so therapeutic. in high school my friend had shown me how to make bracelets with that f4 method. i should start doing that again.
Angelique Rott: Thank you for the video I have now a new idea
Laura Mitchell Music: Super cute you two. Appreciate your vibe. Thanks for the tips.
Elisa fuentez: How much do you sell therm for 26”? I have some in my hair I did myself but I have fibromyalgia and can’t anymore. ..
Jiovana Achard: Un grand merci pour ce partage ! thanks you
Joni Wood: I wish I could see what you're doing. I'm a visual learner, and even though you're explaining it, I'm totally lost.
Sunshine Adventures: Where do you get your cord!!!!!!
Hema S: This video is equally interesting like your yoga videos.
Karlie Bassett: Can you use nylon twine?
Binnur Genc: does anyone know if they are selling and if so how do we order?
ashikime: Thank you!
Jarkko: What kind of cord are you using here..?
Trudy Ann Caudill: Hiw did you put it in? You cant see anything
Kirrah Mae: I don't understand how to do the cross cross accent thing
Lisa Kuus: I can't see good what you do.
jeannie mullinder: Your hands are always in the way, bad camera angles, can't see what you are doing.
Neutrale: I can't see what you are doing..
Alisha Portugal: I can't see a thing.