How To Install Curly Clip-Ins | Essentrals Hair
- Posted on 09 January, 2018
- Clip-in Hair Extensions
- By Anonymous
Hey!! Today I'm sharing my new favorite winter protective style using Essentrals Hair! This company offers virgin hair for those who seek a natural look, that blends in perfectly with your very own hair texture. Plus it's 100% human hair, and free of all harsh chemicals and dyes! I was sent two sets of the Coils Clip-Ins in 18 inches. Each set costs $100. I would suggest 2 sets for a full protective style or 1 set to add volume and/or length to your left out hair! Check out the Website to order https://www.essentrals.com/product-pag...
---------
!!!!!!!Please Subscribe!!!!!
https://www.youtube.com/channel/UCbara...
————
GET TO KNOW ME
https://www.instagram.com/naturallybig...
https://www.facebook.com/naturallybigb...
https://naturallybigbritt.wordpress.co...
https://twitter.com/naturallybbritt
Snapchat: naturallybbritt
Email: [email protected]
Featured Brands
Renpure Viva Curl CoWash https://www.renpure.com/product/coconu...
Bask and Bloom Stimulating Oil https://baskandbloomessentials.com/pro...
Entwine Couture Hydrator and Styler https://www.letsentwine.com
————
SHOW YOUR SUPPORT
---------
GEAR
Shot on: Canon G7x Mark ii, Nikon D5500, iphone X, GoPro Session
Editing: imovie
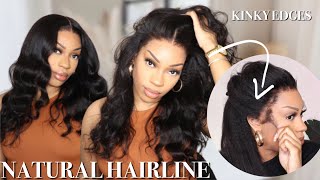
What'S up guys, naturally, big Brit here today, we're talking all about curly clip-ins, I partnered with essentials hair and they sent over two bundles of their coyly. 18-Inch clip ends and I'm so excited, because this is how it looks straight out of the bag. So I have the two bundles: you get this amazing card. That shows you what you got. I have the coil II line and 18 inches, and this is all about how to take care of the hair, and you can see they're bundled very nicely and look at how thick this hair is just straight out of the pack. I mean from roots to the ends. It was super super thick super dense, so I'm very excited to go ahead and try these out. So I'm just showing you how thin the wefts are. The construction looks really really nice and neat, and the way that clips are sewn on to the weft was super strong. You can definitely tell that these are going to last you a good long time so because I was sent two bundles. I got two pieces of everything, so this is five clips and again that's two pieces because I have two bundles and then I also have two pieces that have four clips and two pieces that have three clips two pieces that have two clips and then I was Also given four pieces of single clips and again that's because I have two bundles so of course cut that in half. If you wanted to order one bundle, so I'm gon na go ahead and just go wash all of the hair. I separated the two bundles into three sections, just to make it a little easier for me and I just rinse the hair really thoroughly. And then I added a little bit of co-wash and just detangle and just look out how easy and beautiful this hair is to detangle, and that is the shedding I got from one section. So I just let the co-wash just sit on the hair for about five minutes, and then I went ahead and rinsed all of the hair very very thoroughly and is how it looks without any product soaking wet. So I just added a little bit of oil onto the hair, and I wanted to put some leave-in and some styler onto the hair, because I was hoping to set these curls into place. The second use this for the entire week and these products really just looked so beautiful on the hair. They just blend it in really really nicely, and I just went ahead and let that air dry and set that on a towel and look at the texture. I mean the curls are beautiful, so this is my hair. My hair is looking a little cray y'all, I'm just showing you like, literally for chunky flat twists in the back and just pinned up the ends with some bobby pins, and this is not neat. This is not clean or flat at all, and it still turns out beautiful, so I'm just putting the two pieces that are five clips and that goes from ear to ear. I just open up the clips and then I place them into my hair and kind of felt with my fingers of how I wanted them to lay, and then I clip them down - and this is the second piece that has the five clips and I'm just going Ahead and putting that also on the base of my head slightly higher than the first piece and I'm just opening all the clips, putting them into my hair, where I want them to be placed and then clipping it down, and it was super duper secure. It was not going anywhere so now, I'm just gon na turn around and I'm showing you guys how it looks from the front so far. I also have my leave out flat twisted much more neatly here and that I'm going to take out at the end. So I'm go ahead and continue with the pieces of four and I'm putting that on the perimeter of my leave out, and that just gives me a much fuller look and make sure that my leave lays much flatter and has a more seamless finish. So again. I'M just putting those clips all around the perimeter of my hair trying to get it as close to where the part is as possible, and then I just clip that down and just fluff that out then do the same thing to the other side. Perfect. So now I'm just using one of these single pieces and I'm gon na put that at the base of my hair right with a flat twist in then I was gon na, be my leave out. So just go ahead and clip those out of the way and now we're gon na work on filling in the center of our hair with the rest of our clips. So you can see. I have a lot of space here in the center, so I'm gon na start with the three pieces and I'm gon na fill that in starting back at the bottom and just go ahead and clip those in you know slightly. Each piece should be slightly above, where the last one ended just to kind of give it a little bit of space. These are the two clip pieces and I'm just filling that in from the bottom up now and that's where the other two piece clip is going to be, and now I have the three single clips at our left and I'm just filling those in and the great Thing about clip-ins is you can take them out and readjust if you need, if you feel like that, doesn't sit right, you can just take them out and reclip them in and it's so easy to do so. I'M going to take down that little part and just fluff the hair, and I was really filling myself. I was loving my results so far and I wasn't even done. I was already loving it so now, I'm gon na take out my flat twist after a champagne break, of course. So now I'm taking down the flat twist that I put in this morning, they're not completely dry and of course you can see. My hair is much shorter in the front, then the clip ends, but I will show you shortly how I blend the hair to make it look more natural, I'm going to take a small piece of the front and I'm going to just chunky twist it towards the Back and just pin it down with some bobby pins, and that makes sure that my own natural hair covers the base of the clip ends. And then it just looks very natural, very blended and I'm able to rock this style as a very nice protective style. For an entire week - and that's it you guys, I hope you enjoyed this video. I hope you guys subscribe. I hope you give this a thumbs up. I love these clip-ins, they work so well. Of course, I had two bundles to do a full protective style from essentials. Hair make sure you check out the description box, so you can order some of your own and I will see you around in the next one.
Comments
Sidney: So did it come with 2 sets of bundles? Or how did it work?