The Best Curly Clips Ins For Type 4 Natural Hair | Multi-Textured Water Jerry Curly Clip Ins
- Posted on 23 October, 2022
- Clip-in Hair Extensions
- By Anonymous
▬▬▬▬▬▬▬▬▬▬▬▬▬▬▬▬▬▬▬▬▬▬▬
Use Code CQSL to save $$$ OFF
I am wearing 18 inches clip in hair extensions in water jerry curly texture from CURLSQUEEN .
GLAM FULL (10 PCS SET)
Water Jerry Curly ( suitable for curl patterns of 3c/4a and Multi-textured hair)
Shop the same #waterjerrycurly #clipinhairextensions for #naturalhair
https://www.curlsqueen.shop/93985889
√ 100% High Grade Brazilian Virgin Human Hair
√ Upgrade 10 Pcs Set for A Full Head
√ Double Wefted and Double Dawn
√ True To Length
√ Thick & Full From Top To End
WHAT'S THE DIFFERENCE BETWEEN AFRO KINKY CURLY AND WATER JERRY CURLY TEXTURE?
Afro kinky curly texture and water jerry curly texture is both suitable for 3c and 4a textured hair while water jerry curly texture is also a perfect match for Multi-textured hair with both 3c and 4a curl patterns.
Connect with Curlsqueen :
https://www.instagram.com/curlsqueenof...
https://www.tiktok.com/@curlsqueen.com...
▬▬▬▬▬▬▬▬▬▬▬▬▬▬▬▬▬▬▬▬▬▬▬
Hey y'all, welcome back/to my channel! In today's video, I will be showing you all how I installed these water jerry curly clip ins! I absolutely love multi textured clip ins because they are catered to naturals like me who have different curl patterns all over their head. Clips Ins are a good protective style for the fall and winter because of cooler temperatures as well as allowing you to get extra sleep in the morning due to not having to style your hair ! I hope you all enjoy the video and find it useful! Be sure to SUBSCRIBE, COMMENT, give the video a THUMBS UP, and SHARE with a friend!
♡ PRODUCTS USED:
Carol’s Daughter Almond Milk Leave In Conditioner with Almond Milk, Aloe Butter and Shea Oil https://amzn.to/3wtOnIr
Texture ID Coils Daily Moisturizing Cream https://amzn.to/2P4bDcY (Also available at Sally Beauty)
The Doux Mousse Def Texture Foam https://amzn.to/3M9HUrx
Lemon Scent Edge Booster https://amzn.to/3JFiZtL
Red by Kiss 1875 Watt Ceramic Tourmaline Hood Dryer https://amzn.to/36ye3cf
♡ MUSIC: epidemicsound.com
♡ POPULAR UPLOADS:
How To: Straighten Short Natural Hail | 4C Silk Press | Fixing Bad Trim | Styling Short Natural Hair
https://www.youtube.com/watch?v=N4qf0V...
Wash n Go on Short Natural Hair + Nighttime Routine | Thick, Low Porosity Hair | DEFINED CURLS!
https://www.youtube.com/watch?v=dJ2mCp...
How To Straighten Type 4 Natural Hair at Home | Silk Press and Trim on Short Natural Hair
https://www.youtube.com/watch?v=I_6k2F...
2020 APARTMENT TOUR | Modern Farmhouse and Bohemian Inspired | Starring Lia
https://www.youtube.com/watch?v=DJuImM...
Mini Twists on Short Natural Hair | Quarantine Protective Styling
https://www.youtube.com/watch?v=D6idIh...
♡ NEW VIDEOS EVERY SUNDAY AT 1:00 PM EST!
Hit the subscribe button for more videos like this!
Be sure to click the notification bell so you don't miss any new videos.
Subscribe Link: https://www.youtube.com/c/StarringLia
♡ DISCLAIMER: This video is not sponsored. All ideas and thoughts are my own. Links included in this description may be affiliate links. If you purchase a product or service with the links that I provide, I may receive a small commission. There is no additional charge for you! Thank you for supporting the Starring Lia brand.
♡ WHAT I USE TO FILM VIDEOS!
Camera: Sony a6400 https://amzn.to/3onN0Ue
Lens: Sony 18-135mm https://amzn.to/3qQvCca, Sony 85mm https://amzn.to/39oNyot
Mic: Saramonic Blink500 https://amzn.to/2NCIioJ, Blue Yeti https://amzn.to/3pWy2WL
Lighting: Ring Light https://amzn.to/3aeZDNO, LED Lights https://amzn.to/3oXikcU
Vlog Camera: Canon Powershot G7x Mark ii https://amzn.to/2M1pzD6
Phone: iPhone 11 Pro Max
Editing Software: iMovie
♡ COURSES AND TOOLS THAT HELPED ME ON YOUTUBE!
YouTube Growth Masterclass https://tonitannerscott.teachable.com/...
♡ ABOUT ME!
I am a natural hair enthusiast! I have been natural since January of 2014 and have experienced the ups and downs of styling my natural hair. I want to inspire you to embrace your natural hair in the workplace unapologetically, so I will be sharing everything I have learned so far about natural hairstyles, growing and maintaining healthy hair, and how to sometimes do it yourself!
♡ FOLLOW ME ON OTHER SOCIAL MEDIA PLATFORMS!
Instagram: @starring_lia https://www.instagram.com/starring_lia...
Facebook: Starring Lia https://www.facebook.com/starringlia
Twitter: @starring_lia https://twitter.com/starring_lia
Tik Tok: @starring_lia
Snapchat: jharnell
♡ EMAIL: [email protected]
♡ FREQUENTLY ASKED QUESTIONS:
When did I go natural? January 2014
When did I do a second big chop? July 2019
Where am I from? North Carolina
Where do I stay? North Carolina
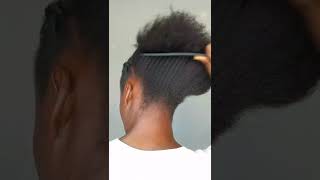
Today'S video is sponsored by curls Queen in this video. I will be showing you all how I installed the water Jerry curly cleopians, by curls Queen along with this package. They also sent me a few little goodies, so I did get a detangling brush, which I was super super happy to have. One of these. It works really really well with the extensions as well as a bonnet and some extra clips, if needed. Also, the clip-ins were really really full, which I absolutely love when it comes to hair extensions and the wefts were really really thick as well, so it really helped for a full natural look. Of course I am starting off with my natural hair. I did do a stretch routine without actually adding any heat to my hair right here. I am actually just parting. My leave out for this hairstyle. I wanted to be sure that I could either do a side part and a middle part for my side part I'm. Basically, going to have it kind of off center to make it that center part, but typically, at the end of the video I am pretty much going to go with the straight part in the middle. I am going to go ahead and detangle that I did use a little bit of my Carol's Daughter, leave-in spray, just to add to my hair and add a little bit of moisture, I'm just going to braid it down to put it away so that we can Go ahead and get into the twist slash braid down foreign, I typically like to do a breakdown or a twist down. However, I have found that doing flat twists actually saves time, but it also reduces the tension on my hair, and I have found that I am able to easily slot the cones from the clip-ins into my twist versus. If I had cornrows. Of course, I'm going to go back in with that leave-in and apply a daily moisturizer, which is from the brand texture ID. The reason why I'm using lightweight products is because I will be straightening my hair soon, so, if you all are looking forward to that make sure you are subscribed to my channel. One thing that I learned after setting my appointment up with a professional is that using a lot of heavy products can cause your hair to reverse. So that is why I'm using lightweight products today, prior to my appointment, I am just making sure that I flat twist tightly because one thing about flat twists that we all know is that flat twists can loosen up very very easily and sometimes they can unravel at The root, so you just want to make sure that you are doing it as tight as possible because it is going to loosen up and don't forget to coil those ends to secure it in place. I am going to repeat this process all over my head. Pretty much my twists are going to go straight back and I am going to secure it at the back of my head in a tiny little bun foreign. Thank you before securing the twist in a bun. You want to roll the twist in the direction that allows it to tighten up a little bit and then secure it away, foreign now, let's get into the clip in so I did go ahead and remove those pieces that were keeping the bundles together. I did go ahead and wash and condition these bundles off camera, because that is just what you need to do when you have clear pins. I am starting off with one of the clip-ins that have four Clips up there. Prior to installing these, you want to make sure that the clips are open and you saw how I did that on camera, and then you just want to install them. One thing I like about curls clean is that they gave us two um clip in wefts that had five Clips, you had two with four two or three, and then you had several that had two clips on it and it was very, very helpful to have those Have those clip-ins organized prior to installing them, because you really want to do this in a u-shape and u-shape is basically exactly what I'm doing here: making sure that as you're installing the clip-ins, they come up to the front of your edges, also going along the back. So as you're installing these, you just want to make sure that you are creating a u, and that makes it so that when the wind blows, nobody can really see the whips, and it looks like it is your hair. I did use all of the clip-ins that were provided, which was technically one bundle, and one bundle is enough for an entire head. I am going to go ahead and separate this leave out. As I'm separating the leave out, I am going to go ahead and show you all how you could part your hair for a middle part. Before doing that, you want to make sure that you actually have hair to cover the wefts that exists and, as you all can see, you don't need a lot to actually cover those with. It is just very, very thin sections. The only reason why my leave out is a little bit more wide is because I wanted that versatility to have a middle or a side part and for the side part with this style. You could do it in a curved curve motion. That kind of looks like a c, and that is what your side part would look like. However, today I really wanted to go for a middle part, because I have not had a middle part in a while when it has come to style in my hair. Now for this clip-in tutorial for today, I actually want to show you all how a twist out will look. Typically, it is easy to do a wash and go, but sometimes I like getting in there adding some moisture to the clippings using my mousse death, and I like to just do a twist because flat twist or twist in general, are always perfect perfect for any type Of curly hairstyle, I love that curls Queen provide a variety of different textures of hair, not just with their clippings, but their other extensions as well. One thing about black and natural hair is that most of us have a lot of different textures on our head, which means that we can have loose curls in one spot and Tighter coils in another spot, which sometimes can cause a lot of frustration. If we are trying to match our hair with our extensions, however, one curl pattern extension does not necessarily work the best with multicultured hair. If you're looking for the most natural hair extensions that bloom seamlessly, I highly recommend this texture, as it can be manipulated to really really match your curl type foreign. I am going ahead and section out my leave out just a little bit more and what I am doing here is. I am Gathering some of the hair extensions with my hair, because I want to begin blending my hair right at this moment. So, as you all can see, I said, shut my leave out into three sections. I am adding some mousse to my leave out just to go ahead and prepare my hair to be laid down in the front, and I am detangling my hair separate from the extensions just to not cause any further breakage. I am doing a flat twist right here, because I thought this was best in order to blend my hair with the clippings, and you always see how that turned out shortly, but continue watching to see how my hair reacted to this little method. I am going to do that on the other side, as well as in the back before sitting up under the dryer foreign here's, my hair in all of this twist. It really did not take much time at all to add these twists, only because they're pretty much medium sized and it didn't really need too much definition. So I just went with a few twists. I am adding some more mousse to my edges because, of course I want to go ahead and lay them down, and you all know that this has been my favorite product lately with just laying down my edges and it really really works wonders if I am going To sit up under the dryer, I am going to add a few black strips to my hair before sitting up under the dryer in order to make sure that the hair stays in place. Thank you. After about 30 minutes and a nice shower, I am ready to take down my hair, so I'm just removing my scars and I'm also removing those black strips. What I notice is that my hair had a lot of shine to it and I didn't even have to add any oils or anything to them. But I also noticed that, even just by shampooing and conditioning the clippings that they had their own natural luster to them, which I really really like and really really prefer for my curly hair extensions taking out these twists was really really simple and easy. You didn't really have to focus too much on what the separation looked like, because the curls just naturally fell apart with from one another. So that is exactly what I'm going to do until I get to the front of my head foreign, when I got to the front, I noticed that my hair did not quite blend in the flat twist like I needed it to and honestly, I'm pretty sure it's Because I didn't add a lot of heavy products to my hair, but it is okay, we are going to fix it and we are going to have this thing blending. So I decided that I could just really just slit my hair down on the sides which I am going to do with my Edge booster. In order to give my hair a more seamless look Edge. Booster is one of those Edge controls that have a lot of lot of hold to it, and you don't need to reapply it throughout the week, because, if you do it will Fleet, so one time is enough. Okay, I am just making sure that I smooth that product through my hair strands and once I feel that it is super super smooth, I'm going to gather it and secure it with one of my large bobby pins and voila. That'S it that's all and you're going to repeat this on the other side, foreign now I am going to add some Edge booster to this little back section here as well, because I want the hair to look similar and cohesive. So I am going to use my rat tail comb to make sure I smooth that product through and to make sure that it is covering those left, because, of course, you do not want people to be standing over you or looking at the back of your hair And they can see the wefts. I am going in with more of those products in order to blend my hair and what I like to do when blending is to take my hair along with pieces of the extensions and I like to coil them or intertwine them. Together, this helps me for a seamless look and you are going to want to do this until you don't see any of that poofiness in the back of your head. Here are the final results. When I tell you I have gotten so many compliments on my hair. Like this, people really have enjoyed it and so have I. It has just been amazing in this new fall weather. I hope you all enjoyed the video and found it useful, and I can't wait to see you in the next one see ya.
Comments
T J: I am so glad you posted this. I was just looking through your channel looking for the other video of the clip ins. I want something for winter as a protective style
Suphane Dash: Thank you for this! My graduation is soon I will use this,please do wash and go
MsPleasant74: I've never seen this channel before, but thank God you popped up. I was looking for something like this. Thanks, great video