Tutorial: How To Make Extension Clip-Ins (Frame Your Face)
- Posted on 23 February, 2012
- Clip-in Hair Extensions
- By Anonymous
Expand for more INFO:
Products Needed:
Hair Needle
Hair Thread
Clips (Hair Store)
Extensions (Weave)
Scissors
Type of Hair Used: Virgin Indian Wavy Hair
Where to Purchase: sheenashairemporium.bigcartel.com
Face Of The Day:
-Face: MAC Matchmaster Foundation 7.0
Nars Taos/ Dulce Vita- Blush
-Eyes: MAC Chill on Ice paintpot, BH Cosmetic Palette Pinks, MAC Espresso e/s, MAC MSF Dark, lashes, maybelline Studio Gel Liner
-Lips: MAC Redd lip pencil, MAC Viva Glam Nicki l/s
Camera: Canon T1i
KEEP UP WITH ME:
Instagram: Start2FinishMUA
E-Mail: [email protected]
BLOG: www.start2finishmua.blogspot.com
TWITTER: @start2finishmua
FACEBOOK: www.facebook.com/start2finishmua
BEAUTYLISH: www.beautylish,com.start2finishmua
CHICK APPROVED: www.chickapproved.com/partner/start2fi...
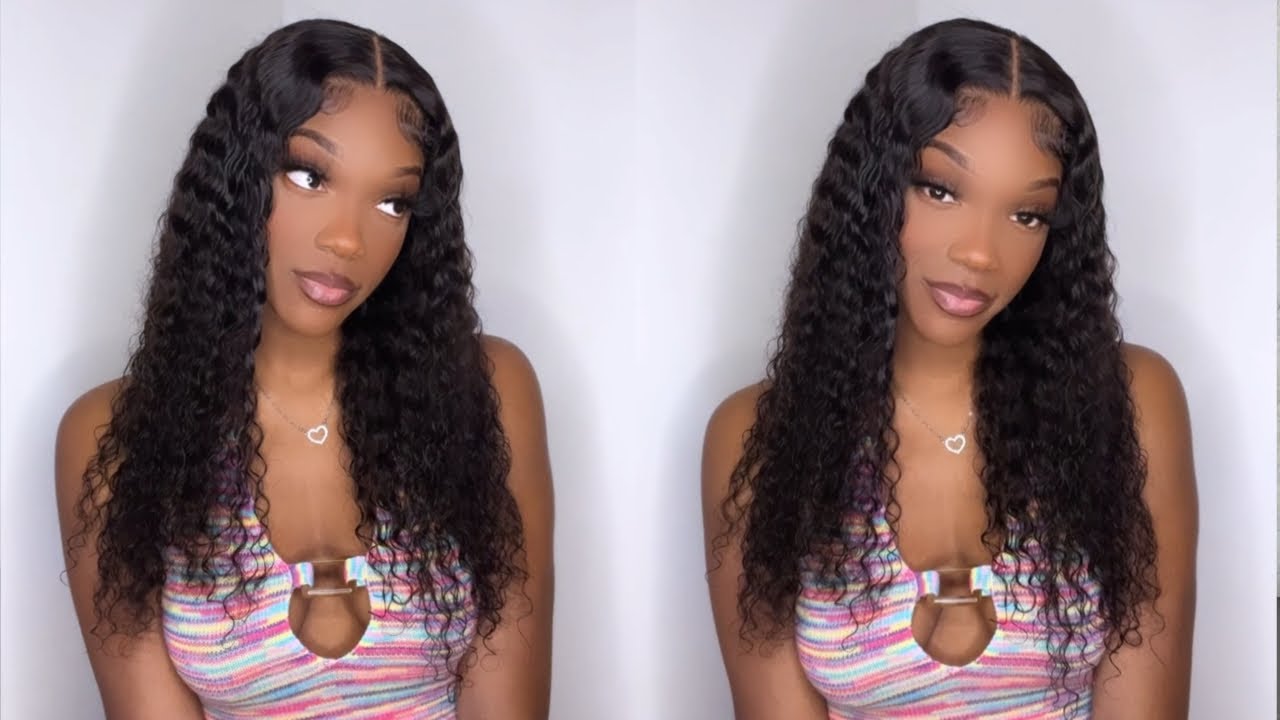
Hey you guys today, I'm bringing to you frame your face. Clip-Ins, I don't know if you guys notice or I can tell, but I has a weave extensions installation in my hair right now and I did it kind of thin, because I'm in the military you know having it too bulky hinders me from styling it the way That I want to and the appropriate way to style your hair and Red's. So you know I didn't want it to be full and just not easy and capable of going into a ponytail or a bun the way I would want it to so now that I kind of want more fullness and something to frame my face. You know I can't unbraid my hair. I can't change the way my my installation is right now because I just recently got it, but I did figure out a way to add hair around my face and to give it fullness. So I thought about creating um frame. Your face pieces - and I was just you know, taking my weave extensions and placing it like in my hair, seeing like how I would you know style it if I had to get a rebate and whatnot and then I thought like I could make clip-ins. So that's exactly what I did. I just cut the hair into small little pieces added Clips. My add clips to it and I just a place that where I wanted it and I cut it to frame my face, so this is how it looks so yeah if you guys, are interested in seeing how I created my frame, your face clip in stay tuned. So you guys I'm going to show you how to make frame your face clip pins, and this is for those who don't want to do so wins or you may have to sew in, and you know like the way your hair is braided up like you can't Take hair out so you just want to add something to like accentuate your face and your features or if you have short, hair or long hair. You don't want to cut your hair to where you know like you have to have like layers in the front and whatnot you can make frame your face. Clip ends that way you can just clip it in and kind of accentuate the features that you want. So basically, what I did I just took clippings from my local hair store, which was Sally's, and I just sewed it to the weft of my weave. My extensions like this, so I'm just gon na show you guys how I did that and then show you guys at the end, how it looks and how I put it in so stay tuned. So what you're going to need you're going to need thread, and you can get this from your local Beauty store and it comes in black and browns. So you can just get the color that matches your hair, color or blends in. You will also need a needle, and I got this needle from Sally's. It comes in straight and it comes in a curved. I think that straight works better when trying to get it through the weft of the extensions you're going to need the snap clips which you can get from Sally's as well, and I want to say that it was $ 1.99, but he may be $ 2.99. But I do know that it's not over 4 bucks and it's not less than $ 1. So it's somewhere in between 2 and 4 bucks and it comes with two clips in each package and then you'll need scissors. And then we've already have my we've measured out to how I wanted, because I will only want it in the front just to kind of accentuate and frame my face. So I already have it a cut to where you know cut to about how I want it. So taking a threaded needle just basically take the thread and thread it. You want to put a knot at the end, because this will be the the end of the of the thread for the clip in so it's needed. It'S not it and I have it long enough that way. I can do all of my clips on the on the weft, so I'm going to take my leave as you can see, it's the flatter side and I'm going to place the clip behind it and, as you can see it has, it has some holes one right Here has five holes and I'm going to sew through each hole going over and under over and under over and under like that. So I do it like that. So what you can do to make it easier. You can just place it through the actual weft and it will be hard at first push it through the weft and you go through the first hole and such and push it through like that. You want it to be as close to the clip as possible. Then you're going to go over and then back through the weft and do the second hole like that. I'M trying to keep this as clear as possible for you guys you're gon na go over and bring the needle back through and through the hole you're gon na. Do that all the way to the very end of the clip, so once you have it through this hole to make a knot, you just I what I do. I just grab the actual thread wrap it around my finger like that. It'S basically going to be wrapped around your thumb and then from underneath. You could take the needle slide it through and then you just pull you hold the actual loop, so you can get as close to the clip as possible. So here you have your first clip installed onto the actual extension and then you're just going to repeat the first couple of steps to get the second clip on it. So same thing, you're going to just kind of spread it apart, get it as close to the very end as possible, and and then you can start towards the end or in the actual middle, but either way you want to thread it just like you dread. The first one, so I'm gon na do that and I'll be right back so now you have the clip ends so to the actual extension so now you're ready to install it. Let'S get started so the way that my hair is parted and braided up. It is in a u-shape, so I only have the middle out the problem that I'm having is the fact that my front, the front of my hair is a little bit shorter than the rest of my hair. My my real hair is like a little bit past. My shoulders, but the front is actually shorter because I had layers and I had bangs, so it's a little bit shorter, so the way that it is now it's like, if there's a gap in between my leave out and the actual hair extension itself. So what I wanted to do, I wanted to be able to add clipping without having to redo my entire installation. So that's how I came up with creating frame your face, clip mins. So, basically, I'm going to I'm just going to part my hair to where I have the hair to like, where I want it and you can comb it apart. However, you want it to do it to where you know you like it and then clip it closed, and then you just comb your hair over it see, and now I have or frame your face piece and then what you can do you can just like. Take your flat iron and curl it like you can flip it. You can curl it under you!


Comments
Lavander Kiss: I was actually thinking about getting clip ins and you gave me excellent ideas!! Thanks for sharing!!
lauren leigh: Ur so pretty!!! Lol love this thanks for the idea Im going to try this bc I'm starting esthiology school on the 28th & girl I LOVE MY EXTENSIONS but I can't wear them for 2 months while we're in the class room so this will just be perfect for me to do on weekends! Thanks!
LeSha baby: You did an amazing job on demonstrating how to put on the clips best one I have ever seen
Erika Wyatt: They frame your face really well! Nice job! xxx
RaenaJenks: this is the best tutorial for sewing on the clips, great job!
F Wooten: i love this make up look. tutorial please!!! :)
mangopeel: You've got amazing bone structure in your face. You're gorgeous. And this video was really helpful, thanks
ViNaBabY1: thank you for doing this! and you are soooo gorgeous by the way
Robreya1019: Make Up Tutorial please you look absolutely gorgeous and im feeling this look, I wanna try it out for my up coming date soon :)
Ashley Smith: Excellent detailed video. Thanks for sharing.
Kenneitha Harris: Great video thanks. I am going to try this today
ShereeW1: You don't even need makeup, you have natural beauty which is rare.
doubledancer: Excellent idea! Looks awesome!
C Love Beauty: Your makeup is flawless......:-)
tl0991: what lip coloe are you wearing? It looks really beautiful!
jonika taylor: love the idea:)
Willow: Your so pretty without makeup ..
carollann26: Hey girls, if you're looking for the clips in there is certain sally's store that have it in bunch like for about 8-10 clips in for 5,99$ so just ask it because they might have it & save dollars :) !
paulalalam: your very pretty without makeup.
Fee _: i have a round face with a high forehead what do u recommend hairstyle wise or how should i frame my face? :) thanks.
HannahEstherRuth: Pretty!
Prettythithi: I always wanted to try clip ins but had no idea how to make them. I'd rather try this then glue or braid ins.
quietcat14: so cute!
Taneka Phipps: love ur makeup!!!!!!!!!!!!!!!!!!!!!!!!!
Sooya xyooj: awesome!
SincerelyShayla: i thought of doing that, its a good idea
desrob77: Your hair is supper cute!
Jennifer Sheena: you're gorgeous hun
Gabrielle Morris: Make-Up Tutorial Please ! Thumbs Up If You Agree So She Will See This!! (:
Sun Kara: start at 2:40
simiohh: you're so pretty!!
JoyceN.: U r gorgeous!
Kiesha.Primoxo: Ohh ur in the military!! No wonder you have musles. So cool
Madison Parker: YOU HAVE BEAUTIFUL CHEEK BONES
Nau: you sound like Adrienne bailon