How To Install Afro Curly Kinky Hair Clip Extensions On 3C Natural Hair | Amazing Hair Extensions
- Posted on 07 September, 2017
- Clip-in Hair Extensions
- By Anonymous
I've been protective styling with afro kinky curly clip in extensions and love it! If you've ever wondered how to install afro kinky curly hair extensions in 3c natural hair with flawless blending you'll enjoy this tutorial.
Natural hair extensions are the best clip ins for those interested in flawless blending 3c natural hair styles. The clip ins are super easy and provide endless hair styling versatility.
In this curly kinky clip in extension tutorial, I'll demonstrate how I prep my natural hair for clip in extension installation. Then I demonstrate how I blend the afro texture with my own 3c texture by using the 3 strand twist method.
I hope you enjoy the tips and techniques shared and enjoy these amazing extensions for yourself! As promised, below you'll find the details on the natural hair extensions!
CHECK OUT STYLES I'VE CURATED FOR YOU: http://www.504739.spreadshirt.com/
// PRODUCTS USED //
❤ This beautiful hair is from https://www.amazingbeautyhair.com/
Discount Code : LXLadon $10 off for all the hair
❤ Tangle Teaser: http://amzn.to/2j5xBLC
❤ Phusion Non Slip Satin Head Scarf: http://amzn.to/2vitfXk
❤ Quemet Biologics Aethiopika Hydrate & Twist Butter: http://go.magik.ly/ml/5gr2
The hair details -
Company: AmazingBeautyHairExtensions
Hair name: clip in hair extension
Hair material:100% virgin human hair
Hair Length: 20inch(available in 14-20inch )
Hair Color:natural color
Hair Weight: 100gram net hair weight
Hair Style: afro kinky curl
Package: a set of 6 pieces 17 clips
One-10inch piece with 5 clips each piece
One-8inch piece with 4 clips each piece
One-6inch piece with 3 clips each piece
Two-4inch piece with 2 clips each piece
One-2inch piece with 1 clip each piece
Hair link
https://www.amazingbeautyhair.com/coll...
https://www.instagram.com/amazingbeaut...
Hair Type: Fine hair curly and coily 3B, 3C, 4A and Miora is thick hair 3C, 4A, 4B
Density: regular - Miora very dense
Join me on Facebook: https://www.facebook.com/NoLyeNaptural...
Follow me on Twitter: https://twitter.com/nolyenaptural
Instagram: http://instagram.com/boldlyblendingout...
SnapChat: Nolyenap
"Natural Hair"
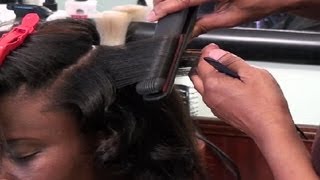
I am so excited to do this video for those of you who are new hey. My name is LaDonna. This is a no lighten up, Charlie me Channel and I'm so honored that you decided to join me today. So sit back, relax and enjoy this demo review and tutorial alright. So those of you who've, been following me on Instagram know that I have been posting this hair like crazy, so about a week ago I filmed an unboxing video for you guys. We received these amazing afro kinky clip-ins from a company called amazing beauty, hair extensions. So I asked you guys for like suggestions in terms of how I should work with it and what kind of video I should create with you guys, and you suggested that I do a wash and go and work with a natural texture of the hair. Alright and then you said after that, I should go ahead and do a textured style like a braid out twist out. What have you well, as I told you in a recent video, I tried to do the wash and go, but that was a no-go. This afro kinky hair, as you saw in the unboxing video, is beautifully dense. The curls are, you know, tight and beautiful, and while that hair was beautiful, it just did not match my natural washing go texture. My curls were much more loose. You guys know. I have very fine, less dense hair and it was just very difficult for me to blend my own hair texture with the kinky afro texture. So what I did was, I did a three strand twist out and I have been loving it ever since. So I'm going to show you how I accomplished this three strand twist out blending my own natural hair with the afro kinky hair, to get a seamless, blended, look and then I'll come back and do a review of the hair itself. Okay! So I'm starting out on freshly washed and conditioned hair. I deep condition because I know I'm gon na keep my hair put away for a little while, and so this section in the middle was sort of carved out, so it could serve as my leave-in and I'm just gon na bantu knot it so that it doesn't Get in the way, as I French braid the rest of my hair, I have quite a bit of leave out, I think, compared to most people, but that is because I do have fine low-density hair, and I find that this is the best amount of leave out To have so that I don't have to worry about the wefts being seen around the crown of my head and now I'm carving out hair on the left and right side of my head and the reason I'm doing. That is so that you don't see where the clipping wefts and and begin on either side of my head and then I have a nice sort of you know. Hair line it'll provide more versatility for me in terms of styling and things of that nature. With these clip ins, I don't want to be worried about, like the wefts being seen alright. So now that I've carved out my sections you're just going to kind of begin the process of French braiding, your hair, I'm not going to show you that guys, cuz you're gon na see these were some struggle. French braid. It was bad alright, so I'm gon na start out just by installing the three clip left and you can see the hair, it isn't super thick, but it does thicken up as you begin to work with it, but yeah. So I start by opening up the clips and don't laugh at my corn rolls y'all. I know it was a struggle. It was a struggle night like I have these nails on. It was just it was so difficult, but I do suggest you do more braids than what I did ideally but yeah. These work just fine for my purposes. They won't be seen anyway, but I like to secure the middle clip first and then secure the clips on either side. I just feel like the clips are easier to work with that way. As you can see, the hair is very secure and it went in perfectly so now I'm going to install the four left or four clip weft. I cannot speak. I'M gon na install that next and what I like to do is use this two finger method. I don't know if that's a probe method or not, but that's what I'm calling it and install the middle clips first and then you'll see me work my way out to the ends. I just feel like when you install the middle clip it's easier to work with the ends, especially as the wefts get longer and longer to make sure that you secure them evenly and you just have more control over things I find so periodically, while installing them. I did use a little bit of my aloo scense, moisture, balancing conditioner as my all-time favorite conditioner, and I did use it on this hair because I absolutely loved this hair and I want it to last a long time. So this hair is damp. So I'm going in and adding a leave-in conditioner so that I can keep the hair nicely moisturized before I add my styles, which you'll see me do just a little bit later, make sure you get the ends of the hair yeah. So now I'm going to move on to the five cliff clip of's. I can't say it and this time I'm only going to open up the middle clips. I'M gon na leave the ones on the ends closed. That'S because this weft is long and to me, maybe it's because I'm a novice - and this is the first time I'm doing this - it's just easier to open those cliff clips, nothing ready to install them the longer the weft I feel like you want to really position. It to make sure it ends where you need it to end. For me, I want, at the end of the weft, to meet the area just before the leave out on the side of my hair began. That way, I didn't have to worry about the wefts being seen, and it was just a better, you know, sort of installation and I was able to avoid having any lumps or bumps in the hair and that sort of thing the other good thing about you know Installing the middle section first is that you can play around with it and kind of see. If you want to reposition things. I did that on one side of my head because I felt like it wasn't necessarily as even as I wanted it and it allows you to just have more control over the overall process and reposition things kind of as you go. So don't hesitate to do that when you're installing these widths, all right so now I'm gon na go in. There were two two clip left's, so I'm gon na go ahead and install those, and I installed those toward the back of my leave out section just to make sure that I'm covering it and I get right up close to where my leave out would begin, because I didn't want a huge gap there and then I'm going to take that second, two clip weft and I'm going to install that on the opposite side of the head and you'll see at a moment I actually overlap the two widths. The reason I do that is because I didn't want there to be like a gap in between where the the west's ended and you just thought like that gap in the hair. Anything like that. I also didn't want the braids beneath it along the top to be visible at all, so you know it's kind of like curtains, you know how you overlap your curtains a little bit, so you don't get that gap in the middle. That'S essentially why I installed the West that way, so everything would just be seamless and then they give you one final clip left. You say it you can. I liked having the single clip left because you could just put it where you want it to have more fullness. So I really like that all right. So now everything is installed and now it's time to begin to set the hair and that is really really critical to get a nice blend. So I'm gon na start out by working on my leave-in. First, I'm going to saturate it with water, because I find, when I'm doing three strand twist outs, the wetter. The hair is the more texture I get and with this hair you definitely want to have more texture. So I'm just gon na take my tangle teezer, which I absolutely love, because these bristles are so pliable. I love it and I'm gon na go through the hair just to make sure I don't have any kinks or anything, because I want my three strand twists to be as smooth and consistent as possible. Alright, so now I'm going to go in and create my part. Now you're gon na see me do this L part and I'm going to tell you why. I recommend this specific part in just a moment, but yes, so see how that L is there now, I'm I never. I rarely did a middle part with this, but it actually helps the hair to lay better when you're trying to cover the tracks. So you'll see that in part two of this video, when I do the takedown, but it makes things so much excuse me it's so much easier. So now I'm gon na take this a so peak. I'M not gon na butcher to butcher that, but it's equipment, biologics butter, so I'm gon na take this butter and I'm gon na use it on my hair. Yes, my fine hair and I'm going to use it on the extensions. So I love this butter now I didn't use all that butter. That was God my daughter has been using this. She has a very thick DIMMs hair and that's why I chose to use it on the afro kinky curly clip-ins, because it works equally well on fine hair, as does very dense hair. So when you're selecting a product to work with to set your style, if you're doing a braid out twist out whatever you know, process you're doing you want to make sure you use a product that works well and consistently on both your texture of hair and the Texture of the clip ends you're using that'll help you to have a more consistent style, and you know it'll help both sections to look more consistent when you're blending them and then, as you wear the style. So I did a flat twist into a three strand twist and I like to do that because again it helps the hair to lay better also when you're separating you don't have to do as much separating, because you know it's just by virtue of doing a flat Twist, you create sections every time that you flat twist on the scalp, so you want to make sure that you coil the ends and you'll see why that's simple, yes, see how you get that nice coil. My hair takes a minute to coil up, but you want to do that because it will make it easier for you to blend your hair in with the clip-ins as well, and it's just a nice way to kind of finish. The ends of the hair. Okay, so yep, you want to curl coil that last section as well all right. So now you can't forget about those edges on the side, so we're going to do the exact same thing: we're gon na wet those sections, we're gon na, add a little bit of butter and then we're gon na flat twist them and they'll be done like that's. Yes, so I didn't want to bore you guys with that that process, because I figure you get the point at this point all right, so one of the things about Fleck Swiss is that they can become loose. So what I do is I use a bobby pin to secure them so I'll you know, turn them in the direction they were twisted tight, but not so tight that you're pulling on your edge or that it hurts or anything like that. That was a bad example. I'M gon na show you again in a minute but see how I'm turning it in the direction of the flat twists. That'S on the scalp and then I'm just using a bobby pin to secure the end, because that's gon na allow me to have more texture. At my roots, a lot of times with flat twist outs, your roots are not going to be as textured if you have low density, really soft or fine hair, and so the bobby pins help you to get that effect. All right. So now, I'm just gon na. Do regular three strand twists on the rest of the hair, so you want to saturate it with water and you want to go ahead and use your butter on the hair work it in really well and make sure that you're adding enough products on the end of The hair as well and at some point when you're using butters like this or any product on the hair, you do want to go ahead and clarify the hair eventually to lift it off, especially because these are you know, natural hair clip ends. You want to treat them just like you would treat your own hair and you wouldn't want to let butters kind of settle on your hair, because over a period of time is just gon na prevent your hair from being s curly, and it's just gon na look Kind of blah, like hair, looks the way when you need to clarify it alright. So, as you see, I am nicely coiling the ends and I'm just gon na repeat this process throughout. I think I ended up doing probably about ten three strand twists. So now they're done, isn't she beautiful, no she's, tired and she looks it alright. So after you've done this, you want to take a scarf and wrap your head. I'M using my non-skid scarf, which I absolutely love. It is the only scarf that stays on my head overnight, so I love love, love this thing and it's also breathable enough that the twists have the ability to dry by morning all right, so I'm just gon na go to bed and in part two of this Video I'm going to demonstrate to you guys the takedown style, as well as the final review of the hair. Alright, thank you guys for watching and I will see you in the next video subscribe. So you get a notification once it has uploaded bye, guys.


Comments
Toni H: Thank you so much for this tutorial. The best I've seen, now I feel confident to install mine. Bought a month ago took them out the pack, tried to install and got discouraged and placed back in the pack.
M Midd: Thank you so much for actually giving us the measurements along with a tutorial. First out of all the videos I've seen.
Nicole L7123: OMG!!! Your hair is so similar to mine. I'm so happy I ran across your video!
LiveLoveLaugh: Hi does the clipins pull or weigh down your hair now that you have had them for a while?. I have fine hair like yours and mine is thin. Thanks for answering if you can.
Pokegirl4581 Anime: Your hair looks nicer than the extensions
Felicia'sLoving HerLife: Very nice..you look younger with without Make up and yes you are beautiful...tfs
Kyah Kimbrough: how many bundles did you use?
Natalia B.:
Xenia Stephenson: I bought black hair instead of a natural hair color how can i make this work?
Beryl Lubanga: Pretty..