How To: Right & Wrong Way To Do Tape-In Extensions | Beginner To Expert | Ft: Y-Wig Hair
- Posted on 30 May, 2022
- Clip-in Hair Extensions
- By Anonymous
Undetectable Tape In Extension
Direct link to the kinky straight tape in extensions:
More tape in hair extensions:
https://www.ywigs.com/collections/tape...
Ywigs official website: https://www.ywigs.com
Ywigs micro-loop hair extensions:
https://www.ywigs.com/collections/i-ti...
Ywigs Clip-ins Hair Extensions:
https://www.ywigs.com/collections/clip...
Ywigs U-Part Wigs:
https://www.ywigs.com/collections/u-pa...
Ywigs HD Clear Lace 13x6 Lace Front Wigs:
https://www.ywigs.com/collections/13x6...
Connect with Ywigs:
http://www.instagram.com/ywigs_officia...
https://www.facebook.com/Ywigstore/
Snapchat: Ywigs Hair
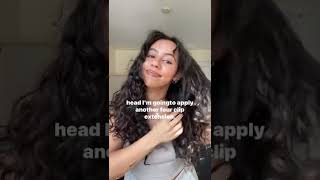
Hey y'all: what's up so i'm back with another video this time, i'm doing a taping extensions. This is not my first time doing them. This is my second time and again, like the i tip extensions, when i did those we are going to be learning together as we go through this process, i'm going to be teaching you guys the right and wrong way to do it. I'M going to be messing up and correcting it, and just telling you guys what to do so today, i'm using wire wigs extensions. They sent me their kinky straight hair, um, three bundles off their tape ins. This is a 20 inch and i just like i, when i did the eye tips with y wigs. I do love their kinky straight hair and i did the same thing same texture on my sister with the eye tips. But today we're doing tape. Ins and again they sent me three bundles. They are really full each bundle. I did end up using about two and a half bundles. So yes, um her hair was super full at the end. So i do feel like you can use two bundles. However, like i said, i used two and a half and her hair was really nice really full. So taping extensions is when it comes uh, just like that, so it looks a little natural on that end and then on the other end is where you there is. The tape, so i'm gon na jump right into the video, so she did ask me to shape up her little kitchen back there, but i was like uh, we like a natural kitchen around here. So what i'm going to do? I'M just going to straighten her hair and, like i said, i'm going to be learning as i'm going and teaching as i'm going. The student is the teacher. The teacher is a student okay, so we're going to do the same thing again like the itip video. A lot of you guys love that video and said you learned a lot, so this is going to be the same thing, but for taping. So what i'm doing right now is i'm just straightening her hair, which i've seen most uh tape and extensions. They just went ahead and straightened the entire hair. I just feel like it's easier to attach the tape when the hair is straight than when it's all kinky curly at the roots, even though it is kinky curly hair. I just feel like it doesn't attach well to the hair when the root is curly, so it's best to straighten the hair, and i feel, like you know, even if you straighten the kinky curly hair, it's easy, all you got to do is wet it for it To like bounce back to a kinky curly like texture, with both your hair bouncing back and the um tape ins bouncing back to a kinky, curly texture. So right now i noticed like that's not enough hair. I learned my lesson from the last time, like that's, not enough hair to cover the weave and we gon na make sure we cover this time. We'Re not gon na make that mistake, so i want to completely make sure that none of the tapings are shown when she lifts the hair up. None of the tapings are shown when the hair is down, and you know i just don't. I just want it to look natural and nice and i just love the finished results with these. So these are tape. Ins, i'm peeling it from one bundle. You'Re gon na need two individuals to make one layer thing like if you get what i'm saying so right here, i'm just parting out to make sure like do. I have enough hair out on the sides and do not be afraid to go deep in to the hair as far as like leave some hair out on the sides. Please, because you do not want these to show it's hard. It'S not that hard to take them out, but it was easier to take the eye tips out than it is to take these out. So what i do is just peel off uh, peel off that white stick and i'm gon na place it under the hair. So you don't want it to be too close to root, and i noticed that i did put that directly on the roof. But even when i did that, i asked her when i lifted up and down like did it hurt and she said no. So what i noticed here is that i did do too much hair, so what i'm doing i'm gon na just peel that hair back so with doing taping extensions. You do want to have just a little bit of hair so that not only does the top sticky sticks on the hair, but it also sticks to the bottom tape. If you get what i'm saying like you, don't want the hair to be so much that both tapes are just sticking the hair and not sticking to each other. So you just need a thin layer of hair between them just to secure them. But you also want enough space or enough gaps on the tape, so that, when you stick the top layer on, it also sticks to the bottom layer of tape. So you want to line it up properly and lay them directly on top of each other and make a sandwich with your hair, so a thin layer make a sandwich and yeah stick them together. Here i am just securing them, make sure and it's secured um but yeah. That'S all you need to do is make a sandwich, and then i'm gon na keep going and, like i said throughout this video there's so many lessons that i learned and that i need to teach y'all and just keep watching. I know it's a little longer than my usual videos, however, like i have a lot of uh training in this video, that's going to be helpful for when you guys are doing this, so i'm just going to keep going making sandwiches and i'm not going to fart Um get too close to the edge like do not when you're doing these guys do not worry about um fitting in so many that you're getting too dangerously close to the edge and you're not leaving enough hair out on the edges. So right here i got a little impatient. You know like i need to see the results right away. I do feel like i should have just straightened. The entire hair then go in and put the um the extensions in and then flat iron it. But you know i needed to see what's going on, so i went ahead and flat ironed that layer just to see like okay. Is it going to blend in well? Does it look good? You know what i'm saying so now, i'm like just parting out another section and as i go, i'm just parking out section by section not getting too close to the edge and just you know getting it done so, as you can see the part that i parted Out is not too thick like i'm just just enough hair, but even when i part that out, i'm not even putting that much hair, so anyways as i'm going y'all know. I make my mind up as i go. So as i'm going, i'm just like hold up. I can do a half up half down type thing, so that wasn't the initial thought. So that's why i didn't part it out in the beginning, but as i'm going, i like to just you know: go with the flow like i'm, not a planning out type of girl. I just like to do it as i'm going so i did part that out so she could have the option of doing a half up, half down and a middle part. So here i am i'm fed up. I'M just like you know, i'm not gon na. Do it step by step anymore, i'm just gon na uh, flat iron, the whole back, half first and then go back in and lay the tape ins in so here i am, i'm just going to go ahead and flat iron. The whole thing! Well, half of the head and then go in so here's another lesson you guys when i was uh at this point, i'm like, oh, my god, i'm not doing it in a smiling direction. It'S gon na be difficult for her to put her hair up in a ponytail if i'm not placing the tape ins in a smiling directions. If you did watch my micro link, uh video, like i had to place them in a smiling direction, and for this i don't know what came over me or what i was thinking but immediately. I was like - oh my god, autocorrect and thank god i didn't wait too late to figure it out. It didn't mess up the hair at all, but this also needs to be done in a smiling direction. So um i'm just testing that to make sure it's not going to show and even though i part that layer out, i do not use the entire layer to place in between my tape. It'S still like a small amount that i place in between my tape. So i'm just gon na go, go ahead and um. There is a smiling direction right there. If you don't know what that is, it's like you know, i don't know how to explain it. You'Re smiling. So it's in a smiling action. Y'All get it y'all ain't slow. So that's what i did there and i just went ahead and finished up the back, but i wanted to show you guys like how i place them in and, as you can see, so that bottom layer right there. The bottom tape, like i placed it, it's kind of close to the edge, but enough hair to cover it and then, when i was making the second layer like, even though that looks like enough space to put another tape right next to that tape right there. I it was just going to be too close to the edge, so you have to skip it. So don't be, don't think you need to force a tape in just because you feel like there's enough space to force the tape in there just go ahead and go to a next layer. And then, when i did my next layer, i just kind of went over closer to the edge or as close to the edge as i i could without you know, having a tape show and then went from there. So when it falls it's just not going to fall on equally because i'm just stacking them on top of each other, i'm just kind of going like in a staircase kind of way. So now this video is going to show you, or this part of the video is going to show you like how much hair i have on the tape. As you can see, i got close as possible as i can, and that's how much hair i have on the tape. As you can see in between the tape in between the hair, there is some tape, some adhesive showing and i'm sticking that layer on top of it and it's gon na stay in her hair, because it's not too much hair that i placed on the tape to Like make it slip out or not stay or whatever, so these are supposed to last really long and um. There is solutions that you use to basically get them out. Some people use alcohol um. I don't think that's a good thing to use, but they are oils and stuff like that that you can use to take it out. Maybe i will show you guys how i got it out, maybe on like a story or like a short video, but this is the final um for the back and it's super full. I think i use like uh one bundle and, like a few of the second bundle in this, to get the entire back completed and it looks great, i'm gon na just go in now and flat iron, the rest of the back. Because again, i'm impatient - and i just like, take my time overall like when i do videos like this. I basically tell they need to like block a day off, because i'm going to take my time, even though, if i was in the salon, it would take me much faster because i'll just like boom boom boom boom boom, but because i'm filming i just want to Get all the footage that i can so that i can tell you guys, like okay, step by step, what's important or just show the whole style, but it did take me too long to do this. This hair, i know like it. You should be able to knock this out in like an hour and a half two hours, but it did take me like four hours. I don't know why, like we was chilling, the baby was running around like doing the most, so it did take me a while, because i just wanted to film everything and make sure it was right. You see how slow i'm combing it like. That'S literally me, like coleman, is super slow and just making sure that it's right and the hair is so full like look at how full that is, and her hair blends in so well with it. So now i'm gon na go into the top yeah, i'm not done yet y'all. I still got ta do the top, so i went ahead and flat ironed, the entire top and made her middle part, and then i'm gon na go in. So the important lesson about this part of the video is that when um, when i went in to start placing the tapes, i really had to make sure that i had enough hair out on the bottom half like near her ears. So when i started laying the tape guys, i put only one tape for each layer. If you get what i'm saying like, i didn't try to put tapes next to each other um, even though they look like it would have enough space. I literally just put tape one tape going up up up up up and i just made sure that i pulled back on the tape where her edges was like a little thin. I pulled the tape back some and then i just moved it back like forward backwards forward backwards, just like that, just so that um it will fall properly and be full enough at the top when she's done so, even though each layer is just one tape, i Didn'T like stack them with each other to like force it in there, so it's just one tape, each layer. So now i went ahead and flat ironed her hair out. This is the final look of it fully being flat ironed. I absolutely love it. It looks super full super thick and it just blended so well with her hair. Her hair is not natural, she does permit, but she doesn't permit so that it's like super bone straight. It still has a little kink to it and um yeah it blended. So well with her hair um, it looks great someone went ahead and curled it and it holds the thing about. I like about this hair is that it holds curls so well. It like the curls was lasting y'all and i really it's hard to find hair that curls really last and that annoys the crap out of me. I hate going through a curling process and then, as soon as i'm done, the whole thing falls out, so this hair does hold a lot of curls and or holds it for a long time, and this is the final results guys so here she is um again. We use the y wigs extensions, they're kinky straight hair. These are three bundles of her 20 inch tape ends and it looks super full. I used only two and a half bundles and got these results. Her hair is already thick and nice, so this just helps make it look even better. Here is the half up half down part of it. The information for the hair will be in the description bar. If you want to purchase it so go ahead and check that out again. This is why wigs extensions this is their 20 inch kinky straight, and i hope you guys enjoy this video. Thank you guys so much for watching see you next time.
Comments
A Taurus Woman: Duchess you did an awesome job I love the hair It looks so natural.... it's beautiful ♀️Thank you for sharing♥️
Bethany Barfield: This style turn out so cute thanks for the tutorial I like this.
Renee Mosley: Beautiful install!!!
Heloisa Paixao: Lindo trabalho parabéns
Cher John: You did good, always a pro❤️
M Bell: ♀️Super job...I'm going to look at this again and try this..thanks for sharing...ky
Live true love you: Looks amazing!!!
Jackie Randolph: You can't tell their hair add to her hair looks so beautiful.
Elise Laughlin: Absolutely gorgeous!!
Tangela Chapman: That Is Beautiful Queen's, When You Curled It That Was Awesome. ❤️❤️
LULA YUP 80z BaBy: Gorgeous this is a must have
Tvrx Vyc: Eres un ídolo KISSSSSS.Uno siempre en mi corazón,hermosa,amoru,elecciones,culturales.❤️ Son unos de los mejores conciertos.
Sweet pea 3: can u reuse tape ins? probably no but curious
Indybindy: this is so pretty
Beza's amazing tube: Wow wow so beautiful! !!
Cassandra Turman: Great job beautiful and she look amazing
Kitchen Lab: Very good and happy beautiful style
Ashley Cristina Kyhara Gabrielly: i Love
Ana caroline Batista:
Paricia Jones: ✅✅✅♥️♥️♥️♥️
Virginia Redbone: