Zigzag Hair Coloring Technique | Chocolate Raspberry Brown Hair | Kenra Color
- Posted on 09 January, 2020
- Fusion Hair Extensions
- By Anonymous
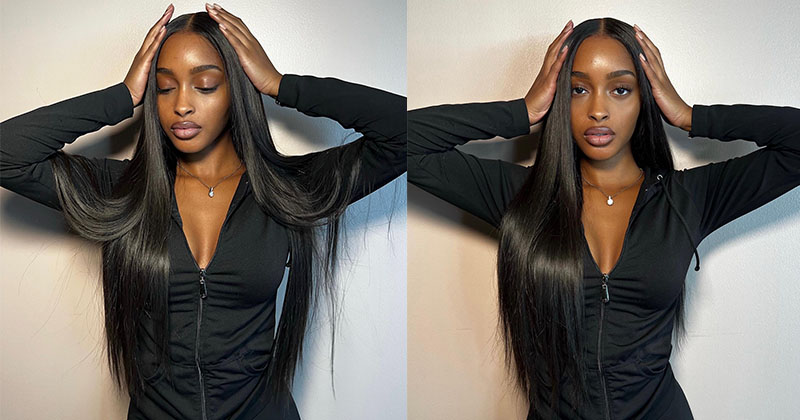
Learn how to create this beautiful chocolate raspberry brunette hair color using a zigzag coloring technique with all Kenra Color. This complimentary color and technique ensure that the brown-red-violet hair color and bob cut will stand out. We show the entire process including formulas and techniques, so make sure to watch until the end!
Interested in Kenra Color? Submit your information and we will reach out to you: http://bit.ly/KenraColorInYourSalon
WANT TO WATCH MORE?
Learn About Halo Hairpainting Technique Here: https://youtu.be/chETJMaZjz4
Watch Air Touch Balayage Tutorial Here: https://youtu.be/lMDb3gGbRMU
If you enjoyed this video, make sure to give it a thumbs up and tell us in the comments below what you'd like to learn next!
SUBSCRIBE NOW: http://bit.ly/KenraProfessionalSubscri...
VISIT OUR WEBSITE: https://www.kenraprofessional.com
About Kenra Professional
We are a purely professional brand dedicated to understanding and serving today’s stylists. Our passion is developing best-in-class innovations, delivering superior and reliable results. Kenra Professional strives to elevate the stylists’ artistry and craft.
CONNECT with US
FACEBOOK: https://www.facebook.com/KenraProfessi...
INSTAGRAM: https://www.instagram.com/kenraprofess...
TWITTER: https://twitter.com/Kenra_Haircare
ZigZag Hair Coloring Technique | Chocolate Raspberry Brown Hair | Kenra Color
#haircoloringtechnique #brownhaircolor #brunettehaircolor #kenracolor
Hey everyone, I'm Oliver Shortell national artistic manager for a camera professional. Thank you so much for joining today. I'M gon na be sharing with you how to create this beautiful, rich chocolate, raspberry, look. It has incredible shine and a beautiful saturation of pigment. I'M also going to be sharing with you how this type of color really complements a strong cut. I'M gon na be working with my five steps to formulation today to figure out exactly what I'm going to be using on my client. The first and most important thing is to know exactly where your started. First, I'm going to use the level finder to see exactly what level my client is, so I'm checking at a level three inserting it and see that it disappears into the hair so that I know she is a natural level. Three in talking with my client today, I found that she wants to be in level six with a brown red violet hue through the top section of her hair and a level four Brown violet reflection through the bottom I'll talk more later about why we chose to Do this in talking to my clients about what they want? I love for them to bring in pictures. One trick that I always have is to always cover up the face of the model so that they can just see the hair. I want to make sure that they, like the hair, that they see and not the model in general. Another trick is to never show your clients, the swatch book, that's a tool for you as a stylist to know the color family that you're working with, because I know that my client is a natural level three and I'm lifting to a level six. On top. I know that I can work with either a 30 or 40 volume, I'm lifting to a level 4 on the bottom, so that means I'm going to be working with a 20 volume. If your client has coarser hair, you could always up your developer strength, buying a volume if your client has virgin hair. It'S also important to know that you can up your developer strength by one volume as well, because the hair on the end is generally harder to lift than that root area. The next step in my consultation would be to check for gray hair. As you can see, my client doesn't have any gray hair today, so I won't need to add any natural series into my formula. The final step of my consultation will be determining the amount of underlying pigment that would be left in the hair. So, as we can see I'll be lifting to a level 6, so we'll be exposing orange in the hair, because I'll be working with more of a brown red violet base, I won't need to neutralize this pigment today. I can actually use it to my advantage to enhance the color. You can always refer to our swatch book or our website. If you need a reminder about how to formulate with camera color, you can also use the kenra color amazon alexis kill for formulation as well as conversions from other color line. If I were to be cutting off two or more inches from my clients hair today, I would generally do this before my color application. This would help save time and products, but because I'm just trimming my clients hair today, I can either do that before or after the color service, because I really want to accentuate the brown red violet color that I'm putting in my clients hair today, I'm going to Be putting a brown violet directly below it, I'm gon na be working with a zigzag parting around my clients head today, I'm gon na be working around the parietal Ridge and going pretty deep with my zigzag. It'S gon na give the most blended effect. If I wanted a more defined look, I could go in with a more shallow zigzag and have them further apart. It'S important to remember that the deeper you go, the more blended it'll be. If I wanted to create more of a bold shape in the hair, I could work with a star pattern on the top of the head. That would allow for my Brown violet to really shine through as well, so starting just in front of the ear. I'M gon na work with my tail comb to really give that deep zigzag effect. So you can see that the bottom of my section goes down to the temple comes up just above parietal Ridge and then is going to come back down to about two inches above the ear I'll work that all the way around the head. When you get to the back, it's important to remember that you offset that occipital area make sure that your zig zags don't sit on one side or the other and continue that zig zag again crossing through the crown and the parietal Ridge. All the way, through to the other side again about two inches above the ear, I got a little high on that one. So I can always just go back through take out what I don't want and very important to remember for this last portion to finish exactly where you started, which is right at that temple area, be very careful when combing this section, because you're working with a zig Zag is very easy to comb into your bottom section as well, so really make sure you're holding the tension and combing just that surface of the hair and make sure you're not combing too low. So once I get all the hair combed up to the top of the head, I can go back through to check for any imperfections that I may have. So I see that my zigzag is a little off here, so I can just go through and add that to the top section. So once I have that all combed up, I can check for a balance from the front. I want to make sure that my entry point from sectioning and my exit point are the same. I'Ve chosen to work with kenner color monochrome series today for my client, the monochrome series offer a rich saturation of color that are going to look amazing on this type of shape. When working with a cut such as a bob, I tend to stay with a little bit more of a simple color placement, so today, again working with an upper in a lower section, one pro tip I have for you today is between sectioning and application, never mix. Your color, you don't want to mix your color until you're ready to apply it to the clients head, because you want to get the maximum performance out of your color. Today, I'm going to be using 4bv, plus with 20 volume on the lower section. If you remember earlier, I was talking about how virgin hair can tend to not lift as easily at the ends as it does at the root, but because we're only lifting one level down here. I don't need to increase my developer stream when I get to the top I'm going to be working with 6b rv+, with 30 volume at the root and 40 volume at the ends. So it's important to remember with kenra color that 30 volume can get you two to three levels of lift and 40 volume can give you 3 to 4 levels of lift, because my clients, hair is virgin. I'M going to be working with 40 volume on the ends because, as you remember from earlier, if hair is more resistant, we need a higher developer to ensure that we really get that see out of our color for my application today, I'm gon na be starting through The bottom and then working my way to the top. This will ensure that I keep a clean, color application and make sure that I don't transfer any color from the bottom section on to the top section. That'S going to be lighter to ensure the my application stays really clean. I can take a foil fold that in half and put it directly below my first section, so everything can lay on top of that saturation is key when it comes to color application to really get the proper end result. So you can see here that I'm taking a small subsection applying at the root area first below and then above and then really making sure that I'm saturating that color all the way through to the ends after you've applied your color. You want to see more hair color than actual hair without full saturation of color. Your end result could appear blotchy or inconsistent. Once I get to the area that has the zigzag sectioning, I like to break it into the three separate triangles, I'm going to make it a lot easier to work with, rather than trying to have to work back and forth, pay close attention as you're working up The triangular sections, through the back you'll notice that I'm working with a wide brush and the section is very narrow. So at this point I may need to change the angle of my brush to make sure that I'm not getting that 4bv plus into my upper sections. You can see that we've finished the section that covers the occipital and nape areas of the head. Now, I'm going to be moving on to the sides to keep the application still very clean. I can clip away any of that upper section that looks like it could be touching the lower section. Now you can see that we're getting here to the area of the zigzag, so I'm going to be working, my section down again that will allow for no transfer of color. Another way to keep this application very clean is just to work. Everything toward the back, so you'll see that this entire lower section is being over directed down to the nape. I'M also gon na be doing the same thing on the upper section, I'll be bringing everything straight to the back that way, we're not getting any color all over the clients, ears or all over their face. As you can see on my clients hair today, she does have some natural dimension in there. I'M choosing to use the monochrome shades because they do give that solid, full rich saturated effect. So I've just finished the bottom section. You can see that the color is fully saturated, so I know I'm going to get the result that I'm looking for. As I was talking about earlier, you can't see any hair. You really just see hair color and that's how I know it's been pushed all the way through the section. So now I'm going to be going through again with my foils fold, it in half I'll place them in my zig zags. So then I can work with my top section and keep those two separate now that I've gotten to the top section I'm going to treat it just like I did the lower section. So as I'm going through this is zigzag I can take my a triangle apply. My color all the way through do that all the way around and then move on to the top. As a reminder, I'm going to be working with 6b rv+ with 30 volume at the root through the top section and 6b rv+ with 40 volume through the ends. So it's important to remember that heat comes off of the head. That'S why I'm going to be using 30 volume with 6b rv+ at the scalp and 40 volume, with B rv+ through the ends. Once I have the 30 volume applied, I can go back through with my 40 volume again ensuring that I'm really pushing that color into the hair, because I'm working with a little bit larger section to ensure that I'm getting really even color results from root to end. I can go in and smudge between the 30 and 40 volume. They don't share that I don't have different levels of lift from route through ends. I finished most of my zigzag around the head, but you'll see that it left out the hairline I'm gon na leave that into the left, because that hair is finer and I don't want it to over lift past everything else. So now I'm going to be going from the crown all the way to the front hairline, leaving that fine hair as the last part of my application, as I'm working through this top section I'll come through apply to the bottom of my subsection. Take the subsection paint the top of it I'll, do this about three or four times then I'll clip the rest of the hair away and work with my 40 volume through those mid lengths and ends. This would be great for timing and it's also just an easier way to apply the color. So when I get to the hairline, you can see that the hair is a lot finer. So now I don't need to apply to both sides of my subsection. I can just apply coming back when you get to the hairline. You can see all these fine hairs have been left out. One tip for you is to really only make sure you're applying that color, where it needs to go. The color doesn't need to go on the skin too far down. Also, you can work with a dry brush in just a little bit of product to go through and lay those fine hairs into the rest of the hair. I'Ve just finished my color application. I'M going to allow it to process for 30 minutes. My client had resistant gray. I could allow my color to process up to 40 minutes after processing we shampooed and conditioned with Lux 1, which is in our kenra platinum line. I then blew my client dry with the lux one leave-in, and now I'm going to be working with my camera, Platinum soaking in heat cream, along with a straightening iron. To really polish this look. You can see this beautiful, rich chocolate, raspberry color. When I open it up, you can see the deeper color underneath that B V with the BR V sitting, just over the top again, with this type of shape. This beautiful blunt shape. This type of color works really really well. I love the saturation. I love that there's not a lot of variation from hair strand a hair strand. Thank you so much for joining me today to learn all about this look make sure you subscribe to our YouTube channel to get all the latest updates from Kendra professional
Comments
Maryam Sani: Absolutely great clean job ,definitely am going to use this beautiful technique in the salon. Thank you
Leticia B: The shine her hair achieved from these monochromatics was unbelievable! Well done. Beautiful color, beautiful cut too.
E. Mcm.: beautiful!! Thank you for sharing your technique!
Treasures of Plantz: BEAUTIFUL!!! I will try this formula
Marvin M: I love this hair color, beautiful haircut bob too it's well done.
Miriam: Absolutely beautiful! I want this.
Miranda Bisnoù: Wow... what patience!! Beautiful
L B: Absolutely beautiful color.
Ange C: Beautiful hair !
Vanessa Dickens-Boyd: Gorgeous
Anna Sayed: Lovely color and cut!
Cecelie N.: Very very nice, thank you
Chela Huera: This color is Amazing❣❣
Sometimes Snarky: Pro tip: When doing the shorter hair at the back have the client put their chin on their chest (if the can).
MelaninDawn: This is a beautiful job
Margarita López: Love the colors thanks you
K: Her hair doesn’t look like it’s virgin hair at the beginning. It already looks like it has some violet tones in it.
Sometimes Snarky: Where my cosmetologists at? Using 40 developer on the ends of virgin hair because it is more resistant?!?! Nope. If she had colour in her hair you would have to remove it which would be more difficult but the simple fact that her hair at the ends is around two to three years old means it is LESS resistant. It has sun and styling damage and the cuticle will not be as close together as that hair which Is less than a year old.
ניר: Wow amazing tutorial
1NB5! BND: Luuvvv Itt!! I need this color on my Locs
Caroline Bonini: Yes!! Love the short hair! ♥️
Lisa Parks: The sun naturally lightens hair that's prolly why she has some subtle highlights
Traci Lord: This is Stunning! What brand flat iron do you use?
Carmen Ramos: You're amazing :)
A B: Phew! Thank god he went back to fix that piece of hair that fell, I wouldn’t have been able to sleep!
Fearless: Her hair was really nice but i didnt see a difference in the color.
Kayla A: This looks amazing but I'd be afraid to try it. I got a Kenra shampoo and conditioner as a Christmas present and ended up with a bad allergic reaction. I will say don't get an allergy with their product because they won't refund you anything even if you only opened the product.
Kuttiesmith03: Ummm i dont see the difference, i can barely see the color. Her hair is very pretty and healthy though.
myesthic rodriguez: wao beautiful,I want to ask what I can do to my hair I did bad to my hair I bleach my hair and my hair now is like gum and I am loosing a lot of hair what can I do to have my hair strong again.
Candy Gutierrez: Looveee it I wish someone would be able to do my hear but all places I go to they don’t care bout wat I want or wat looks better on me all they have cared for is their $$$
Elena Ferrer: Super nice .. come to Miami and use me as a model .. grandma who wants to go lighter from dark brown to many tries!
Erika Rodriguez:
Irok:
Ernestina mendoza:
stacy jobe: When will we be able to get vegan haircolor? Haircolor and perms are tested tested on innocent animals. It's time to teach the truth about how our hair bleach and hair chemicals come to be. Animals suffered and still do for our beauty. I am a cosmetologist and I stopped doing perms and color and highlights until we can respect our industry with the truth and stop the suffering.
LaVerne Coleman: Nice
Cathy Schumaker: I don’t see the difference.
denise cappelletti: I have paid $100. or more for Hair color