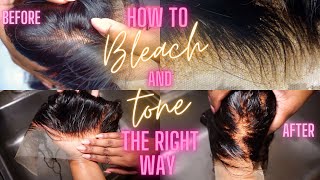
Bleach & Tone + Hand Tied Wefts | Trying A New Extension Method With My Client
- Posted on 19 February, 2020
- Fusion Hair Extensions
- By Anonymous
My client usually does really long extensions but today we are going a little more low maintenance. We are trimming the extensions quite a bit and trying a new method to see what she thinks about hand tied extensions.
Here’s a great application and my tips and tricks to bleach and tones to keep the hair nice and healthy.
To watch other videos on bleach and tones I’ll link the videos below
⬇️⬇️⬇️⬇️⬇️
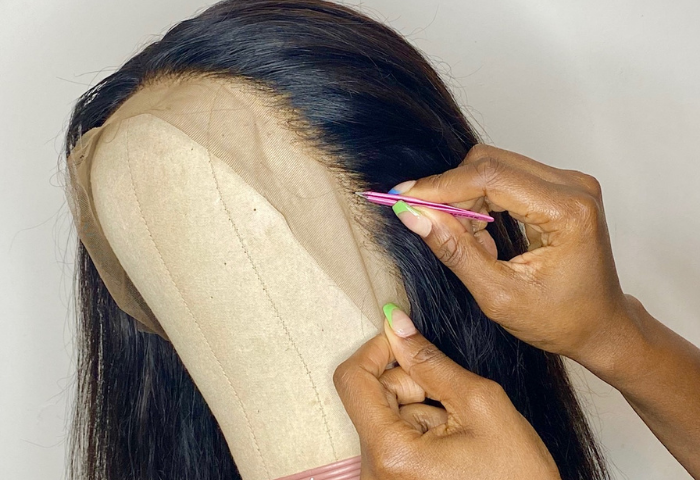
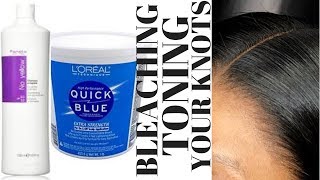
Hey everybody, I'm so excited to show you this service with this client that I'm doing she's one of my all-time favorite blondes she's, absolutely gorgeous check out these extensions that we're doing today. If you want to see how we created this look, then keep watching my client that I'm doing today usually has really long extensions that we do here's her hair that we've done in a previous video. I will link it in the description, but today we're trying something new okay, so I'm getting ready to do my bleach in tone. I just had my consultation with my client and, if you guys don't know, I know I've mentioned it before, but the light know that I always use is the Schwarzkopf blondie. So it's bonding for seen. So I also mix my olaplex in there and it really helps the hair from getting damaged it's my favorite. I never have breakage or anything. So this is the bleach that I always use. We'Ve already gone through and done her rough trim, and I honestly kind of wish that I would have left her lengths where it was at, because I thought we were gon na be taking her extensions up a little bit higher in the back area. She said she wanted to do like a long bob, this time versus having an extremely long extensions that we do in the past like 24 inches. So I wish I would have just left her hair the length that it was. I really thought that we were going to be taking the length up in the back to meet her natural hair, but we actually ended up, leaving it quite a bit longer. So I probably would have just left her length alone. If I would have known that ahead of time, because it probably would have blended and not have shown her natural weight line as much, it doesn't really. But I can like just a little teeny a little bit, see it every now and then and I feel like. If you can see a weight line through extensions, then I just I wish I would have just left the length alone anyways here we are getting into her bleach in town. I'Ve done other bleaching tone videos before in the past, but I think I'm going to link those in the description below so I will show you guys those if you want to watch them. I will say for her. As always. I always let people know her. Hair is naturally like level 8, so for her to be able to achieve this really icy blonde look is extremely easy. She hardly has any grow out like she doesn't have a heavy line, because her hair is naturally so light. I always just like people knowing that, because if somebody has darker hair, it's just harder for them to achieve this blonde and her hair stays pretty light. It doesn't get too brassy. So I just like people knowing that, ahead of time, that the service can be a little bit harder to accomplish on somebody with darker hair. That has a lot more warmer tones in the underlying pigment. Please be very cautious not to overlap and run the lightener through the ends. If you swipe it, if you see a little bit of warm areas, that's probably fine, but just be really cautious, especially in these front areas, not to overlap, because these little baby hairs can be pretty delicate. I prefer to use foil with my bleaching tones, because I want to make sure that the bleach stays nice and warm and insulated, and I want the hair to process. I feel like it. Just gets an even lift and I don't have to worry about going through and reapplying very much, because I know that it's not going to dry out. I prefer to start at the top of the head and work my way down. I feel like this way. I get better lift to make sure that it's processing along with the front section, because I want to make sure that we have a nice even lift. And I don't want to start at the bottom of the head and work. My way up and then worry about. The top section not being as light or taking longer or whatever, so I just prefer a plane this way, because that way, I feel, like I get a better brighter lift now that I've made my way down to the nape of the neck I'll let this process For probably, like 10-15 minutes, see how she's coming along double-check my work and everything she honestly doesn't have to sit that long, because her hair is naturally so light. So I'll check my work after this processes and then we'll start combing through the ends. Don'T forget once you've applied everywhere to go through the hair line and make sure that you get even saturation and make sure you have a really clean hair line, because you don't want there to be any spots from your partings. So after you apply make sure you go through the whole hairline and double-check your work to make sure you haven't left anything out now that she's been processing for a while. I go back through pull the foils out, make sure that she's lifted to a nice Hill yellow. I want to make sure that I swipe the lightener through the ends again, because it always amazes me how light the roots get and how, over time, the ends can get so brassy, because her hair was this light. Before and just after flat ironing heat on the hair, it just always warms up, no matter who you are so I always want to make sure that I go through and comb the lightener through the ends after it's weakened a little bit. So it's not damaging to the hair, and you can see here how it's already starting to brighten back up and then we just let it process for a little bit keep wetting the hair. So that way, it has even saturation - and this is just gon na help - rewrite her hair back up and break through the brassiness. This is usually the point where I start panicking because look at how bright she is at the root. Look at that heavy line of brassiness. I always start panicking thinking. Oh my god. What if I can't frighten her ends up? What? If her roots are super light and her ends are super warm and you can totally see that her colour doesn't blend she's, not super platinum, and it's not just her. I think this all the time with all of my bleaching tones. I start getting anxiety, but you know follow the steps make sure that you formulate correctly and honestly, it always turns out great. I probably only let this sit for about five minutes. To be honest, I really don't want it to sit and damage the hair and honestly it ends up punching through that brassiness pretty fast. Once I'm at the shampoo bowl, I just wet her hair, just a tiny little bit and then kind of massage the bleach through the ends just a little bit more to kind of relight in it. And you can see here that it's still super brassy. But after it sits for a few minutes like right here, I mean look at how much brighter that is. It really makes such a big difference. I always do treatments for my clients. This is the acidic milk rinse by bio lodge, and I honestly love this. This makes the hair feel so healthy. It just kind of brings the pH back. You know the balance back to the hair. After doing treatments like this, the hair just feels really really frazzled for a few days, but I swear get this use it on your clients. I do not charge extra for this. I just include it in the service, because healthy hair is just gon na give me better attention with my clients, I always use olaplex. I do not charge for this part of the service either. I see people charging sometimes 50 or $ 60 for like olaplex treatments and to me I just don't like doing that. I like including this in my service, because I feel like healthy hair shouldn't - be an option. So for me it just it makes sense just to include it, because that's just gon na give my clients more trust. In me, this is what I'm using to tone her here and you can see how much that kicks the breasts out. It'S toning down really nicely we're not going for a super ashy. Look we're trying to stay more of a brighter blonde, and here you can see that it actually toned down really really good, that heavy line of brassiness is gone, and so I'm really happy with the way that her toner turned out. Can I just give myself a high five look, how perfect those colors match together now we're going through and we're gon na section for her extensions. So I'm asking her to find her part. So that way, I can try to get up as close to our part as possible, but I want to make sure it's on the right side today. We'Re gon na do natural beaded wefts for her extensions. This is a different method than we've normally used and make sure when you do these, that you're doing your two finger sections above the ear, because, as these grow out in like six weeks, you don't want them hanging down and like hitting the ear so make sure. When you do your partings that you're going through and you're double checking to make sure that you are two finger lengths or two finger widths above the ear, I got really lucky form a training in natural beaded wefts, because my good friend Mary, she actually did training With platform, hair extensions and she wanted somebody to be able to do or her extensions, so she personally actually trained me, which was really nice. She gave me a kit and everything I mean. That'S super amazing and I'm so grateful for her. So we've been trying to switch my clients over from tapings to doing some rows of extensions, so this is the first time that my client is doing this method of hair extensions, and so I was excited to see how she likes these versus doing tapings right now. We'Re just doing our tracks and you can see that I'm using the blonde colored thread to match her hair and we're going through and we're using the beads. I believe they are silicon lined beam, so this is going to be a lot more healthy for the hair and less damaging. I know before I've used like eye tip extensions and some of those beads don't have silicon in them and that can really clamp and break the hair. So if you have the option for what beads you can get get beads lined with silicone, it's kind of like a little cushion for the hair okay, so here is her first road that we've done and I feel like I'm just gon na show you the process Along the way, I will say for sure that this is so much more work, so much more meticulous and so many more things to remember than just doing tape ins. So I honestly think that if you want to do these method of extensions, that you should definitely get trained, I know a lot of people that do I tip or tape, ins or whatever I feel like. They just kind of figure it out on their own and I definitely recommend finding somebody who you trust, somebody whose work you admire whatever and just invest in the method and learn it through somebody who you can certify you, because, honestly, this is my first time doing. It on a client - and it was kind of nerve-wracking, because I didn't have my friend right there with me like. Okay, don't forget to do this, don't forget to to do that and I was fine, but I just felt like oh my gosh. This is so much more to remember. On top of just you know, doing tape. Ins is like the easiest thing, so I definitely recommend either invest in a course or just really really practice before you take this to an actual, paying client. Now we're on to our second row: it's really time consuming and kind of just too repetitive to show you the whole process so we're on to our second row and honestly. This one goes by so much faster because it's just like half the shape and half the distance of the previous horseshoe shape. So this is all we're doing we're just doing two rows. I didn't feel like we needed to do a third row, but you can always do a third row if you feel like your clients, gon na, want it for extra thickness, but this is just our first time we're so we're just kind of feeling it out, seeing If next time we need to add more hair or more rows and when she comes back she'll give me her feedback and then we'll go from there. Okay. Last time, when I was doing my haircut, I totally adjusted the camera and got it in the wrong angle. So right here, I'm gon na show you how I was doing her haircut. This is different than what I would normally do if she was keeping her hair long. I would start in the back, but because we're kind of angling, her hair. I want to make sure I'm leaving the length and preserving it so I'm starting in the front at the longest point making sure that it's even and then I'm just gon na kind of angle it towards the back to see how much of an angle is she You don't want, and then, when I get the correct length and the angle right that she's wanting she doesn't want it too severe of an angle. Then I'm gon na meet it together in the back. Here'S the finished length we're definitely a lot shorter than we've normally done, but she just wanted to do something more low-maintenance. Do you want me to do any like facial tanning blending, or how do you feel about it? I can see her these ones, but it just looks like it's part of my veins yeah. It'S I'm just feel so late, hey, that's another thing, that's kind of different is that in those areas it does feel a little bit funkier, but it doesn't always every time. Do you want me to leave it straight, or do I mean put like all right? Here'S the finished product. I love the way this turn now. I'M gon na be so excited to hear how happy she was with this method of extensions. Thank you guys. So much for watching, if you have any questions, please leave it in this section below
![Blonde Bleach And Tone Gone Wrong [How To Fix Banding - Major Hair Transformation]](https://static.hairurl.com/p/2022/05-30/8ca28227c047e6adc6612fd62d4972eb.jpg)
Comments
Odalys Ruiz: Your work is impeccable! Great results as always.⭐⭐⭐⭐⭐
Shannon Duncan: You look beautiful! Her hair looks awesome
Dayanna Balderas: Could you do a tutorial on how to apply beaded weft extension please!
berivan bad: Are you mixing all the paints equally?
Stephanie Gossett: How many wefts did you put in the track? Just two? Looks great babe! I love the way you explain things. My adhd brain thanks you.
The Hemp Girl: what vol developer was used? :)
glitz n glam glass skin: Wish u were here in Florida I need a good blonde stylist for light hair with little dimensions to the root no brass