Crisace Ready2Go Cold Fusion Hair Extensions - Installation Guide
- Posted on 24 November, 2014
- Fusion Hair Extensions
- By Anonymous
Watch as Chris from Crisace guides you through installing ready2go cold fusion hair extensions. Cold fusions hair extensions have never been so easy.
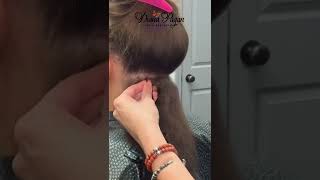
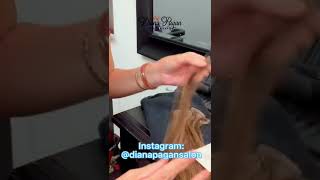
Hi Chris from Chris achi today we're doing something really exciting. With our cold fusion, our cold fusion is called ready to go now. Our model today has really nice shoulder length, hair, perfect model for this we're going to be doing volume, length and color. That means color with no chemical. The technique we're going to do today is going to be an ombre or balayage or, however, you guys like to call it what we're going to lighten it on Brant and lengthen it and have lots of volume to this look without doing any chemicals. So watch it's going to get exciting a lot of fun Thanks in our ready to go pack, it's 20 inches long, and this is a full head of hair. So what we're going to use on our models? Hair today is two of these. One is going to be in the brown and one is going to be in the blonde we chose now when you get it out of the pack. It looks just like this, and on the back of each tab is a little peel and stick now. This product is reusable when you're finished, wearing and anywhere from 6 to 8 to 10 weeks. The client can come back in get it removed, Reeth, app and reinstall, so she can keep the hair up to about a year which is going to give her a long time for her own hair to grow, and it's going to protect it at the same time. So watch this technique on ombre with no chemicals. This is our first section here and the first color we're going to put it is the blonde and that's going to be done underneath now. What I like to do is I like to take one and I always start from the center, so I can do one here, one here and one here, so I'm going to get the 3 out of this now, if you've ever watched us install these before I, Like to use a little weave, which is basically like a cable system, peel off the paper, lift the hair right up place it right underneath give it a quick top. Now you can see how much this is already lengthening. Our hair. Take the brown one. I'Ve already peeled it and you're going to place it right over top now, people always call us for color, and when you're doing this effect, you can see that her color is just a little darker and you want to create that gradual change from a darker brown To a lighter brown to a blond on the bottom, so again, let's put that away. I am do a little weave again place that right beside that one's a little chunky, so I'll pull that out, so it's lace or weave. Now I like the weave in the cable system over a slice I get to have a little bit more product touching product instead of the hair. In between now, it's really important that there's enough hair in between so there's enough hair that can hold on the extra weight and that's our first row. So we're back, we've taken our next section, I'm going to continue doing the light on the bottom, with the dark on top. So when you guys are ordering this, depending on, if you're doing a full pack on someone or a pack and a half try to order the equal amounts of both colors because sometimes in your design, you might want to add some blocks out or take it away. It'S good to have it a lot of people, don't order enough hair, we find and they get stuck through an install where the model you know was deceiving and she needed more. It'S like doing a color. You want to have more than one tube in the house when you're applying that color so saying when I do these full heads, I always try to have more now. You can see how fast this is filling up and how pretty it's. Looking already we're going to go in section another one and we're going to add another row so now we finish it up until the upset about my next section is going to be another half inch up, but this one's going to go on the top of the Year, right around the front, I'm going to incorporate the sides as I go along building it. So I don't have to section air after it's going to go, is one even flow around the head, so watch how this is done so now we finish that section just hit the sit bone, we've sectioned the sides all the way through now. What we want to do is stay away from that front line and just stay above the ear. Here'S, because we want to be able to pull our hair back and stuff within here and she's, going to do that now, she's getting really long here. So we're going to start by again from the center working our way all the way around this side and then working our way all the way around this side, we've sectioned it out. You can see, and that's how I like to bring in the sides on this that way, I really want to cover the area over the ear. This is such an important area when you're, adding long hair, so we've taken another section all the way around and we're going to continue going all the way around all the way around st. you can see how this is actually um brain all the way. Now it's fading out so beautifully. We got a beautiful fade in here. Looking spectacular, can't wait to get to the front so now we finish the final row, I'm going to comb her hair it down and you can see that fade is really really nice. Now what I like to do on the top row, what I want to do here is, I want to take a very small section and I'm just going to take the brown and just do one row of brown, so I'm gon na do it with just a Small little section here and that's going to blend it out. If you see and we're here we're not going to do the blonde we're just going to do the brown on brown. So you can see once we add this piece. It'S going to take that demarcation line away right away, just with one piece added: it's softened even more, so I'm just going to do one more on each side, and these are knowing when to go brown on brown and blonde on bronze. We went about 70 percent 80 percent, the blonde on the bottom, the brown on top to create the the double color look. You can see just with those two piece: it even makes it a little softer do one more over here now, just by adding that little bit of brown, it's softened to look already so now when you drop the top, it makes that demarcation line even softer, and That'S just doing the brown on brown on top, so what we're going to do for the front here is we want to bring a little bit a little brighter look into the front, so we have a little bit of hair left. I'M going to do one blonde! One back on back blonde to brighten up this area. Now I'm going to cut all this in so it works with our own layers in the front and when you pull this back, what I really want to do is do a little accent piece in here and how we do this is I take a little section Out of where I want it, nice and tight, I take a very small section and what I do is, as I take one of these and I fold it in half. So what you want to do is the folder you want on the outside, so you can take a small little slice and you're going to place half of it through I'm just going to leave a little bit out there, because it's a bit too much hair in There and then you're going to fold this over completely and that way she gets like a highlight detail right from the front, and we picked that up now she has enough hair there I hit it then, when I cut that in that's going to give her a Piece right from the front, you can see how nice that works out and that's a small little detail, I'm going to do the same on the other sides. If you didn't catch it here, we're going to do it on the other side, thanks for watching. I hope you learned a lot today. This is coloring and creating volume length and beautiful, beautiful crotchet check out. These highlights no chemicals, no, nothing watch some finish photos thanks. You

Comments
Robin Adkins: I absolutely love what you have done. Can you please do a video of how you cut these extensions ? Also, I have trouble with the tapes slipping on me because my hair texture is very slick. Have you ever found a client that can't use the tape in?
Melody Patterson: And since when are tape extensions known as cold fusion???
Jen A: Keratin Fusion is the way to go. I have thin hair that is oily. I've had them over a month and as long as I brush them twice a day and put it in a braid or pig tails at night to avoid tangles. Plus a silk or fake silk pillow cases are slippery so I sleep on those. It doesn't pull the hair while sleeping. They last 4 to 6 months if taken care of. It's the least detectable in my opinion. No sulfate in shampoo and alcohol free hair spray. Look up the application process and you'll see what I mean.
Rose Beauty: These aren't cold fusion hair extensions! They are "Tape ins".
Erin Clark: Her hair looks amazing. Can this be done on someone that has a longer pixie cut? I'd like to try this, but I'm afraid my hair may be too short. What is the average cost?
Frances Brewer: BEAUTIFUL! !
Denise Blalock: Beautiful
MamaKat: I hope she doesn't plan on wearing her hair up because when you place them all vertical, it makes pulling your hair up impossible, unless you don't mind lumps. And going above the parietal ridge (the bone where your head curves) with tape ins, ESPECIALLY a high contrast color, is a rookie thing to do. Your hair will part there and everybody can see the extensions. I like to use tape-ins in the back, putting them on a slight diagonal back on the sides, and then use small fusion strands in front of the ear, on the sides. I can also install fusion a bit higher than tape but going as far up as he does is kinda ridiculous He could have at least darkened the roots of the extensions that he put high and around the face.
Josette Desrosiers: good job!
Nadia Linn: How could you do a tutorial, without knowing the method you are demonstrating? I wanted to see cold fusion (strands of hair, attached with beads), not tape-on... WTF!
Palak Chopra: very nice good job
Ann Doe: how do you wash this type of hair
Alice Carolyn: Cold fusion? Lol you mean the tape method hahah
sarah shepard: how long does ypur hair need to be for these
Isma Carvantes: The assistant is judging that blend tho.
Magiamagiaao: Omg can feel his arrogance coming out his pores his energy bothers me... could watch the whole video... he is doing it all wrong .... these people think they know it all here is prove they don't know shit.
Life As lex: How many pieces did you use?
Christine Nicol: I feel like he was doing this in a hurry
MamaKat: Thats called tape-in AND 10 weeks to maintenance is way too long.
StylezBy ROBIN: these will slide out our hair lol
Jenny Bellandi: So did they go out of business???
Anna Mars: Uh those are tape-ins not cold fusion lol
missmalibumattel: Wrong extensions for the wrong hair type, wanna see that disaster after a wash
de fe: So wrong!!!! The frontal pieces are way to in front and she would not be able to put her hair back also it would be hard to hide I just dislike this video
Melody Patterson: That blond assistant looked pissy as hell!!
Jenny Bellandi: So crisace retired and told nobody...so now we scramble to find an alternative. The website just disappeared!
Avril Collins Martinez: Ridiculous....they aren’t cold fusion....terrible video!
Anisha Johnson: That looked terrible..