How To Install Itips Micro Links Extensions On Thin Fine Curly Natural Hair | Curlsqueen Hair
- Posted on 28 June, 2022
- Microlink Hair Extensions
- By Anonymous
▬▬▬▬▬▬▬▬▬▬▬▬▬▬▬▬▬▬▬▬▬▬▬
Use Code YTHE to save $$$ OFF
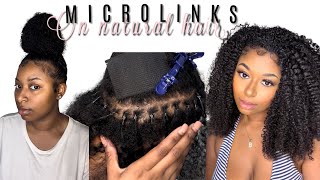
I am wearing 24 inches itip microlink extensions in water kinky curly comb texture from CURLSQUEEN .
Shop the same #waterkinkycurlycomb #itiphairextensions #microlinks for #naturalhair
https://www.curlsqueen.shop/e8e88b8F
√Natural Glam Set-200 Pcs-200Gram
√ 100% High Grade Brazilian Virgin Human Hair
√ True To Length
√ Suitable for 3b/3c Hair Texture
√ Thick & Full From Top To End
Connect with Curlsqueen :
Instagram: https://www.instagram.com/curlsqueenof...
Tiktok: https://www.tiktok.com/@curlsqueen.com...
▬▬▬▬▬▬▬▬▬▬▬▬▬▬▬▬▬▬▬▬▬▬▬
.
products used:
scalp oil: https://amzn.to/3B9LdbF
Shea butter cream: https://amzn.to/3G7Iym3
cantu curl activator: https://amzn.to/3vJa1rR
cantu silk serum: https://amzn.to/3vAMzgt
Micro links Pliers: https://amzn.to/3BWj6yM
.
Other videos:
YOU CAN’T TELL ITS FAKE HAIR. Versatile micro links on 4c hair, Looks so natural || Ywigs hair: https://youtu.be/5gn1R8GZvC4
YOU CAN’T TELL ITS FAKE HAIR. Versatile micro links on short curly hair, Looks natural || Ywigs hair: https://youtu.be/Lz_uyNqxb-0
Only 15mins, Amazon prime Lace front wig, NO BALD SCALP, NO BLEACHING, NO PLUCKING | Unice hair: https://youtu.be/NjRDHcIEpQg
Lazy Amazon prime Lace front wig for beginners, NO BALD SCALP, NO BLEACHING, NO PLUCKING |Unice hair : https://youtu.be/N408hA9Di8w
Only 5 mins, READY TO WEAR GLUELESS Lace Front 5x5 closure Wig, NO WORK NEEDED! |Julia hair : https://youtu.be/HyDjEmSX0-s
How to: INVISIBLE V PART WIG TECHNIQUE Looks natural from the scalp + FAKE SILK PRESS | Julia hair: https://youtu.be/A4Rr2V0zQps
How to: U-part wig crochet illusion, NO LEAVE OUT, Looks so natural | Ywigs: https://youtu.be/XLrWJrX4VLY
YOU WANT A PART OR FLIP OVER? U-PART WIG NO LEAVE OUT CROCHET ILLUSION | curls curls: https://youtu.be/wTwGw9q06j0
How to: Individual crochet illusion for short passion twist. Looks natural from the scalp: https://youtu.be/WRlKnGBuQmU
How to: individual crotchet illusion for BOX BRAIDS. Looks so natural + NEW BRAIDLESS METHOD| Gottin: https://youtu.be/KWLjYiAhemM
DETAILED PARTING TUTORIAL WHILE DOING BUTTERFLY BRAIDS AKA JUNGLE BRAIDS: https://youtu.be/iJX750B5Fmc
BRAIDS CLASS: Get Perfect box braids size, Parting size for spacing, and Fullness + Gripping roots: https://youtu.be/zlqOQcRA_Ok
Still cant grip twist to save your life? Try this! No rubber bands needed! | XTREND SPRING TWIST: https://youtu.be/opJxOo0aN8o
NEW STYLE! TWIST LOC TUTORIAL...MARLEY VERSION! If you love marley twist and faux locs, try this: https://youtu.be/FkW5RXuUUXw
HOW TO DO MULTIPLE PARTS IN FRONT FOR TWIST OR EVEN BOX BRAIDS + GETTING THE BRAIDS TO LAY FLAT!: https://youtu.be/pXiFDyCeY3c
TWIST CLASS: Multiple ways to start twist, twist from the root, Knotless twist + box braids twist: https://youtu.be/Q4Ut5qX9arY
NEW STYLE...MYSTIC BRAIDS TUTORIAL, different from passion braids, passion twist and butterfly locs: https://youtu.be/5cGnn5_Eqes
GAME CHANGER, this is how to refresh knotless box braids no re-braiding using crotchet needle WOW!: https://youtu.be/QQAcgcVNi58
DETAILED KNOTLESS PASSION BRAIDS TUTORIAL WITH BONUS BOHO TECHNIQUE | PASSION BRAIDS NOT TWIST: https://youtu.be/b88nsTehEmI
THE BEST BUTTERFLY LOCS TUTORIAL COMPILATION NEW TECHNIQUES FOR LONG & SHORT HAIR: https://youtu.be/RXLS0HBgwBc
THE REAL PASSION TWIST TUTORIAL..EXACTLY BOHO BABE TWIST and LOC TECHNIQUE: https://youtu.be/9wQCFOxXynk
BRAIDS CLASS: BOHO BOX BRAIDS TUTORIAL | PART 1- Hair details & Prepping: https://youtu.be/FZ9_cQ4WH8c
BRAIDS CLASS: Perfect your box braids, no lumps, no bumps + Dipping technique to remove stiffness: https://youtu.be/i2hAXJf2ASk
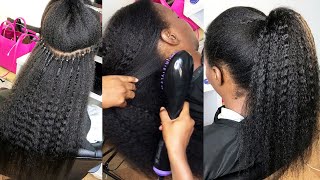
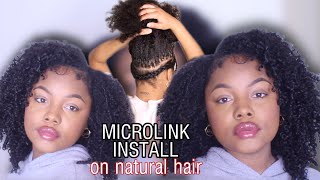
Hey guys welcome back today, i'm going to show you how to install eye tips, micro links on a thinner, curly, fine hair. So my models here is a little bit thin and fine and curly we're going to be using extensions from curls queen and i have their eye tips micro links here in this bag. I have two bundles of the extensions, so let me show you what they look like, so they give you pack in the packaging. They give you the hair, of course, from course queen to bundles, and they also give you gifts. So this is what the hair looks. Like it is their um water, curly, kinky, curly hair, and this is the texture. This is what it looks like. Okay, so i've done um micro links before um, but these ones are the eye tips one. So this is not the micro loop one, and this is that 24 inch water, kinky curly, and this is the gifts that they give you. They also give you tools, which i think is very important, so you don't have to buy the tools and it contains the beads and the needles, the crochet loop needle. They give you some combs and they give you some clips as well. So you pretty much. Have everything you need to install this micro lens extension and um yeah, so they give you the plier, of course, this pie, you could use to install and remove and they give you the crochet needle okay. So i'm gon na show you how to install them. So i am parting out the leave out area she's going to have a middle part, i'm just taking hair around the perimeter out as well, so her hair is really really thin. So i'm going to take a lot of hair out to make sure it's covered and um. Yes, that's what i'm doing so just watch and see how i install it i'll show you up close and very detailed, so the parts that you're doing have to be small enough for the beads to go through and the eye tips to go through as well. Okay, so don't make the parts too big, or else you're gon na struggle to put the eye tips through the bead and um leave some space from your scalp. Okay leave a little bit of space so that it's not uncomfortable all right. Now i'm going to switch pliers from the curved one to the other one, okay, because it's easier for me to clamp the beads with this one that i'm holding right now. You can use either of the pliers to install and remove it. It doesn't really matter, but because i'm recording this, this particular plier right here is easier for me to hold in the angle that i'm recording this. So all you need to do is just clamp. The bead um clamp it really well, so that it's nice and secure, but don't put too much pressure so that it's not too tight that you break off your hair. Okay, just clamp it and once once it feels nice and clamped and secured together, then you're good to go so for the parting, i'm really just parting in a small direction and i'm not leaving any hair out in between the install of the eye tips. Okay, the first time i did micro links - or, should i say, micro loops - i left some hair in between because the extension i used the first time was like a kinky straight texture, so the hair was already like already full so because this model right here, our Hair is curly and fine and thin, so i'm not leaving any hair in the middle, because i want her hair to be as full as possible because our hair is already thin. Okay, so i'm not leaving any hair in between i'm just going to install the eye tips until i get to the front. So what helps to make this process a little quicker is to like just pre-part it like you see how i'm parting it and like just putting some hair up some hair down like that. So i already pre-potted and then i'm also going to put the beads on on all the parts that i did before i come back to start putting the eye tips through the beads. This is just a quicker and faster way to organize it all right. So i ended up taking a few of the eye tips out in front because our hair was really thin in the front to take it out. It'S very easy. All you have to do is just clamp it like this until it becomes round again - and you just slide it out - it's very easy so and that's basically how to install them on thinner, curly, hair, make sure you check out curls, queen hair i'll leave the link To the hair in the description box, thank you for watching this video i'll, see you next time you

Comments
JeniWoo: Wow her hair looks so beautiful! Great job! Please post a maintenance video update with this style if you can, I can never understand how you take care of microlinks. Great vid!
CurlsQueenofficial: Thanks for showing us so professional content!Love it sooooo much !
j.ullyanna: Que perfeição
FixedFlame: Always A++ Work❤️❤️ Nice Job!
Cheryl: Is this the hair you asked me if I wanted to do? It came out really nice. You never let us down. Do they hurt laying on the hard plastic clamps?
J Nevé: I think less links and more leave out on top would help conceal the top more.
Uzet Anthony: Nice job as always
Lavender flowers: How long do these stay? Looks good
True Jamaican Experience: Hi hope all OK well with you ☺
Latoya Russell: cute!!!!
True Jamaican Experience: I'm still seeing that thing please