How To Make Halo Hair Extensions : No Glue, Tape, Clips, Or Links Easy Ameliakit
- Posted on 22 March, 2018
- Microlink Hair Extensions
- By Anonymous
EASY DIY and tutorial on how to wear halo or Invisible hair extensions! These flip into your hair, and are easy to install and take out within seconds.
Subscribe & Links:
INSTAGRA: https://www.instagram.com/ameliakit/
TUMBLR: http://theameliaway.tumblr.com/
BUSINESS EMAIL : [email protected]
AWESOME MUSIC BY :
Lotus Lane by The Loyalist - Preconceived Notions https://soundcloud.com/preconceived-n...
Creative Commons — Attribution 3.0 Unported— CC BY 3.0
http://creativecommons.org/licenses/b...
Music promoted by Audio Library https://youtu.be/1YVHRMVwwHg
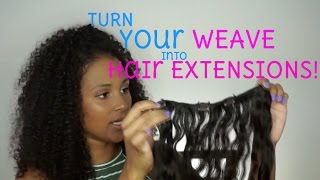
Hey and welcome back to my channel, my name is Amelia kit, and today I am wearing my invisible hair extensions or halo extensions. These are held up by an invisible wire and a micro link clip, and you cannot tell they blend seamlessly into my hair. You can't even tell that I'm wearing hair extensions to get these made is really expensive. So I'm going to show you guys how to DIY these there's no glue, clip-ins micro links. Your natural hair is not affected by these hair extensions and you kind of flip them into your actual hair, so it's being held up by the weight of my head. Basically, it's a really cool, DIY and plus, if you do like wearing hair extensions, you don't have to risk damaging your hair or the weight of it actually hurting and pulling out your hair, which is something that happened to me a lot. So let's go ahead and get into the DIY for this DIY you're going to need a ton of hair extensions. Burbly ones are combined on a single weft or have a lace, wafted band and then you're also going to be needing micro links. You only need two. I picked these up on Amazon and you can get them to match the shade of your hair extension and then you're also going to be needing this stretch cord. I got this from a Walmart. I like the thicker one, it's more comfortable, so get the point. Eight millimeter and yes, it is very stretchy, so in case something does happen, they are pulled it's flexible and stretchy. This was about three bucks. This is about eight and then two things you're going to need that hour around your home are some needlenose pliers. I know these are rusty. These look like they're from like a horror movie, but any type of needle nose, pliers and then also scissors to cut the so. The first thing you're going to do is measure out your cord. This is the link that I have it at right. Now, I'm going to go ahead. Take the cord again, you want it to be that thick stretch cord. So it's flexible measure out the length you need and then cut it off. Gon na be using micro links. Choose the color that fits your hair, I'm gon na be using blonde. My micro links are ready, so now let's go ahead and attach them. The trick to this is either have that lace weft, so you can actually take the link or take the string and loop. It through the hole just like what I'm doing right here, but mine actually come with these attached loops. You can actually sew these on so that you don't have to go through that, so I'm gon na put it through with it through the loop just like what I did and now I'm gon na need my micro link. So the trick to this is I'm gon na go through the other end here, put on my micro link and then I'm going to take this end and put it through I'm gon na pull it taut and then the last step to this oops. Now that I pulled it on it's, our last step is take the needle nose pliers. I lost my nose pliers, so I'm using these. Those are best, though we're gon na hold it down and it clamp it into place. So you can see it was one circular and now it's flattened and our stretch cord is being held in tightly. So we were to do that same thing. On the other side, take your micro bead, put it on the stretch, cord put the end of your string through the loop and then take that and put it back in. Ah, sorry put it back into your micro link and then pull it taut and then last but not least seal it clamp that shut and that's it. It'S really simple process. It'S very easy to do and you have your very own, invisible, hair extensions just like that. So this is what they look like. I do wear these usually just for videos, sometimes special occasions like anniversaries, but I do love these. They are kept in really nice condition because I'm not tangling the hair clipping it in and taking it out. It'S seamless checking it out as you're quick putting it in is very quick all the way you guys, so my hair is put up I've split half of my hair and put it in a little in the back and now we're going to flip them in. So this is my favorite part. I'M gon na make sure that my hair is tangle free, so I can get out easily. I'M gon na take my hairband and then I'm going to take the back of it like this flip it over my head, secure it into place, as you guys can see, secure it into place, and then my last step take out my little bun. I am wild mains hair right now, so our last step is going to be blending them and styling them. This part is pretty fun and easy, as you guys can see. This is the only part that is detectable and you can't really see the wire banding. That'S going to be securing it into place, so I don't like to use heat on my hair. There'S a great way of getting beautiful, wet set curls you could use the Conair curling rods or I can use the thicker Sally's one for thicker crows or could use this wet spray. Hair bottle smooth out your hair. If you want it to be straighter, but I'm going for that, curly look girl. So what I like to do, take pieces of hair and actually just braid them together, all right and now, let's undo them to have those little waves. And I hear it's a lot less time and hassle, then clip in hair extensions or any of the other ones that I've tried. I hope you guys liked this inexpensive DIY and I look forward to seeing you in my next video bye. You


Comments
Tina K: Great diy! Thanks for sharing! Love your videos
Rose: thank you so much , this was very helpful. Im sure making the hair was quick but not making a video so i appreciate the time put in!
Glitter_Angel Makeup: You can also sew the extensions onto a piece of elastic instead of the lace
Ingrid Stowers: Thank you!! This saves us all a lot of money,can't wait to make one,..,
The Vintage Vegan: Wow great idea! I need to do this with my extensions
Greens & Things: Amazing idea!! You are sooo Prettie & Clever
n: Brilliant! I did not think to use my micro links
Butterball Beee: Nice video! Super helpful
Destinyatk: Great video! Where did u get the one piece from? It looks so thick.
Marissa Morales: Omg I love your hair. Your so pretty !!
Lauren Haley: How many grams are both those pieces you used, and how long is the weft band?
Tarah Swinson: Did you glue the hair onto a piece of lace? What kind of glue? I have beaded extensions I want to put onto the lace.
Trish R: It’s taut, not taunt. Cool tutorial!
JB Gods Girl: Where did you get the lace part?
faith07: Where do you buy the lace?
Denae Krisman: Thought you were going to show how to sew the hair onto the fabric band from a one piece weft
gen murrai: How do you add the lace
sophia williams: Cool thank you
Anastasia Austen: microlinks!!! smart.
RASENGAN 31907: I love her
BlaXer: Sadly i cant use hair extentions
RosePepper777: Your title says “No...links”