How To: Blonde Curly Sew In | Curlsqueen | Sydnee Ciara
- Posted on 16 August, 2022
- Sew-In Hair Extensions
- By Anonymous
++ open me ++
Whats up guys ! Thanks for watching I hope this tutorial helped you to do your own BOMB sew-in! This hair is so pretty and even better in person . Let me know your thoughts on it . Comment below and dont for get to like and subscribe!
Hair Details:
▬▬▬▬▬▬▬▬▬▬▬▬▬▬▬▬▬▬▬▬▬▬▬
Use Code SCYT to save $$$ OFF
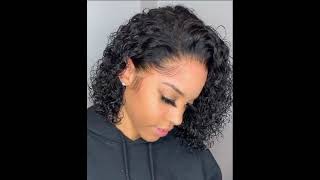
I am wearing 16 and 18 inches weave bundles in jerry curly texture from CURLSQUEEN
Shop the same #jerrycurly #bundles #weavebundles #extensions #leaveout #sewin for #naturalhair
https://www.curlsqueen.shop/0cd8Dc46
√ Luxurious Upgrade 150 Grams/5.3 ounces per bundle
√ Easy styling & Hold curls very well
√ Longevity: at least 1 year with proper care and maintenance
√ Hair can be colored and bleached
√ Double wefted hair extensions
√ Tangle free and minimal shedding with proper care
Connect with Curlsqueen :
Instagram: https://www.instagram.com/curlsqueeno...
Tiktok: https://www.tiktok.com/@curlsqueen.com...
▬▬▬▬▬▬▬▬▬▬▬▬▬▬▬▬▬▬▬▬▬▬▬
FOLLOW ME ON MY SOCIALS
I N S T A G R A M @sydneeciara https://instagram.com/sydneeciara/
T W I T T ER @imsydnee https://mobile.twitter.com/imsydnee
S N A P C H A T @sydnee_ciara
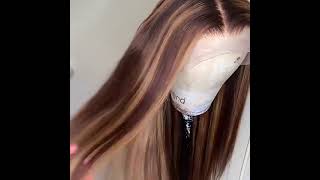
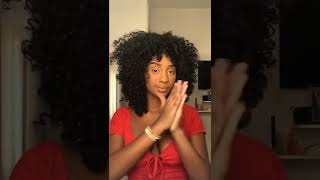
This is curls queen. I look like a lion. Welcome back guys. Today'S video is sponsored by curls queen, they sent me two lovely bundles of jericho, hair in the lens 16 and 18. in the package came their signature, curls paint brush and a silky bonnet okay. So i am not a professional, so this is very much trial and error, but i did my best to show you guys what i did for my first time bleaching this hair this light. So if you want a more focused video on bleaching comment below or if you have any tips just comment below as well, so basically i just followed the proportions on the back of the quick blue package. It will tell you how much developer you need to pour and mix with their um substance, but honestly, i will just keep pouring developer until i would get a consistency that i like so for me. I would pour until it gets thick, but not runny. If you, what i mean like um and once it's, that consistency i'll just start applying the bleach on the hair and i'll, do it front and back and i'll cover that with aluminum foil for 35 minutes. Now this that i'm showing you was my tester section. So i did apply the bleach closer to the roots, but for the serious sections make sure that you're leaving the roots left on bleach, so that it'll be easier to blend with your hair. So once that was done and i covered it for 35 minutes, i did rent it out and i washed it and stuff, and i decided i wanted it even more lighter, so i applied more bleaching off it for another 35 minutes, so yeah. So, like always we're starting on blow-dried hair, we're going to start sectioning our leave-out, which is the very first braid that you see so you're going to do the same on the other side of your head. I'M going to go ahead and section and leave out in the back, for when i pull my hair up and on the sides and, of course, that hair on the top of my head, i'm going to section that as well make sure you leave out enough hair. According to the thickness of your own hair, now you can skip the leave out in the back and on the sides. If you don't plan on pulling your hair up or if you just simply want less hair left out, you can do that as well. Now i want to leave out a section we're just going to go ahead and start braiding our hair down. I did a different braid pattern in my previous sewn video. I believe i think in my last video i attached some of the braids together, while braiding then having multiple single braids, like i did in this video. If you would like to check out the sew-in foundation that i did in that first video then i'll link it above um. It might be a little bit more beginner friendly, but it doesn't matter in the end which braid pattern. You follow whether you attach the braids together while you're braiding or you braid them singly, and you have multiple braids that you have to sew up it doesn't matter. I just thought i would try something different in this video because i thought it would give me flatter results, but i feel like it was just more work having to sew up each braid. So so, as you can see the first two braids that i braided down, i parted those sideways towards the top of my leave out and i had them going all the way back to the back of my head and the rest of the braids. I just had this going like straight back. I did the same on the other side. Um i feel like this is easy for when i'm sewing down my net, i have something a continuous braid to sew off of. If you get what i mean, i don't know um also, please ignore my dry scalp. It'S like tragic, oh my lord, so when it's time to sew the ends of your braids up, i'm just taking them and i'm placing them right in the middle of my part, and i'm just sewing them up, and i did this for each of the braids okay. So once we're done braiding and sewing everything up, we're going to go in with our net, so we're going to sew that in on top of our head. So basically a lot of you guys were asking me what the net does. So it provides a barrier between your hair and the weave, and it also helps the style last longer. Also, it allows you to sew more hair in areas where you might not have hair to braid for a bundle to be attached so yeah, that's basically what that does. So, i'm just pointing out where you are going to be sewing your neck onto your head. You'Re going to sew it onto that first anchor braid and make sure not to sew it onto your leave out braid and on the top of your head you're, going to try and get as close as you can to the top of your leave out. Okay. So now it's time for us to start sewing our bundles down. I'M going to start with my darkest bundle and i'm going to start sewing that down underneath the braids in the back of my head and then once i get to like a stopping point. I'M just going to take that bundle and i'm going to flip it over and continue sewing, so i'm not going to cut my bundle, i'm just going to flip it over okay. So i only went about halfway up my head with that dark bundle and then i stopped and then at that point then i just cut the remaining bundles off the remaining hair off um, and then i went in with my bleach bundles on the top of my Head - and i just did the same thing i placed it where i want it to be placed and then i started sewing it down and then i didn't cut it, but i flipped it over and then, when i get to the top of my head, i'm going To try to get as close as i can to my leave out at the top okay - and here is the finished product before i styled it. Um this hair is absolutely beautiful um. I just love the way this color turned out and the hair is still so soft and the curls are still intact. I'M actually very surprised to see how they held up after bleaching - and i say i'm surprised because usually whenever i bleach curly hair, the curls usually fall and they turn into a wave instead of a curl. But these girls - they just stayed beautiful and in order to blend my hair at the top you're going to see me just do a three strand twist and attach a roller to the end. It looks really natural minus my little hair right here. We can tuck that, though we can tuck her can tucker this hair. I'M just really surprised that this hair has held up after so many bleaches that i did on it like the curls are still there if you're not shopping, curls clean. What are you doing like? What are you doing? Girl, okay? So now i'm just going to show you guys the different hairstyles you can do. You can pull this hair up since we left hair out in the back and we can do a high puff with it see how pretty that looks. And, lastly, we can do a half a pass down. So basically, i just took a clamp and clamped my hair back and at the top, and i left the rest of the hair down so yeah. Thank you guys so much for watching my youtube, video and supporting me don't forget to like and subscribe and comment, and i will see you guys in the next video you

Comments
Sydnee Ciara: Hey guys thanks for watching. The footage of me applying the toner after bleaching got deleted :( so i couldn't add it . However, I mixed 2 parts 30 volume developer with 1 part toner and applied it to the hair for 30 min. I will do another bleaching hair video showing the steps better. ❤❤❤
CurlsQueenofficial: Thank you so much for the sharing!You always do a great job.
Whittney LaBrew: I love this !!! You did such a good job explaining things… let me run to there site RIGHT NOW !!!!!