Braided Weave Sew In Extensions Installation - Doctoredlocks.Com
- Posted on 09 January, 2014
- Sew-In Hair Extensions
- By Anonymous
Supply: doctoredlocks.com, Questions: [email protected] .
In need of maximum coverage, but afraid your weave will show? Worry no more. Learn tricks and tips in creating a braided weave that no one will detect.
Products used:
Wefted Hair
http://www.doctoredlocks.com/category/...
Thread
http://www.doctoredlocks.com/product/O...
Weaving Needle
http://www.doctoredlocks.com/product/W...
Black Elastic Rubber Bands
http://www.doctoredlocks.com/product/R...
For more tricks, tips and hot deals "Like" us on Facebook!
http://fb.com/DoctoredLocksInc
For hair extension packages and tutorials, visit our website!
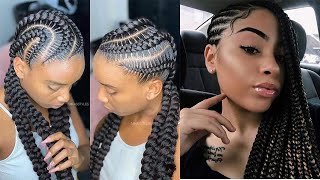
Braided weaves are a traditional method of applying hair extensions that covers all or most of the natural hair.. This allows for an easy transition between hairstyles or it allows you to give your natural hair a break for awhile.. With this method, we're going to be leaving the front out to allow for more versatile styling. And also to ease the transition between the front hairline and the rest of the weave.. You will need Your hair extensions. Thread., A weaving cap. Shears. And a weaving needle.. The first step is to take the ends of your cornrows and tack them down.. So you will have a nice and smooth molded scalp. To tack down the ends of our cornrows, we're simply going to fold the ends in on themselves. And place. The cornrow in the groove between two other braids., This will allow it to lay as flat as possible. Position your weaving needle through the braids. And stitch your braid tail in place. Sew any other braid tails in place and you're ready for the next step.. Now we are ready to apply our weave caps.. Weave caps are made out of a non-stretchy mesh material.. These help hold the entire style in place.. These are an optional step., But not really, if you want your weave to be very long lasting. To keep this hair manageable, I'm going to pull all the front hairline that we've left out for this style towards the front. To make this style as believable as possible. Not only did we leave the front hairline around the perimeter out, but we also left a bit of the hairline deeper in., Since we have some of the hairline cutting back in we'll need to put a notch into our weaving cap to help create that base.. Using a weaving cap is optional., But it will help hold everything into place. As you sew. Now we're ready to sew on our weaving cap into place.. Take a peek at where your cornrows are. Take your thread. Go into one of the cornrows and, through your weaving cap., Go back back through your thread to anchor it into place. Stitch as close to the front of the cornrow. As you can. Then move along to the next cornrow and do the same thing. Try to avoid pulling individual hairs with your thread. Doing so will cause scalp irritations. Continue stitching the weaving cap into your braided base until you have secured the entire perimeter. Now we're ready To sew on our first piece of weft., We've pre-cut a piece that reaches across the back to go in the lowest possible position., Since this weaving cap has a tag., I'm gon na cut that. So it's not in my way. We're positioning this as low as we possibly can. So that we can maintain the most believable coverage.. This completes our first row. We're gon na continue working in rows until we reach the crown.. So now we're starting to see our style emerge. By the time that you get to the crown. You'Ll need to start thinking about the direction that you want. Your finished style to flow in.. So, since we're leaving this front part out, most of the hair for this style will be directed towards the back.. So we're gon na continue working in rows, filling this up through the back. And then also filling in through the sides.. Once we get up to this part, her., We'll start putting in finished pieces that are smaller to direct it around the part.. For this last piece, we are going to go as close as we possibly can.. This may mean tacking into some of these finer hairs.. Just be really careful as you do that, because you don't to pull on any hairs too closely., So I'm gon na grab in the front. I'M gon na take a clump of hair. Anchor, my thread. And then I'm gon na come up. And attach my weaving hair.. Now, with that anchored in place., I'm just gon na continue stitching. In tiny, fine stitches just to anchor this last piece of weft in place., With your final piece in place, and nice and flat. Go ahead and clip away your threads. And now you're ready for your Final style., By leaving your perimeter hairlines free., Your braided weaves will have maximum coverage and flexible styling options.


Comments
Jessica: can you wash your hair with that weaving cap on?