Can'T Sew In Bundles? Try Microlinks Weft Extensions..No Sewing, No Braiding Required | Curls Q
- Posted on 22 September, 2022
- Sew-In Hair Extensions
- By Anonymous
MICROLINKS WEFT EXTENSIONS | MICRO BEADS WEFT EXTENSIONS | MICRO LINKS | MICRO LINKS CURLY HAIR
▬▬▬▬▬▬▬▬▬▬▬▬▬▬▬▬▬▬▬▬▬▬▬
Use Code YTHC to save $$$ OFF
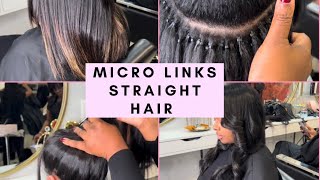
I am wearing 22 inches microlink beads weft in water jerry curly comb texture from CURLSQUEEN .
Shop the same #waterjerrycurlycomb #microlink #beadsweft #extensions #braidlesssewin for #naturalhair
https://www.curlsqueen.shop/B1c22a93
√Ultra Full Set-300 Pcs-300Grams
√ 100% High Grade Brazilian Virgin Human Hair
√ True To Length
√ Suitable for 3C/4A Hair Texture
√ Thick & Full From Top To End
Connect with Curlsqueen :
Instagram: https://www.instagram.com/curlsqueenof...
Tiktok: https://www.tiktok.com/@curlsqueen.com...
▬▬▬▬▬▬▬▬▬▬▬▬▬▬▬▬▬▬▬▬▬▬▬
.
Other videos:
Only 15mins, Amazon prime Lace front wig, NO BALD SCALP, NO BLEACHING, NO PLUCKING | Unice hair: https://youtu.be/NjRDHcIEpQg
YOU CAN’T TELL ITS FAKE HAIR. Versatile micro links on 4c hair, Looks so natural || Ywigs hair: https://youtu.be/5gn1R8GZvC4
Lazy Amazon prime Lace front wig for beginners, NO BALD SCALP, NO BLEACHING, NO PLUCKING |Unice hair : https://youtu.be/N408hA9Di8w
Only 5 mins, READY TO WEAR GLUELESS Lace Front 5x5 closure Wig, NO WORK NEEDED! |Julia hair : https://youtu.be/HyDjEmSX0-s
How to: INVISIBLE V PART WIG TECHNIQUE Looks natural from the scalp + FAKE SILK PRESS | Julia hair: https://youtu.be/A4Rr2V0zQps
How to: U-part wig crochet illusion, NO LEAVE OUT, Looks so natural | Ywigs: https://youtu.be/XLrWJrX4VLY
YOU WANT A PART OR FLIP OVER? U-PART WIG NO LEAVE OUT CROCHET ILLUSION | curls curls: https://youtu.be/wTwGw9q06j0
How to: Individual crochet illusion for short passion twist. Looks natural from the scalp: https://youtu.be/WRlKnGBuQmU
How to: individual crotchet illusion for BOX BRAIDS. Looks so natural + NEW BRAIDLESS METHOD| Gottin: https://youtu.be/KWLjYiAhemM
DETAILED PARTING TUTORIAL WHILE DOING BUTTERFLY BRAIDS AKA JUNGLE BRAIDS: https://youtu.be/iJX750B5Fmc
BRAIDS CLASS: Get Perfect box braids size, Parting size for spacing, and Fullness + Gripping roots: https://youtu.be/zlqOQcRA_Ok
Still cant grip twist to save your life? Try this! No rubber bands needed! | XTREND SPRING TWIST: https://youtu.be/opJxOo0aN8o
NEW STYLE! TWIST LOC TUTORIAL...MARLEY VERSION! If you love marley twist and faux locs, try this: https://youtu.be/FkW5RXuUUXw
HOW TO DO MULTIPLE PARTS IN FRONT FOR TWIST OR EVEN BOX BRAIDS + GETTING THE BRAIDS TO LAY FLAT!: https://youtu.be/pXiFDyCeY3c
TWIST CLASS: Multiple ways to start twist, twist from the root, Knotless twist + box braids twist: https://youtu.be/Q4Ut5qX9arY
NEW STYLE...MYSTIC BRAIDS TUTORIAL, different from passion braids, passion twist and butterfly locs: https://youtu.be/5cGnn5_Eqes
GAME CHANGER, this is how to refresh knotless box braids no re-braiding using crotchet needle WOW!: https://youtu.be/QQAcgcVNi58
DETAILED KNOTLESS PASSION BRAIDS TUTORIAL WITH BONUS BOHO TECHNIQUE | PASSION BRAIDS NOT TWIST: https://youtu.be/b88nsTehEmI
THE BEST BUTTERFLY LOCS TUTORIAL COMPILATION NEW TECHNIQUES FOR LONG & SHORT HAIR: https://youtu.be/RXLS0HBgwBc
BRAIDS CLASS: Perfect your box braids, no lumps, no bumps + Dipping technique to remove stiffness: https://youtu.be/i2hAXJf2ASk
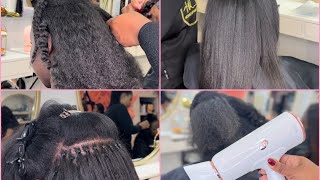
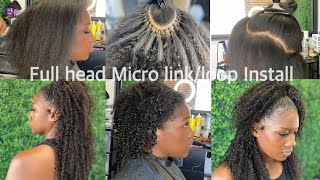
Hey guys, this is my model's natural hair. Her hair is short and curly, and we're going to be installing some micro beads weft on her hair to make it look longer. Micro beads wefts are a way to install bundles without sewing in the tracks, and that's what we're going to be doing today, foreign and we're going to be using some micro, beads weft extensions from curl spleen from curvesqueen.com, and I have three bundles of their micro beads. Weft extensions, the packaging comes with the tools that you're going to need to install the extensions they give you some beads and they give you some crochet needle and a plier which you're going to use to install this some clips and a brush and also a bonnet To keep your hair intact, so I'm going to um do some leave out around the perimeter and also in the middle, as you can see, and um yeah, I'm just going to show you how I install it. I'M going to show you two ways to install it. Actually so the first one you're going to see me flipping the weft kind of like upside down and then the second one we're going to install it the regular way you do a sewing, so just pay attention and see how I install it step by step. Thank you foreign. So before we actually proceed, um don't get confused by those white little things you see on the weft, it's just a little um Loop thing that is going to help us to install the her hair to pass her hair through the beads um easily. Without having to use the crochet needle, so thank you curls, Queen for being thoughtful about that, because it's going to make this whole process quicker and easier foreign, foreign, foreign, okay, just to explain what I'm doing right now in case, you are very new to this. So I'm basically um parting, her natural hair um, basically equal to where the loop is um. So if there's any hair that is in between the space in the tracks from one point of the beads to the other, then I just leave that hair out, because I'm trying to make sure the tracks are like as flat as possible and not bumpy. So I basically just passed her natural hair using the white Loop thing through the bead, and then I use the plier to press the bead down to make it nice and secure um when you're pressing the bead down, don't press it too close to her scalp leave A little bit of space so that way it doesn't cause any tension. It doesn't make her uncomfortable. So it's basically the same way as installing micro links um, but this one is basically installing the micro links way, but on a weft bundle. If that makes sense. Foreign foreign foreign, so now we're going to install the second way as you would place the tracks. If you were to do a sew-in, but you're still going to see me flipping it a little bit just to press down the beads, so um yeah just keep on watching foreign foreign. These microbeads weft is an alternative for people who don't like to so in bundles or don't know how to sew in bundles um. I know how to sew in tracks, so I actually prefer to do sew-ins, okay, but um. I always like to show you guys new things, because I know that one thing doesn't work for everybody and somebody may be out there who doesn't know how to sew bundles, and this may be helpful for you, um yeah, the only um downside. I would say to this with, if I were, to compare this and doing sew-ins is that your hair is not protected, so your hair is kind of left out and you have to use bundles that blend with your hair. So that way, you know it doesn't become too obvious. It has to blend your hair, basically foreign foreign foreign, so I'm going to use my Cantu curl activator mixes with some water in my spray bottle. I'M also going to add my Cantu um oil, oil, serum and some shea butter I'll leave all the products in the description, so just shake that up and I'm just gon na spray it over her hair. So maintenance will be easy for her because her hair is Curly and the extensions are curly so um it won't be a problem. It will only be a problem if your hair doesn't blend with the extensions okay, so just make sure that you get the texture that blends with your curls or your hair type: okay, um, but yeah. You basically would just treat it like your hair. That'S how I would say to maintain them and um for how long you could wear it. Um, I would say six to eight weeks is a good amount of time and then you should be ready to take them down, but yeah the hair is gorgeous, as you can see, while I'm brushing it and um yeah. So I will leave the link to this here in the description. If you want to try this curly hair and um, keep watching I'm going to show you guys how to take it down at the end of this video. So just keep on watching foreign foreign foreign Charlie, Charlie. Don'T talk to me all right so to take it down uh we're going to need the plier. I actually switched to my other plier. That looks like this. I'M about to show you that the teeth is kind of like a little bit different, but you could use the same one that came in the packaging, so you're just going to press the bead in the opposite way. As you can see it's flat. So we're going to try to make it look round, so you just press it until it becomes round when it's round it means it's open and then you just gradually gradually Slide the hair out and that's basically how to take it down. Don'T you do. Thank you.
Comments
Tamtha Clark: Yes, I have hair similar to your Moms and that would be a good option for me. The sew-ins are great but too much lost hair when taking them out. The tape ins are fine if you don't oil your hair in that area and have time to keep them up. I tried the micro method and enjoyed it, but it was tedious, yes, this looks like it might be the trick. So easy my husband could do it. Thank you for making this tutorial, you are appreciated. 
TeaWithGee: I would really love to try this on myself. Great job!
Aries Asata: No way. Tape ins are MUCH easier, last longer, and come out with almost no effort OR breakage. I've grown my hair 3 inches since I started wearing them (beginning of summer). So great job, it looks good! But it's a no for me.
CurlsQueenofficial: Thanks for the sharing!You always do a great job!
d g: U just changed my pro life in soooo many ways
Namithalie Mendes: Beautiful
Chinese by Tyler: Thanks
Mamafatou Diaw: Numéro
EVANS: No ma'am