Curly Microlinks | How To Install Microlinks | Curls Queen
- Posted on 20 September, 2022
- Sew-In Hair Extensions
- By Anonymous
▬▬▬▬▬▬▬▬▬▬▬▬▬▬▬▬▬▬▬▬▬▬▬
Use Code YTSD to save $$$ OFF
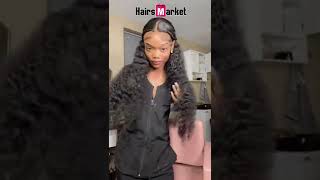
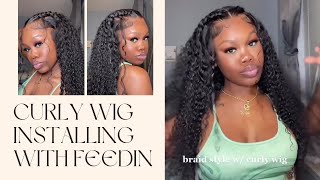
I am wearing 18 inches microlink beads weft in Water Loose Curly texture from CURLSQUEEN .
Shop the same #waterloosecurly #microlink #beadsweft #weft #extensions #braidlesssewin for #naturalhair
https://www.curlsqueen.shop/F39F71B8
√Ultra Full Set-300 Pcs-300Grams
√ 100% High Grade Brazilian Virgin Human Hair
√ True To Length
√ Suitable for 2C/3A Hair Texture
√ Thick & Full From Top To End
Connect with Curlsqueen :
Instagram: https://www.instagram.com/curlsqueenof...
Tiktok: https://www.tiktok.com/@curlsqueen.com...
▬▬▬▬▬▬▬▬▬▬▬▬▬▬▬▬▬▬▬▬▬▬▬
Thanks to all my subscribers , We’re over 500K subscribers, I truly appreciate you all
FAQ‼️
. I’m located in ATLANTA GEORGIA
. I film with my iPhone 11 Pro Max in 4K HD and edit with iMovie app
. My website - https://linktr.ee/slayedbyjordan
.22 years old (Aries ♈️)
Don’t forget to like, share , comment , subscribe, and turn on your notification bell . New videos every week ‼️
Instagram : https://www.instagram.com/slayedbyjord...
Twitter : https://mobile.twitter.com/legitpretty...
Facebook : Tyler Jordan
Email me [email protected] ( serious only )
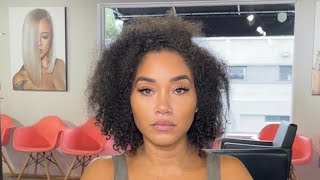
Today, we're going to be working with curls clean, so we have this pink little bag. That is great for storage, for all the tools and stuff that you need to apply your microwave. So, let's start first of all, it gave us three uh duck bill and I get Eclipse yeah. It was three of those in the navy blue color. They gave us a detangling brush. It also says the curls clean on it. We have a rat tail cone. We also have some hair grippers to help you keep the hair out the way and um that way you can have a nice neat install. We have some um silicone beads, they give you some extra beads we have. This is the information about your hair and everything. Um, what is this? This is a thank you card. First of all, this is a beautiful thank you card. I love this. I'M gon na put this hair brush into the thighs. I remember to tell y'all. We also got this. I don't know what to call this, but this is how you this is what you're doing micro Loops we're not doing micro Loops today but um. I don't know what this tool is called, so I'm not going to tell y'all, but it comes with it and then but this is what we are going to be using. So these are our pliers right here and then we have this crochet hook, and this is what we're going to slide. We'Re going to use this crochet hook to grab the hair and slide it in between the bead and we're going to use the pliers to close the bead down and lock them into place, um so yeah. These two things we will be using today. We won't be using that other tool right there we're going to use the disc, and I love that they they give you that in the box, so you don't have to go everywhere else and buy it. You get all your hair out of touching into the green stuff and they also gave us so gave us a bunny. They also gave us a bunny and I think the Spiderman is double-sided. It is, and it also comes with the drawstring, so it won't come off. Love that so now for our hair, we have the water loose curly, 18 inches and I think we have the Glam scent, which is a hundred and twenty pieces which is 300 grams. So basically it's like three bottles. So here are the three bundles, as you can see, they come with this stuff on it. This is just to keep the beads from like tangling with each other, but basically is bundles, but their beads along the track of the bundle and we're basically going to do. A micro link install like that. This is the water loose curly texture, yes, super style, super thick love that and we're actually going to do a curly install. I know a lot of people, they get curly hair, but they don't dry it out and pressed in, and you know styling, but we're gon na do a curling install with this hair and we're also going to color this hair. My model has red hair, so we're going to color this hair from a natural brown black to a bright red and we're going to do a curly micro link style using this water loose curling 18 inches Glam set 300 grams from curls Queen. So if you're exciting you're ready to get into it, I know you will love this video, let's get into it. Ah all right y'all to get this hair read today we're going to first bleach it we're using our bw2 powder and 50 volume developer. I made my consistency a little bit looser than normal. Just so it can spread on the curly hair, easier um when you make it the um, when you make it thicker it's harder to spread, and you know you tend to run into uneven and uneven bleach. So I like to make it a little bit looser a little watery that way it can evenly spread, and you know it just gives me an even bleach so right now, I'm just using my coloring brush, making sure I painted on those roots. You can get the bleach on the beads. It'S not going to do anything to them. Don'T worry about that. Unlike tapings with the micro links, you can color the entire thing without having to worry about running into any issues, so you still putting that bleach directly on that track, indirectly, on that bead, I'm doing that first with the brush, and once I have that fully coated, I'M just going to take my hands and just start slapping it along the length of the bundle foreign yeah. You make sure you're working that bleach through the brondo really good. You want to get an even bleach and you want to make sure that you don't have any black spots. I definitely use that paddle brush that I have over there laying to the left side to brush, through the bundle to just make sure that everything is evenly coated, and then I just set it to the side. I think I left that bleach on for about 20 minutes so that the hair red we're using our uh L'Oreal High color, red and um some 40 volume developer. This is the bundle after I bleached it and rinsed it out using Dawn dish detergent. I did it condition I just shampooed and left it, as is. I also made my red hair dye consistency, a little looser than normal as well just so it could evenly spread um on the bundle um and I didn't blow dry the bundle before putting this um high lift color on it. I literally just uh, towel dried it and then just started putting the color on I'm doing the same process. I did with the Bleach I'm making sure I apply with my color brush on the roots of the track. Um, like I said you can get it on the bead: it's not going to cause any issues and once I paint it on actually, I think I painted the entire bundle using the coloring brush. Um then again I might have not, who knows, but just make sure you get that color everywhere and make sure you're using your paddle brush to evenly distribute it. So you don't miss any spots um. I know a lot of you all may ask. Why didn't you just put the lawyer High color on from the jump? Well, unlike your natural hair, with bundles, just putting high lift color on the bundle from the jump is not going to get it to the uh shade of red or burgundy that you want, because it's it's processed Virgin Hair, it's not raw hair, so you need to First break down those buns first, so that's why I like to bleach the hair first, just to get any coating off of the hair, and then I like to go in with my actual color that way it can actually take the way I need it to um. If I was to just put this on the bundle like straight um out the box, it was just going to turn a dark burgundy color. It wasn't going to be red at all. So that's why I bleached the hair. First then put the color on it'll. Just give you a better uh color result, foreign, I believe after I applied this color, I let it sit for about three or four hours. I honestly forgot about it. Y'All I just had to do stuff around the house, and then I rinsed it out with my done dish detergent and conditioned it with my silicone mix, and this is the bundles. After being processed here's my baby Selena. This is her natural hair. She colors her hair red herself and this is her natural length her thickness. This is just fresh from a blow dryer, and this is the bundle you know we try to make sure that it's gon na match and um yeah. So for the placement of The Parting, it's the exact same as the tape ends. I do a part across um the head from ear to ear, so we're going to separate our two front sections and then we're going to start um sectioning out the nape to see how much coverage we need to make sure we're covering the tracks. The micro links. Um, like I told y'all in my taping videos, how much hair you leave out depends on how long your hair is, how thick it is, and you know all that good jazz, so everyone's head will be different for how much hair you leave out. Just lay your comb, let your red tail come with the part. If you can see the rat tail comb, you need to leave out more hair. If you can't see the rat tail comb, it's perfect you're ready to go. So that's what I'm doing now, just sectioning out all of her leave out foreign! So now we're about to drop down our first section and we're about to get this micro, Lincoln style started so on your crochet tool. You want to make sure that you open it before sticking it through the bead. It should be open before you stick it through the bead all right Seth. You have your crochet tool in your bead with the latch open you're, going to grab some hair close the latch, pull it through the bead and clamp the bead down with your pliers. I know that is a lot, so I'm going to show y'all again you're going to take your crochet two make sure the hook is open slide it through the bead grab, some hair close the latch, pull it through the bead and clamp the bead down with your Pliers now, if this is your first time trying it, this is going to be difficult, because it's so many steps of a child. It'S really simple! You just got ta think like just think for a second now. What I'm doing now is just measuring my track to see like where I need to cut it, and then I'm going to show you guys again take a crochet tool. Make sure it's open slide it through that bead then you're gon na grab some hair. I grab that hair. I close that latch pull it through the beads. Sometimes it messed up grab it again, close that latch pull it through the bead. Take your pliers and you're gon na clamp that bead down and make sure when you're clamping it down that the B is close to the scalp. So it's secure but don't make it so so tight on the scalp to where it hurts them. But it does need to be tight, so don't get me wrong, it does need to be tight, but it doesn't need to be in a excruciating pain, and that was our first track. So now we're going to drop down another section of hair and we're about to get to it again once again, once my crochet two is through that bead I'm going to grab some hair. If you mess up, it's okay just grab it, so you can get it again close that hook, pull it through that b and press down with your pliers and make sure um if you're, if your B isn't on the scalp, that you take your pliers and push It up to the scalp first then clamp it down, because you want to um Clump. The bead like on the scalp just make sure that you're always asking your client or whomever um. Is this comfortable? Is this okay um? Because you don't want them in pain? And you don't want to risk, you know pulling your hair out with these beads so make sure it's tight, but don't be like just you know, running it in the ground. Now like just going crazy. Thank you. I got my crochet two through my bead. The latch is open. I'M going to grab some hair close that latch. Sometimes it messes up and that's okay grab that hair again close that latch pull it through that bead. I'M going to take my pliers and slide my bead up to the root making sure it's like on the scalp and I'm going to press down and you're literally going to continue that process. All the way up, just like how you do the tape ends. It'S the same thing and look at how secure that microlink track. Is it's not going anywhere and that's exactly what we want so keep it going you all you got it! Thank you. I'Ve been watching. This is foreign and, if you're following my steps and placement correctly, when you pull the hair up, it should be flat. Seamless and you shouldn't see any micro links so right now, what I'm doing is I'm separating out the leave out for her half of half down. You know what the placement of my tapes of microwings - I do it, so you can do a half a half down full ponytail middle part, left side, part right side, part. So right now, I'm just separating her leave out to cover her hair when she does a half of half down, and once I separate that out the way we're going to finish closing up this back section. Thank you. My tool is inside the B with the latch open, I'm about to grab some hair close that latch pull it through. You see how I pull her hair strand through then I'm going to take my bead I'm going to take my pliers and grab it onto my bead slide it up to the root and press it down and boom. It'S secure and we're going to do that again and I'm gon na try to explain that better. So I put the two through the bead grab, some hair close the latch pull it through. Take my pliers Slide, the bead up and close it down. Foreign got this. Yes, I don't know much ready, I should have put you somewhere. Our back section is completely done. As you can see, it's super flat super seamless, you can pull it up, you don't see any microwings, no tracks or anything. This is exactly what we want. You have decided, I know, and right now we're on to the front we're separating out her leave out making sure that it's going to cover her micro links when she put it in a ponytail on the side and in the front. So you will see how I separate her leave out out because it's not in a straight part. It'S almost slanted um and, like I said, depending on the thickness of the hairline of um, whoever you're doing this install on it'll be different. How much leave out you leave out, it could be smaller. It could be bigger, just make sure that all the extensions are going to be covered, and I'm going to show you exactly how much I'm going to leave out. I'M using my rat tail cone trick to make sure that none of the hair will be showing. That is how much hair I'm leaving now, as you can see, that parting is almost like in a V, and you see that little small little slice, that's where we're going to start our first micro link on and we're only going to be securing two beads um On each one of these little sections um because, like I said on the front, you don't use a lot of micro links in the front secrets. So many beaches, don't I'm cheap. You got this. I know I know I know Face Time when it started they shop for the smoke and once I've added My Links, look at how this is looking, it's so seamless so flat. You don't see any of them at all. Now I'm going to park my side part and make sure I cover the tracks on the side, part on both sides and we're also going to point out our middle part leave out to make sure the tracks are covered when we do a middle part. So don't just cover Your Tracks for the side, part on one side, you have to cover it on both sides. You got to think about it that they're going to be tracks right below the middle part leave out, and you need to cover those as well. Once you flip it to the side, so you need to cover that as well. Foreign bitty section is what we are left with and we're only going to be able to put two rows of links on that itty, bitty, section and that'll be all the micro links from the for the front on that side. So in total I only put about six links in the front. The majority of the links are in the back. This is the same way with tape ends it's the same type of placement, just a different way of installing the hair, again foreign foreign, and now the entire micro links on that section in the front is done. As you can see super flat, she can do her middle part. She can also do her side part. It'S very versatile, like we just love it now before I do her finishing style and blend her hair. All together, I'm going to show you some styles that you can do with the hair. You can do a full ponytail, I'm going to show you that first then, I'm going to show you a half of half down and then I'm going to show you the different side parts and I'm going to show you the middle part. You have full versatility with these micro links from curls Queen reminder, foreign off camera and now we're about to cut this hair so that it can blend better with her natural hair. So her natural hair stops about an inch or two above where I'm cutting it um with curly hair when you're wearing it in this curly State um. From just my opinion, you don't want the length uh a lot longer than their natural hair, because with the curly tapings and the curly micro links, you can see exactly where their natural curly hair stops in the extension stops. So I try to cut it to a length, that's maybe a little bit longer or exactly where their natural hair is that way. It just looks so seamlessly and it doesn't look like she has extensions, because if I was to just leave their hair alone - and you know wet everything down, she has such a thick black cut. You will be able to tell exactly where her hair stopped at and where the extensions stopped it and that's not a cute look. So that's why I went ahead and cut this hair to a more favorable length so that it can all blend together, because when people see her out in public or they see her online, if you haven't watched my video, you would think that, oh, my God, her Real hair is beautiful because it's all her red hair, but that's just because I cut it to a length that looks natural and blends with her natural hair foreign looks natural and now we're about to start wearing this hair down. I only have water in my bottle and I'm just wearing the hair all the way down and I'm using my wide tooth comb to help me keep the hair detangle as I wearing it down and we're just gon na wet her whole head down. Yeah yeah yeah yeah yeah, yeah, yeah, yeah, yeah, yeah, yeah, yeah yeah again now. My model C does have a bit of color damage and heat damage just from like coloring, her hair on her own, and you know straightening on her own. So that's why we were scratching the curls up. We trying to get that we trying to get that hair to curl on up and I'm just taking my lotta body. Um foamy moves so we're just gon na put that all on the hair, I'm not the best at defining curly hair. I'M not gon na lie, but you know I can get the job done, but you know I'm not the curl defining connoisseur, but this is just I'm just showing y'all what I did to get her hair in the final look like how I saw it may not Be the best method for the finding curls or waves, but it got the job done and I'm just taking my paddle brush and I'm brushing it all the way through. You just want to make sure that you don't have any Tangles. As you can see, there are no micro links slipping. This really looks like her natural hair like, and I just love that for her this weekend. So, as you can see previously, I was scratching her hair up and now she's crunching, her hair out we're just trying to make sure we get those curls popping. You know her hair hasn't been worn. It'S curly state in, like probably over a year. She has just been straightening it and coloring it red, so it hasn't been used to being worn, curly lately, but we're getting it there and I'm just using my diffuser to help. You know dry, the hair. You know I don't want her walking outside looking like a wet dog, and this is her hair. After we finish the fused in there, as you can see, curves is getting popping and I'm gon na lay them edges down using. I got to be glued the black one. I just did some regular old swoops y'all um. She was there because she was like you look. He made my hair look like a frontal and I was like girl. I was just trying to swoop your edges, but she loved it though she loves her baby hairs, foreign and now her baby hairs are done. So let's do a quick recap. Like I don't know, I want to thank you for watching this video. Once again. This is waterloo's curly, hair from curls Queen make sure you check the description box below for more information on this hair. I have some more hair and lifestyle content dropping this week, so make sure you like share, comment and subscribe and, more importantly, turn on those notification Bells. I love you goodbye

Comments
D'sherice Mo: No one ever talks about how adorable Jordan is
LetsGetJazzy: i love how versatile your work and videos are!! i'm always waiting for an upload ❤️ this install looks so natural btw
SlayedBy Jordan: And i totally forgot , I only used two bundles for this install which is 200 grams !
Lena Monee: This cut and color gives such an inspiration. I absolutely love it!!
Tenae Laird: It’s the smile for me!!!! Love watching your videos & how positive you are ❤️
Fidēlis B: Thank you for never giving up on YT. We really love and enjoy your videos. Not many professionals share the tips and tricks, let alone the process in general! Thank you for continuing
Lollie Singleton: I love it!!! Totally Styled By Jordan. Fabulous work!!!
UnCut Diamond: Love the video! So in the case it may be too tight how do you remove it after the bead being clamped already?
CurlsQueenofficial: Thanks for your sharing! You did a great job!
Jessica O: Beautiful, as always! Could you please do an uninstall video? Uninstalling a wig, tape ins, or micro links? ❤
Kim Jackson-Willams: You did an amazing job she looks beautiful
Make It Fancy With Mrs.D: ❤❤❤❤you are so good at explaining how to do it
strawberryvines: Yay colored links & tape ins. yes please lighten the hair first for loreal unless you're going for darker color. You can even sit in a high volume developer for a long min instead of bleaching.
japan denise: can we get a video on the take down of this style? i want to try this on myself but i'm not sure i'd be able to take it out lol. you did an amazing job btw ❤️
SHANELL MCINNIS: Twist outs & wash & go’s are gonna be sooooo cute
Leida Pérez: Eres un genio yordan un beso para ti que eres el verdadero mago en esto de peinados te felicito mi amor besos ❣️
Nichele Washington: Ok artist!!! I love this video just as much as I love the tape ins.
Shabrina Bailey: damn!!! Im about to do this one right here I havent worn red since hell idk when lol!!
AkibaThaDiva: Everything on point!
MUSIC artist: TERRY B PRINCE OF JERSEY: I love you Channel and you explain it so simple to wear anyone can understand love your channel if you like
KM: Hey Jordan can you do a video on a short cut using a frontal or some type of short cut? I have learned a lot from you thanks
Natalie Jones: Did Jordan say his mom? She looks so young. I love the hair and how her brows are colored as well.
Kaneshia Hill: How did you apply the beads to the bundle
Soulful Renia: Yes ma’am I loveeeee! Jordan you are amazing!
Renee Mosley: GORGEOUS!!!
ilechukwu shadrack: I always wait for your videos mentor ❤
O kee: His smile and teeth makes me watch, oh and how you super slay hairrrr
katakuna ikari: I love the different content
LOOKS BY LO: Jordan what's the name of the crochet tool you used?
One More Hair: So fab work Jordan Love you ~~
Complicatedly Simple: Slay baby slay
Pretty LIFE PrettyWife: ❤❤❤❤❤ love this Jordan.
Lori Amison: Marvelous...
Carmen San Diego: One day I'm going to rd trip from Toronto right to you... no lie.. love you enenergy
Shirlvetta Brown:
Gabriela:
Alisha G: Yes jordan that was everything
DEBRA LIGER: Are you gonna show how to take it out too.
TheXxjackchopxX: So is this mostly for volume??
Rébecca Saint-Eloi: Waoooouuhh
Charisse Johnson: Jordan you are the KING of color.
sweetness Ford: She look like the lady from swv
Its Samiah: Hiiiiiiiii