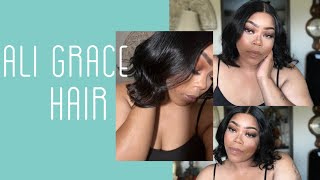
Game Changer!!! Faux Leave Out| No Closure, No Glue, No Leave Out - Ft Yummy Curly Wave. Full Sew In
- Posted on 12 June, 2022
- Sew-In Hair Extensions
- By Anonymous
Hey guys, welcome back!
If you've been thinking of taking a break from closures/frontals but still protecting your hair, check out this video where I create a natural looking closure which you can wear instead of leaving out your own hair.
Tutorial starts at 5mins
Checkout my unboxing and initial review of yummy hair curly wave featured in this video. https://www.youtube.com/watch?v=DmJjsa...
Hey guys welcome back to my channel and i hope, you're having a wonderful day. So if this is your first time clicking on my video watching any videos from my channel welcome you're very welcome to this family um remember to subscribe before you leave, so you can see more videos when i upload them and if you're coming back to watch more Videos, you know you're the real og, so thank you very much for coming back to watch more and more videos. I appreciate you guys um at the end of this video guys, please remember to like this video if it was helpful to you and share it. If you think you want people to hear what i have to say today, because i think it's important, i think we found something guys anywho so guys today. I wanted to talk about this hair. Well, not the hair in itself, but from the description and from the title of this video, i want to talk about how i was able to achieve this look in case. You haven't noticed guys this hair, even though it looks like this. I don't have and let me come a bit closer, so you can see this here guys. I do not have any leave out, i don't i don't have any leave out. I don't have any closures. It'S something i've been trying to find a solution to for my hair, i feel like i finally found the solution that works, and i'm really excited about that. I feel like um. This is the first time i'm doing it um, and i know that it can't even be done better and i feel like the more i do it then i'm probably gon na not need to wear closures anymore, or you know, do too much to make my hair Look natural, i created um a fake leave out, which is how i want to call it um using my real scalp. I created what seems to be a leave out and it's funny because because when i was making this hair, i had a video called my sister um to show them the party when i was done with it and she was like. Oh, do you still need to do? Are you going to do a leave out and i was like? Actually this is not my hair. It looks so real that they thought it was. They thought it was my hair when it wasn't um, and i was so happy with that. You know i feel, like everyone who has seen this hair has been like wait. Did you leave out your hair and i'm like? No, i didn't um. So, yes, i'm really really excited to share that with you guys, um. I think the bottom line is this um. If you don't want to wear any um any closures which i wear a lot of closures or frontals, whatever um. If you don't want to do that, there are a couple of options right number. One is that you leave out your hair, which i don't want to do, because i don't want to have to deal with my natural hair blending it into a weave or whatnot number. Two option is: they have like this invincible, part method, where i think they cut the the weft into small pieces and laid horizontally um. That'S i feel like is a lot of waste man on the on the on the weaves, and in addition to that i don't know, i haven't really tried it to be honest myself, but i just feel like it's a little too much for me um and then The third option - i i don't know if this was originated by um shill, but i know i watched it. She was one of the first people that i had seen. Try this style. It'S like the invincible, not crochet method, where you loop just one out of the two um hairs. I don't know that makes sense, but i'm going to put in a clip of you know someone doing that style. So you can see what i'm talking about. So that was going to be, like my last resort, if i, if i wasn't able to get um this style looking the way i wanted it to look which was natural um, there are other ways that people have done. I'Ve seen people like cut up the wefts and try to glue the individual um to glue the individual strands of hair on the head, which i thought was a little bit scary, because what happens when the glue gets weak and then it falls off anyways enough of The rambling, but long story short the couple of things out there that i just felt aren't um, either easy or are they aren't as seamless, and i was trying to find something that works better. So that brought me to this right and guys. I like to call i like to consider what i did on my hair kind of like an upgraded crochet method, because it follows the method of crochet just a little bit upgraded. So it looks more natural and that's what i'm gon na talk about in this video guys. So if you wanna, if you wan na, see how i achieve this look um a breakdown of the tutorial keep on watching. I must you know, excuse myself a little bit, though, because when i took this video, it was not very you know. It was in the middle of the night. There was a lot going on, so i'm gon na try to piece everything together and explain what i did. I could shoot another video um explaining in detail and trying to make that video a lot cleaner and nicer um before i upload it so guys. Let'S, let's get into this hair, then let's get into this hair to start off um for this um for this hair hairstyle, i'm gon na be using um, my yummy hair and i have posted a video previously um unboxing that hair. When he came, i'm just kind of talking about the hair, if you want to know more about this hair uh make sure you watch that video um, the other things you would need to achieve. This style, like i said, is an upgraded, crochet method. So, of course, you're gon na need um a crochet pin, you're gon na need uh a brush and you're gon na need a scissors um also, you are gon na need um, loose hair, so one option is to use the exact weave on that you're. Trying to do a sewing for and cut off some cut of the weft, so you can have loose hair. I don't want to cut off my yummy hair. I just didn't want to do that. So luckily i found i had another hair which i'm going to show you guys right now. I have this hair right here and this hair is like an old curly hair. I thought it was going to blend in nicely and it does. I think the only problem is that um, this hair is it's not as good quality to be honest as my yummy hair and it gets very freezy. So so i've been struggling a little bit. You know with the with the leave out, because that's what it is. Basically, i've been struggling a little bit with the leave out to keep it from from being too frizzy um. But if you use the same hair um as the weave when you're trying to use it should blend in better, it should be a bit more seamless. The first thing is getting the braid pattern together. Um, i wanted a c part, which is what i have here, and i you know, did the c part and what i needed to do was i um. Should i call them boundary um braids, on the side of the parts here and here, so i just braided it to go in line with the parting that i wanted um, it's important that you make those braids very, very thin as thin as possible, because the thinner It looks the better the the leave-out is going to look at the end of the day and then what happens is when you do thin braids like that, because they're so thin, it's possible that the pattern wants to get closed. It was important to make sure that i kept them open so that you know because they're so small, so they don't close together and you can't see the part so in order to keep them open. I um attached the rest of the braids to um to the boundary braids and i'll. Show you how i did it. I just literally passed the braiding hair through the boundary and then used that to braid it all back and once i did that you know i had to just braid the hair all back as usual, i did like an ankle braid to the side and then braided All back, nothing fancy nothing fancy at all, once you've had the cornrows done. The next step now is to focus on leave out. So the levers really is the important thing and they are basically three steps to get the sleeve out. Looking just the way mine looks or maybe better right, um. This process takes about maybe 30 minutes. If you um just concentrate and get it done, but i think the the result is totally worth it. The first thing is um you want to just you know, take the take the hair that you have for the leave out and cut off cut up the weft, so you have loose hair and then take the loose hair and start crocheting just on the braids, normal Crochet now you don't have to do an invincible part method, nothing just crochet, as you normally would, but just use very small pieces. Now, in my case, this hair is kind of fine, so i had to like tie the knot like twice so i feel like that. Even didn't help because you might have made it a little more bulky than it needed to be. So if your hair is a bit more has a more cluster texture. You probably just need to knot it once, but i knotted it twice because i didn't want to take any chances so yeah. I know that it won and twice, but i use very small, very small pieces just pick it like this. Just take a small piece and just crochet all all the way to the parting, all the way to the parting you're going to have it looking like a typical um crocheted hair, um, and then, when you're done, when the hair is full. That is where the second step comes in. I went underneath the braids with the crochet needle and i took each one. So i have each strand like this and i hope you can see it is so tiny. But i have a strand like this and then they were all crocheted on the hair um and i went underneath the braids and i picked out one strand and just pulled it through just to clarify guys. I don't mean actual hair strands. I kept saying hair strands. I mean kind of like the clump of hair um that you crochet, which is of course made of a couple of strands but um really thin clumps of hair, and i think what this does is because it's so tiny. So now you have all of these little strands of hair coming out from underneath from underneath of the hair, and i don't know if you can see you have individual little little strands of hair like coming from underneath the braids and then those strands at the hair That actually covers all of the imperfections going on so including the knots and the braids that you have underneath, but because you have so many little strands, it looks seamless. It looks like it's going out from your scalp and that's where i think the magic happens. Last but not least, step in this is after you have flipped all of the crochets to come from underneath the braids. Then you just need to use a blow dryer and redirect the hair, so it falls in the proper direction where it needs to go. I did that for this part of the hair. I did that for this part of the hair flipped it this way, and i was done again it should take you about 30 minutes in my case, took me a lot longer, because i was trying to figure things out. I was like okay. Does this work? Should i do this, should i do that? But ultimately the moment i came to the solution of oh just flip, the crochet. It just went very smoothly so again crochet the hair after crocheting, the hair flip, the crochet from underneath the braids, but take very, very, very tiny pieces, the smaller the pieces you take, but again when you're flipping, it is a bit easy. It'S not like you're, not like knotting anything, you don't have to knot it. You don't have to tie it so guys, that's it. The leave out was complete just by doing that, and then i could focus on sewing in the rest of the hair. I haven't really ever done a sewing for myself ever before, so this was really a lot of trial and error, but i just you know sewed it, as i thought was best if you're better at in your hair, probably do a better job than i did, but I sewed in my hair - it's not great, but you can see the you know. You can see what it looks like under there, but you know i'm sure it can be better, but for now it works um. I was really focused on the on the parting and i think it worked out. It worked out seamlessly um so guys. I think that's pretty much. I think that's pretty much it as far as like how i achieve this look again. I know my videos are not like you know. The the clips i showed might have not been like super clear. I hope they are because this is actually very easy process um. But if you want uh, you know something more detailed with better lighting and whatnot. Just let me know um and i could just i could i could do it again. I want to try i'm going to do this. I think more often on straight hair. This is curly hair. So that's fine, but i think it's going to work seamlessly on straight hair as well, because the idea is the same um you don't need to you know you don't need to tease the roots or anything. It just looks. It just looks natural so guys. I think that's pretty much it that's the end of this video. If you have any questions or comments, uh leave me a comment, so i can. I can address those and if you found this video useful or this video helpful, please like this video if you've not subscribed, please subscribe alright guys. Thank you very much, and i will see you in my next video bye, guys.


Comments
MsAlIisVanity: Genius! It looks seamless. Yes would you please do a tutorial in better lighting? I know there are different variations of this but this is a game changer and expands the options for sew ins. Many thanks!
Gracie Constantine: This is one of the most natural weave in I have seen . I was looking for a tutorial and this was extremely helpful.
Dalila Ray: I ❤️ the idea for this method! Can’t wait to try it!! If you do straight hair please do a video with that also! Your results are amazing!
VIRTUE: You did an amazing job and love the style of your video presentation!!!
The HairSmith: I would love another video with both straight and curlier hair. This is a game changer so I’d love to see a more detailed and up close version. But I will be trying this!
rgkmdk: Omg you just don't know how you have saved me! Perfect!! And exactly what I've been looking for. You Rock!!!!❤❤
Casie: Sis absolutely please recreate this video.. slower explanation of the steps This idea is absolutely phenomenal. I love innovation and I'm always looking for ways to avoid leave out (not going well.. I still use minimal leave out & flip over method).. I'm about to dye my hair & gonna try this Because it will help me avoid dying my leave out thanks in advance
Mei Randle: This looks amazing! Can you explain a little more about pulling the hair under the braid? Thank you!
Denise Hurt: Genius!! I agree. A v part would be faster and you can reuse your Yummie hair. I made a vpart wig out of the Burma texture that I had for over a year. I’m going to try this method. Thanks for sharing
VIRTUE: This is perfection, but how in the world is this style gonna come out of the head?!!
Fredah Wiwu: For a beginner you did an awesome job
Jaydia Elie: Looks so good. Please do another video. I really want to try it out
vava vogue: I’m going to try this! Wish me luck
Sharla Antonia: Very informative thank you for sharing
Jesscor Hill: I love it and can not wait to try it with it not being sure a good picture quality I think I still got the concept but would surely love to see you do another tutorial so mine can be just as proficient as your ❤❤❤❤
beenaturallyme boo: Please record something more detailed please where you shoe us step by step. This really looks natural. I love!!!
positivenyone: Thank you!
grAAny01: Im thinking of doing this around the perimeter so I can but the hair in a high ponytail . Do you think it will still work?
Ndianabasi Udonkang: Sending this to the wife. It is so seamless and real. Well done Kaka
themillenialPA: Can you wash this without messing up the part?
Nnaemeka Ezeanowi: Nice hair Kaks!
EVANS: We need a video with closeup of the action
Shenelle Roberts: Wowww ty for sharing
Nkel Morgan: Can this work with sewing on a u part wig?
Life With Lani: How was taking it down? Easy?
J T: put a patent on this NOW
Valencia: This video was mad confusing i have to watch it again. Plus you may need to shorten the amount of time you talk in the beginning before the tutorial