Natural Quick Weave Leave Out Tutorial - Unice Hair
- Posted on 11 June, 2018
- Sew-In Hair Extensions
- By Anonymous
Follow me:
INSTAGRAM➜ https://www.instagram.com/forevercryss...
SNAPCHAT➜ @crystianadenise
HAIR DETAILS:
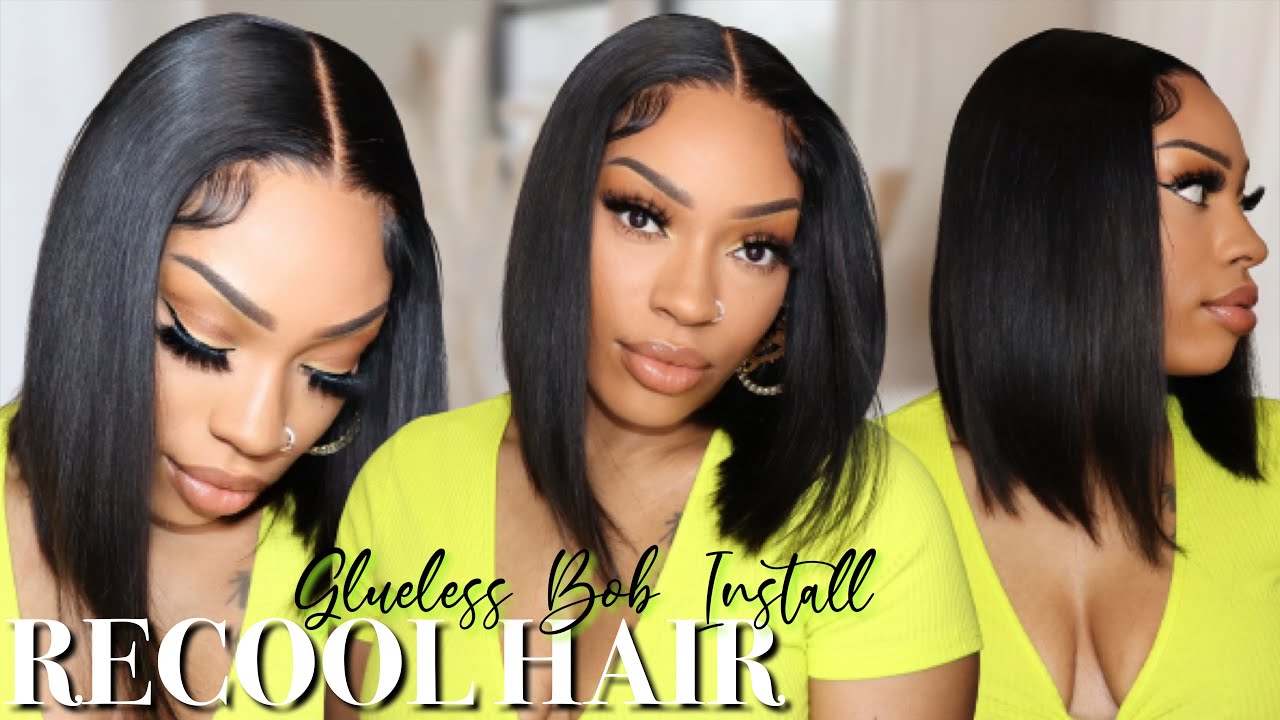
Brazilian body wave 3 bundles of 16 inch (ombre'd by me)
MID-YEAR PROMOTION
TEAIRA WALKER RECOMMEND
UP TO 36% OFF
LIMITED TIME:JUN.14th-20th
Full 39$ OFF 3$ Full 299$ OFF10$
Full 550$ OFF 50$ Full 999$ OFF 100$
HAIR DETAILS:
Brazilian body wave 3 bundles of 16 inch (ombre'd by me)
Same hair in the video: https://goo.gl/bRWhua
Bundles with closure deal: https://goo.gl/3BA4Ge
Aliexpress UNice hair official store: https://goo.gl/sdVTQP
SUBSCRIBE UNICE NOW➤ http://bit.ly/UNiceYT
FOLLOW UNice on INS: https://goo.gl/Ysmtp3
STYLING TOOLS:
Creme of Nature Argon Oil Hair Spray
FHI 2 inch flatiron
Creme of Nature Edge Control
Salon Pro 30 sec Hair Glue
1 wig cap
scissors
I MAKE CUSTOM WIGS. EMAIL ME FOR INQUIRES.
SHOP STOCK UNITS @ https://www.forevercryssy.com
BUSINESS INQUIRES: Email me -- [email protected]
Jumping straight into the video, as you can see, I am gon na be doing a middle, partly bout tutorial. I think you guys really like these. I have less than a half an inch of leave out on each side and then just a triangle, part of about an inch of a leave out, and then I have my hair braided into two pigtails. Just going straight to the back. Now I'm gon na be using a black wig cab, which was totally overpriced at my local beauty, supply store so yeah, but anyway you can usually get about a two way: caps in the packet of one, but I think, like a dollar, if I'm not mistaken, but In anyway, as they go ahead and take a white eyeliner pencil just to go ahead and really carve out my leave out area or the parting for my leave out, so that I remember and not to put any tracks there. So the hair that I'm using is by you nice, hair company. I did go ahead and do a quick little ombre. I will link that ombre video down below. If you guys need to know how to do that, then of course I'm using my 30 second salon probe glue just to go ahead and kind of get these tracks laid down baby. So, as you can see, I'm starting from a nape of my neck and I'm gon na lay that track right above where my ear is, I'm gon na start curving. These upward, I'm literally gon na. Do this all the way until I get to the top of my head, like I said before in my previous um, you know quickly. Videos I like to turn the tracks upward that way, all the hair literally is coming towards your face. So you don't have to worry about from your face too much and also is a good way to really hide the tracks amongst the ends of those, and so because I have very minimal leaf out when the wind blows. I want to make sure that this yeah I mean I'm not expose pretty much so the goal is to make this look like it's your own can't be naturally that so yeah as you can see. This is about how far up I got with just one bundle. So, to be honest, I could have got away with two bundles. I did get three bundles of their 16 inch body wave and, like I said I did a very light ombre on it literally just threw some bleach on it. The very ends of the hair and yeah - this was gon na be perfect, so this will be a good way to really show you how to blend your hair with colored weave. If you need to like I said, I just did the tip so that I'm able to really kind of blend the two, but as you can see, this is how far up I was with just those two bundles and the hair was really really soft to touch It took the color really easy, I think, on the leopard on, for maybe about 30 minutes, with a 30 volume developer, so not too bad and we're about halfway done. So, as you can see, I still just kept curving. Carbon goes upwards using y'all just had a whole little like nasty burp session, sorry anyway, so this is gon na, be the very last bundle. I think that they squeeze those two bundles and I sort of kind of totally just got away with, not including that at all to be honest but yeah. So once I got up to about the top of my hair, this is where I really wanted to be detailed and I'll. Show you guys what I was doing so, as you can see, I literally just cut out the length of the truck, but I need it put a little glue on it and I'm just slowly curving this even all the way up to the top. Now, there's many different methods that I'll typically do sometimes I'll curve all the tracks and instead of having one long track, go around my weave out. It ends up being a very small piece, depending on how I really want to stack that which I made to another tutorial, where I'll show you how to really build up, you know and stack the tracks on top of each other. It'S kind of like the invisible part method, but let me know if y'all want to see that I never actually thought to you know in fire. If that's something you guys might wan na see or not so alright. So now that I'm really really close to my parting area, I want to go ahead and take some scissors and literally cut the wig cap off. I get so many questions about. How is this doing on y'all, I'm using glue like bro? How else are we gon na stay on so as long as I'm gluing the wick up to my head, like that's, essentially what I'm doing? Don'T let anyone trick you and to thinking that, oh, if you use two caps you're somehow having less blowing your hair than three or two? However many caps you want to use ultimately there's going to be some type of glue residue on your hair. It'S about how you take it out, really being able to detangle your hair and really pull that out afterwards. So I do have a video on how to remove a quick weave, but for this one I actually will be showing you how to remove the glue out of your your hair as well. So definitely make sure that you are subscribed turn on those post notifications. Just so that you know exactly what to do and how to maintain the weave and then also how to take it out and get the freakin glue out of your head. So this can totally be a protective style. It does not have to be something that you're afraid of scared of doing or any like that. So, as you can see, I'm literally just you know had that last track go around my leave out area and I don't mind putting that like in my part at all, and so I just cut off the appropriate size for both sides of my I leave out Just to kind of really close the gap there and put it really really close so that when I press out my hair and flip it over everything is just kind of seamless. So it should be good there and, as you can see, I let that would get really really tacky and uh. I guess dry before I start to brush to do it, because I want the tracks to slip back out, but I didn't really get very much shedding or anything, although I did cut the tracks, but it wasn't anything crazy or unusual, but I am gon na go Through with a flat iron, just to kind of put some light waves and I'm gon na be using my two inch, FHI flat iron, just gon na really go through the hair and first straighten it out. So I really want to get this as straight as possible to be able to kind of trim the ends. I think that's really really important, it's not enough to put a weave in, but you should definitely be able to style it, and I understand that some of you guys are gon na be beginners, which is why I'm always really eager to show you how to trim Your hair at home and kind of get those layers and things going so yeah and the thing I only had the flat iron up so like I think I was like 3, maybe 350 or 375, I'm not sure, but I try not to put it to 400 Or 450 because it was unnecessary literally this hair straightened with ease. It was my hair that was worried about and, as you can see, the color it was really really seamless. I do have some like highlights and lowlights in certain areas, but, like I said before, in that ombre video, I showed you how to do that so definitely be on the lookout and check that video out. If you have not already and as you can see, I just pulled all the hair to the front and literally cut straight across just to make sure that everything is really even. I know that the hair is colored and it's not to say that the ends were bad necessarily, but if there weren't any uneven ends. Obviously, because I'm putting leave in there are now I'm gon na be exposed because the hair is color. So I just wanted to make sure that trim that out, as you can see just judging my leave out, I already can tell that. I'M definitely gon na want to put some layers in this just so that everything is kind of seamless and flows together, and it's not like a disconnect from my hair to the actual weave. If you don't feel comfortable doing this, definitely don't do but yeah I'll be showing you how to do it and then here's my Lido as you can see it's more than enough hair to cover the tracks. I couldn't even like part of this out flat, are in this little section and then apply to another track, just for even more seamless blending, which I did you in another leave out tutorial. I think previously it was a side part. So if you want to see that definitely check out the video on my channel, it was a side part tutorial show you how to you know, really blend that leave out. But for me I was okay, but just just a nice little quick pass through with a flat iron, because I didn't plan on leaving this in for great long. I think I'm actually gon na take it out, have it in now, but I'm actually gon na. Take it out in about two days, so you guys will see that and then, as you can see, I'm using my REC tail comb, just a really really really good. Just to really get that part straight. It really helps if you are not that great at parting. Definitely get you a little rock cell column and not either or it takes the ease off. The thing takes the ease off of things really know things of pain out of it, so you're able to just seem as we do, that with no problem. Alright and I wasn't worried about heat damage, I actually didn't put anything to protect my hair. You guys all know. I can't just do as I please with my natural hair. I feel like you should do the same. If you're a girl that wears your hair curly, then of course you're gon na be scared of heat damage. I totally get it, but me I'm always doing something to my hair and when I do wear it natural, I'm usually doing it twist out anyway. So yeah. I need a hair, not there. I'M kind of just like over the whole natural hair crave thing anyway. Now that I'm going back to a relaxer, but you get what I'm saying so as you can see, this should actually be really really easy for you guys. If you only leave a teeny tiny bit of leave out, you should not have to worry about straightening that every single day or anything like that, I literally planned on tying this down, like just a nice satin scarf around the edges, and that was pretty much it To lay it flat and as you can see that literally just blend it like a dream, because I've literally curved all the tracks upward, which makes things so much easier as you can see y'all, I literally don't have any. We bought like barely anything, but I wanted to like pull this back. I definitely could it would not be like a problem or anything, and so, as you can see here, I'm just making sure that everything is fully blended and covered all the tracks are covered. So I'm gon na go ahead and take my cream of nature, argan oil edge control just to kind of go around my edges to really come and sleek those back now. I love products like this because they are a little bit greasy. So if you have natural, hair or hair that you're afraid that's going to revert back, you can always use this as a way to actually hold on to that straight texture a little bit longer because it provides a little weight to the hair. So I actually rub that over my hands a little bit and then literally rub it onto the hair. Not the we've put my actual hair just so that it blends even more seamless and what you'll notice is, as the days go on. It'Ll literally start to melt into the weave because of course it's starting to get way down with that oil and it just it works. It literally works like a dream, but, as you can see, everything is covered, blended, seamlessly. You don't have anything showing no tracks or anything like that. Now I always notice the texture difference in my weaves. Just because I know my hair is a lot more coarse, but if it doesn't bother you then don't worry about adding those additional tracks in, as you can see, I'm just doing some very light layers following the guide of my hair. Now, if your hair is really short, obviously you don't have to do anything like this, but I always recommend it Lee's trying to layer up it here, just to give it a little bit more movement and body unless you plan on wearing it like just soaking straight. I suppose it's up to you, but uh yeah, definitely just add a little bit of layers here with some more regular shears. I actually got these from the beauty supply store, also and yeah they're kind of crappy, so I only use them for my weaves, as you can see, I'm just throwing in a diagonal motion from where my hair is some choppy layers. To be honest, they weren't super perfect at all. I only added some layers because I knew I was going to be curling this, so here's that I'll be using like I said that FHI flat iron just to really add some shape to the hair. Nothing too precise, because I don't want to go over my natural hair too many times with a flatiron, so just a little bit of curves a little curves a little curl, and you guys always act like how long do these last quick leaves usually less well. They can last up to a month. I would say, because you want to be able to really wash your hair now. You can definitely wash your hair with a quick leave. You'Re just gon na want to make sure that you do that with cold water, so cold. As you can stand it that way, the glue doesn't heat up and start to move the tracks around, but other than that you'll definitely be fine if you're scared of the glue or have thicker, hair and think it'll be harder to kind of maneuver. Definitely make sure you use about two different caps just so it's a little bit of added protection, but ultimately you're still gon na have a little glue issue there. So it's up to you, you don't feel comfortable, definitely go to a professional to install it and also get it taken out. But, as you can see, I thought this was really really cute. Definitely a nice length that 16 inch probably got cut up to about a 14 inch, and I just thought it looks really cute flawless and professional. If you guys are not the type that you know, you want hair all the way down to your butt. I totally get it, but natural weaves are still in so don't feel like they're nice when they look good. They look really good. I'M just not selling girls, though just as I change my hair too much but really cute, and I literally just kind of plate with it brush it through a little bit and, like I said when it was time to like wrap this up. I literally just put a silk scarf on and kind of wet, so I really love that color at the bottom. It'S just now adds a nice little touch if you guys have not seen already y'all know that I was gon na. Add on that theme of nature, that is literally, like my favorite, a lot of products cream of nature, all of them, so I add a little bit of Sheen - don't want to weigh the hair down too too much, but definitely just a little bit of huh to It and we are all set babe, so I definitely hope that you enjoyed this video. I feel like it was fairly short. I don't think took me about an hour to do the entire look love you guys so much as you guys can see. This is like so flawless, so definitely send me pictures if you guys try it make sure that you follow me on instagram at forever kissy and subscribe, make sure you turn on those post notifications so that you know when I'm coasting babes. But I love you so much thanks so much you nice per centimeter hair and I will see you next time - stay pretty and back


Comments
Nicole's Yummy Kitchen: Nice! Easy and simple as is should be ❤
Latricia Black: all I have to say is ... DAMN GIRL. you slayed this one ❗️❤️ I’m going to try a middle part now!
Rochelle Bullock: This look so natural. I'm trying it this weekend!
Mandy Bond: I watched this 3 times then attempted it for the first time and LOVE it!!!!! I did a side part though. I'm a lil nervous about how long it will last and how the take down will go with the glue on my hair but the install was simple and looks fab!!! Thanks!
Dairea T: Been waiting for another tutorial on this! ❤️
Rica Y.C.: Looks very natural. Nice job!
Mz.Trinigal Knight: Lovvvve this style !! That ombré is !! You did an amazing job !!
Tamarra CS: New subbie! This style was really really nice! I’m about to go back to my quickweaves
• Iamsheysaint •: Yes yes yes for this quick weave. New subbie here.! Job well well done
Dayleesha J: Yassss i Love this! Im going to a wedding at the end of the month im def gonna have to try this thank you queen!
Tiffany Fisher: So pretty!!! Love the color ✨✨✨✨
Teonsay: yaassss back at it again with the hair tutorialssz. ❤ this came out soo cute
Cybile Bénédict: Should i sew the wig cap on the braids to be sure it holds or its not necessary? Thank you :)
CHARR KR: Love your creativity !
Rhonda Denise: The new intro is adorable lolol quick weaves are your specialty loved the video
Stacey Styles40: Very pretty sis, thanks for sharing..♥️♥️
Alicia Baker: Love it
Alecia Boyd: I love this ❤️‼️
Vanity Chardae: Is there a way to remove the cap with the hair still intact?
Miyaaahh ._: How long do these usually last for you or even in general
Lina Balanta: Amazing !
Queena Barnes: I love this
Nicole Garv: Your makeup looks great as well.
july chavez: do you throw the hair away when you take it out? or is it like a wig after?
Beauty_Queen: Do you have to see the cap to hair so it doesn’t move?
Ariel Valentine: Nice tutorials I like watching your hair videos I new to weaves can you do a video on take care of LEAVE out ? For sew in and quick weaves
Penelope: Love it..like the highlights
Jowmi: Me encantaron como te quedaron pero mí pregunta es como te las quitas despues sin que tu pelo se te maltrate. Gracias y perdona no sé ingles.
morame lercier: Luv the vid❤️ but is the hairstyle secure and how long does it last
Kaneesha Lyles: Where did you get your flatiron? It made your hair look flawless
Vee Luv: You did dat Beautiful Thank-you
0rignallity: can you do a quick weave flip over wig tutorial? i know you've the flipover method by sewing the hair but can you do a quickweave version please
Shadena Lutin: Beautiful
Rose Nyabindi: How long does it last
Taniya Lester: I love you ❤️AMAZING JOB ... YOU ARE SO TALENTED!!!!!
Dottie Dzigns: How do you keep your leave out from linking up...
Ra-shae: Favorite one ♥️
Asia Lindsey: i love your video so much
nadia albert: Blessed hands
Kierra: Last time I did this without a cap, it pulled my skin off my head.
Vanessa C: Can you please show us how did you taken care of your natural hair underneath and weekly hair quickweave routine???I'm eager to learns...Thank you
flwrpwr: Can you reuse this?
Jazz The Pretty One:
Mercedes Turner:
Dana Lynnette: Okay, but can we talk about this makeup though!
Asia Mae: Ayyyye Noti Squad. Love watching your hair videos. Gang Gang
Linda Coleson: You be doing your hair nice
Anggeliqi Rodriguez: Love your videos!!! But less talking. Don’t mean to be rude
Ms Jackson:
Miss Empress: Cute
modelericanicole:
Teee Chincx: When you live in Arizona a.k.a. the desert and cannot do shit like thislove thiss tho!!
Alex Jade: The cap didnt slide off??
NeekTheSupreme: You look GOODT
Monique Mzmo dudek: Why not just use protection like the liquid that come out with warm water duh!
lovely ladyt: What's the name of the hair clips
fantasia conner: “As you can see”
That’s Her Clothing: Naw bro glue won’t get on your hair if you put paper under it
Mom: I'm about to start this now but does it matter the color of the wig cap
mikiscreations: You didn't use a anything to protect your hair from the glue how do you take it out when your done wearing the style
Gee R: The make up.... Ohhh
Monique Mzmo dudek: Oh hell no they have stuff for that now. Girl please bye
Tina Bobby: Damn how many times you gonna at literally
Jess: lol at your intro
Super Glossy: 7th comment
Asia Lindsey: first one