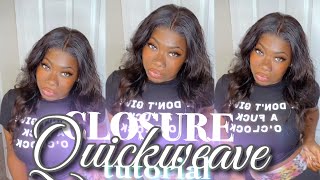
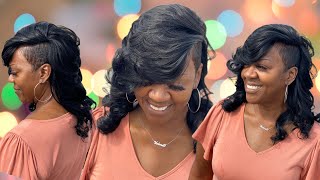
How To: Rubber Band Half Up Half Down Quick Weave No Leave Out | Ft Ac Collection
- Posted on 27 April, 2022
- Sew-In Hair Extensions
- By Anonymous
Hey y’all! I hope everyone enjoyed this rubber band style quick weave tutorial..Turn on your post notifications, like, comment & subscribe.
HAIR website: https://shopwithac.com/
Ac Instagram: @ac_collectionllc
Follow me on my socials
* Instagram: https://instagram.com/me_heavenli?utm_...
* TikTok: https://vm.tiktok.com/TTPdMgf2s9/
* Twitter: https://twitter.com/me_heavenli?s=21
Email: [email protected]
*Intro beat by Mindz*
Shop my Amazon favorites!
http://www.amazon.com/shop/influencer-...
Don'T forget: hey, it's me heavenly back again with another video, if you're new here you're going to love it and if you're returning what's up so as you can see by the title, this is another her tutorial, a quick weave, half up half down rubber band style Design, whatever you want to call it, okay get into it no level. This is my first time doing this style and so far so good. I really like it. I use three bundles. This her is from ac her collection. Thank you for sending me these bundles honey. I love them. Okay, they long too yeah. So if you would like to see how i achieved this hairstyle keep on watching y'all, let's get started on this quick weave, so i got the front tie up, so i did about six large braids in the back. They not perfect, but it don't matter before putting my cap on, i like to oil, my scalp. After doing that, i like to massage it in so that i can get ready to put the cap on then i take my got to be spray and start spraying. The back half of my hair, you want to make sure that you're only spraying the braids, because this spray is what's going to hold the cap down. I like to spray and dry the back of my hair in sections so that i can get everything coated with the got2b spray. You want to make sure that the cap is dry and hard before you get started gluing the tractor. I grabbed the longest track, which is a 28 inch, as you can see, i'm cutting off the plastic pieces and taking the bundle apart. So when doing a no leave out quick weave, you want to put the track in a u-shape instead of laying the track straight across doing this, u-shaped method makes it easier to hide the tracks. I really don't know how else to explain it. Y'All just going to watch, you see, you always want to measure the tracks on your hair first before cutting and gluing it down permanently, i'm always having trouble with my glue bottle so don't mind me using the end of a comb to apply the glue. So, as you can see, i'm placing the track in the back of my head in that: u shape and you're going to repeat this process until you get to the top of your head. I almost forgot i like to use my blow dryer to dry each piece, because i need these tracks to stick moving on to my second bundle, i believe that this bundle is a 26 inch, but i'm not 100 sure moving on to my third track, as you Can see, i don't have much left so yeah, so i had these two leftover scraps from the first two bundles and i wanted to use that to complete the back. I braided the back of the hair in a braid to keep it out of my way so that i can get started on the top for the top. I will be using shine and jam and edge booster. I also use a red tail comb and an edge to brush, and you will also need rubber bands. Of course, my step mom did the parting off camera because i don't know how to prime my own hair right now, i'm going to explain what i did but later on in the video. You will see exactly what i'm doing once i get over to the side. That'S closer to the camera, so i part out the section added the edge control in the gym. I brushed that all in with the edge toothbrush, as you can see right here, i twisted the piece of hair so that it can get really really close to my scalp and then i put the rubber band on since i knew that these little sections were going Into a ponytail at the top of my head, i made sure to put the rubber band in a placement going towards the direction of the ponytail now moving on to the other side, here is a better angle where y'all might can see what i was doing. A little bit better than before twisting it was very helpful because it stayed put and it was stuck which kept it tight and in place making it easier to put the rubber band on. I then went back in with my edge booster to grease up the hanging pieces. I did this so it'll be much easier and it'll look cleaner. When i put all the pieces up in a ponytail, as you can see, i'm twisting the pieces so that i can put them all in a ponytail after connecting all the pieces. This is what it looks like now. Moving on to the ponytail, i start off by braiding my hair, like normal, i accidentally braided in some of the weave, so i had to cut that off. But once i do that, i like to fold my braid in half, because it is kind of skinny. I want to do that to make it a little thicker i use black neck strips to protect my braid so that i won't get any glue in my hair. So i grab my glue. I put glue at the end of the next strip and i'm going to wrap the next strip around the braid. I made sure to pull the next strip tight around my hair and added more glue to wrap the rest of the strip around. I folded it in half and continued the process. This is still the third track that i was using before and just how i wrapped the neck strip. On my braid. I do the exact same thing using the track, so i added glue to the end of the track and i'm going to wrap it around. The ponytail was not sitting at the top of my head, like i wanted it to so. I added rubber bands more neck. Strips and bobby pins to help it stand up better. Of course, i continued the process by gluing the rest of the tracks on the ponytail. To complete the look, i grabbed a piece from the back of the ponytail to wrap it around to cover up the band. I made sure to wrap the hair around tight while also spraying it with got to be spray, because this is what's going to keep it intact. It'S going to keep it locked down, it's not going nowhere finishing it off by using my blow dryer. Of course, hey y'all again, it is the next day i did my makeup a little bit you know had to get cute. This is how my hair looked the next morning before i went to bed, i braided the top half and the bottom half i use sleek and shine anti-frizz serum for the ends of my hair because they were a little frizzy. This little drop was all i needed. Anything more would have made my hair too oily the scent of the oil was peachy and it just smelled so good. Now i'm just going to straighten everything out, as you can see, it's giving split ends, so i ended up cutting the longer bundle just so it can look more cleaner and fuller at the ends. Although i cut the ends, it's still getting long, it's still giving rapunzel. Let down your hair, so yeah, it's all good! Moving on to my favorite part, the baby hairs, so i got my little pink mini flat iron and i'm just straightening out my edges. Now, i'm just using my edge toothbrush with nothing on it, just to create the look that i'm going for. I was debating between two big swoops on each side or to make them kind of like swirly and curly. So this is when i added the edge booster to my edges to mold them down. As you can see, i went with the swirly look yay and we are all done so that is it for the hair tutorial. I hope you all enjoyed don't forget to shop. Ac, her collection, i will link her website down below along with her instagram name. Don'T forget, don't forget to like comment and subscribe. Bye.

Comments
Kami-Lah DaShae: Bomb you got me thinking about doing this on myself & I can’t do nothing with no weave lmao
Jess R.: This is SO crazy bc I JUST saw your tik tok like yesterday and I absolutely loved your hair and I wanted to recreate the style for vacation bc a wig I ordered didn’t come in time. SO cute! And the fact that you did it yourself too! I know that’s right!
Aalayah Anderson: So the first time I watched this video I headed straight to the hair store , the second time I watched I did it on my hair so cute & saved me money ❤️❤️ I wish we can drop photos in the comments
Alalea Rose: this is absolutely stunning how do you protect this look at night?
Blyth Lee: lol I took three styles from you , you did that ma’am! ❤
Leah Thomas: This style is so cute
THEanastasia: I'm doing this a fo sho. Thanks babe
Paris Paris: Yess I’m bout to learn !
Autumn West: Why does EVERYONE SKIP THE PART WITH CUTTING THE CAP !!! I really need to know
VEGA: Love the finished look! The u-part trick in the back> .. will be trying. “Won’t forget” *looks away* *crickets*
Shania Uniqué: Girl that is sooo good
jaz watts .: how long did it last , pretty ??
avionna’s luxxury: how do i tie it up at night?