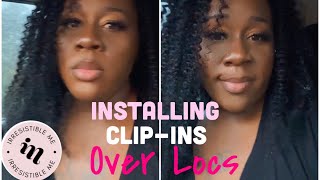
Easy Cute Natural Hairstyle Using Clip Ins | No Leave Out | Betterlength Hair | Shawn Dawn
- Posted on 23 June, 2022
- Sew-In Hair Extensions
- By Anonymous
Hey Boss Babes and Dons
Check out BetterLength for your textured clip ins: https://www.betterlength.com/?utm_sour...
Save $5 OFF any DOUBLE WEFTED clip ins
Promo code: Shawn1014
Follow BetterLength Instagram: http://www.instagram.com/betterlength
My Clip ins Info:
Texture: 3b/3c Kinky Curly
Hair Length: 14"
Color: Natural Color
Link to the same hair: https://www.betterlength.com/clipin-ha...
If you have any questions or comments, feel free to drop them below.
Thank you guys for watching
ALSO CHECK OUT:
- HUGE SHEIN SUMMER TRY-ON HAUL 2021 | FIRST TIME BUYING FROM SHEIN
- 3 MONTH BIG CHOP UPDATE | LIFE UPDATE ☕️. | TAKE MY HAIR DOWN WITH ME | Shawn Dawn
- 2 MONTH BIG CHOP UPDATE | WASH & GO | DOLLAR TREE HAIR PRODUCTS | Shawn Dawn
- TWA FRIENDLY | HOW TO SLICK BACK PONYTAIL | SHORT NATURAL HAIR | NO HEAT
-HOW TO| HALF UP HALF DOWN ON SHORT 3c/ 4a NATURAL HAIR | USING CLIP INS
- 1 MONTH BIG CHOP UPDATE | WASH & GO | DOLLAR TREE HAIR PRODUCTS
- APPLYING WIG w/NATURAL BABY HAIR LEAVE OUT | BOBBI BOSS
- BOBBI BOSS HUMAN HAIR BLEND SWISS LACE FRONT WIG | JUBA | AFFORDABLE WIG
- BIG CHOP WASH & GO | Routine For FAST, HEALTHY Hair Growth | Feat. WILD GROWTH HAIR OIL
- HOW NOT TO DO FINGER WAVES | I TRIED | BIG NEWS REVEALED
- FIRST TIME AT THE BARBER SHOP | EXTREMELY NERVOUS | BIG CHOP 3C/4A
- HOW TO | TWO EASY WAYS TO TIE HEADWRAPS | Beginner and short hair friendly
- CHEAP NATURAL HAIR WIG | NO GLUE NEEDED | BIG CHOP FRIENDLY
KEEP IN TOUCH-
INSTAGRAM: @shaunaemoni
TWITTER: @ShaunaEmoni
TIKTOK: @shawndawn0530
#shawndawn #betterlength #3b3c
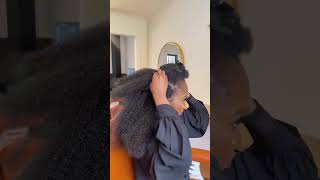
Hey youtube and welcome back welcome back welcome back to my channel we about to do some new things on my channel on my channel, so real, quick and simple, you already know. I got the length better known as better length hair. Yes, these are the clippings. If you have not seen my previous videos, definitely definitely check them out i'll, be leaving my promo code below get you some money off of these beautiful textured limbs, but yeah. If you want this easy go to style, where you don't have to blend, keep watching and make sure you like make sure you subscribe, make sure you comment, because that will really be great help for me, and it will help you guys even more, because my videos Will keep rolling so yeah? Let'S keep watching and i'll see you guys in a second. So first i split my hair into two going from like ear to ear more hair in the back of course, and this part is optional, i made it to where i gave myself like leave out perimeter pieces just in case. I wanted to throw it into a ponytail or do anything else other than what i did, but no liar. This was such a simple go to easy hairstyle that i just left it alone. I left it alone, but if you guys do want the leave out options, i did two on each side. Well, one on each side, one on the left, one on the right, and then i did one on the back, just really thin little pieces that can cover up if you wanted to do like an updo or just have some hair out just for safety reasons. Some people, um, you know, want an extra layer of hair when it comes to having you know false hair. So i definitely understand that, but yeah this part is definitely optional. I didn't even use it, but it was good that i had it because in the event that i needed to use it, i could but yeah just keep braiding keep braiding, i'm a braider, so i definitely know how to braid. But if you don't know how to braid just get somebody to do it for you, because i'm telling you braiding for these clip-ins definitely is a lifesaver. It makes life so much easier than just you know, trying to feed in your hair with the clip-ins, especially if you are growing your hair like i am, and it's not as long as it could be, but now onto the braids. So these were not fancy smancy. They were nothing like you see. My part is: jagged no lie, i don't know how to part anyways, but i just did regular cornrows going back and just made sure all the hair was secure and out the way, because i don't want to feed in here that i do not have to that. Is a hassle - and this is honestly a no leave out type style so feel free to not leave any hair out so now, working with the top i separated in two first and foremost, because i am doing two twists in the front but yeah again, my braiding, Not brady, my parting is real foul, so part that thing as many times as you want to okay as long as you're comfortable with your part, then yeah, but until you're comfortable, keep hurting like. I don't even think i was comfortable with my part. I think it wasn't straight enough for me, but that is okay, that is definitely okay. Yeah part that thing girl and now you're working with two halves so yeah y'all see i did my edges off camera you're welcome because i already know y'all be like girl. Why are you struggling so much with these edges and honestly, i just don't know, but you see that little piece right there that i took out in the back - that's just so when i twist it back, it has something to catch. If that makes sense like i'm, not just twisting it to the side of my head, it's going back as well. So that's one little piece and then i do the same thing with the other side. Now i'm getting my little leaf out part. It'S not a leave out part because it's going to be a twist, but i'm getting my little sections together. So the section that you see furthest back is going to be actually my extra safety net braid in a sense, because you see how all my braids are going back. My hair is kind of fine, so i do need a braid going across to hold that, like top clip in if that makes sense. Just so, the top clipping isn't like um falling backwards, while i'm trying to cover it with a little twisty thingy that i have so i'm just gon na braid this to the side and when i put on the clip-ins you'll see what i'm talking about. I just it's for me personally. I need that braid across just to secure the clip ins a little tighter. It'S just a preference thing. You don't have to do that part. I would say. Do it, but you don't have to this part - is really just a bunch of separation and preparation. So now i'm flat twisting the front that's going to be the actual display, that's actually being shown, like my actual style, in a sense so just flat twist um. If you guys want a detail tutorial on how to flat twist, i can definitely do that for you just let me know in the comments below but yeah just flat twist it and then our rubber band not the end, because, if you've ever been in the end, It'S going to be really really really really loose, so i rubber band the middle little part that connects to my feeder piece. If that makes sense - and i fluff it up a little bit because you know i want a little bitty twist in the front - i want it a little a little a little fluffy and i just do that for both and now i'm working on my, i guess My leave out braid, that's what we don't call it a leave out: braid, okay, so i'm just undo. What am i doing? What is what is shawna doing you see? This is what be the problem with these uh voiceovers, because i thought we was on the same page. I guess we're not. Why are you putting it up shawna? What are you doing? Oh my g. She has a mind of her own. Oh dude yeah. I totally forgot that i did not put the clip in yet i'm looking at the video, while i'm doing this voiceover and totally forgot, but you guys know how i am about these clip-ins. Do them the way your head wants it. If that makes sense, my head is a little small p head, so i might put the clip ins in a different um order. As far as like four clipping three clipping two clipping than you do so don't necessarily go based off of the amount of clippings a person use. That'S what i was trying to do. The first time i started um looking at better length, clippings i'm like okay, so she used the five piece on the bottom. So i can use five pieces on the bottom and it did not work. Okay, so really feel your head, and really just basically trial and error. Okay, it's trial and error just play with the clip-ins, have fun with the clip-ins, but definitely tune into the style and get in with this style. Because, yes, look at me, i'm so happy because, like y'all, every time i put these clip-ins in no lie, i feel like my hair, grew back like i'm just so happy when these clippings are in my head, like it's really a confidence booster, because doing this big Chop, of course, i recommend it, and i really do i really do want you guys to consider big chopping. If you know your hair is not at the healthiest, you know you want it, but if you don't, if you don't want to that's fine too, but these clip-ins really do really do give me a confidence boost because sometimes i wake up and i'm like. Oh gosh where's, your hair, it's like it's okay, shawna put these clippings in and that's what better illness is for. A better length is literally a confidence. Booster yeah, don't y'all got ta. Take my word for it. Y'All should because you're watching this video, but y'all don't have to like just really check the clip-ins out yourself, like you guys will not be sorry but yeah just putting them on. I went um as i got closer to the top. I started doing the top and then filling in the middle, because i just wanted to make sure that i had the pieces that i wanted on the top. I would recommend, because i did this style more than once, so i would definitely recommend this is my first time doing it, but the second time i did it um i put like the three clip basically put a long clip going along the base. Just so, you won't have that you see how i had a little gap. It wasn't a problem with the style, but i just realized that it was a lot easier when i didn't when i used the clip that went along rather than two pieces, because then i had a little gap right there i covered it up, but to avoid the Gap put like a longer piece going along the thing. So then you can just outline it with your um twist, if that makes sense, y'all what the heck! Sorry, okay, i'm back that was um, just just a little firework show, but anyways so yeah y'all see how i did the top and then now i'm going back to fill in the middle. I don't have that much left in the middle, because better literally one bundle takes care of the whole thing and i didn't even use the whole thing, of course, because i have hair out in the front, but yeah y'all fill that in make sure all those pieces Are just make sure your hair is full, but not lumpy, that's the key to it and yeah keep going shawna keep going. This is more is just like uh. You know, look at me and be satisfied type process. So i'll. Let you guys keep looking and i'll. Be back so now for my no leave out piece i just flat twist it all the way across so instead of splitting it up in the middle, like i did in the front, i just take one side. It doesn't matter what side, whatever side feels comfortable for you, while you're twisting do that side. So this is the side i felt most comfortable with, and i just start flat twisting all the way across yeah y'all see that y'all see that flat twisting all the way across and then after i twist it, i use my handy dandy, bobby pins and i just Bobby pin it basically to the clip-ins and then the clip-ins basically hide the other clip-ins and everything is covered. So yeah, that's my video. Thank you guys for watching make sure you like make sure you comment, make sure you subscribe and stay tuned because y'all. I have way more styles to show
Comments
Knews & Knowledge: This was a great tutorial!
Jenae: That style is so cute on you!!! just wondering, do the clip ins have that “synthetic” smell? I’ve been struggling to find curly hair extensions that don’t have a burnt hair or plastic stench to it
Daisy McClaney: Nice!