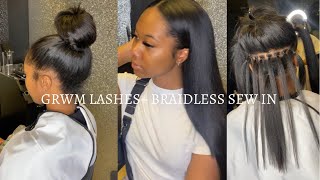
Braidless Sew In W/ Microlink Extensions Detailed Tutorial
- Posted on 11 March, 2018
- Sew-In Hair Extensions
- By Anonymous
Have you ever gotten microlink extensions? In this version, I'm showing you how to do microlink sewn-in extensions using micro beads, hair pliers, and a needle/thread.
This sew in method is ideal for women who want to add volume to their hair without having to tie it all down in a full head sew in weave or under a wig. Your natural hair will be out in between the rows so make sure you are prepared to manage your hair daily as you would without a weave in it.
Ask your questions below
MORE GREAT VIDEOS FROM ME:
- How Much Hair to Leave-Out on a Weave: https://www.youtube.com/watch?v=iJUqye...
- Straightening My Hair for the First Time in 2 Years: https://www.youtube.com/watch?v=Bt7L_1...
*******************************************************
LET'S STAY CONNECTED:
Instagram: http://www.Instagram.com/ItsMeMissRuby...
Twitter: http://www.Twitter.com/ItsMeMissRuby
Health and Wellness Products I sell: http://www.Linktr.ee/ItsMeMissRuby
Hello, my laughs welcome back to music and beauty TV. It'S me mr. ruby. Today we're gon na talk about micro link, extensions, I'm gon na be doing a step-by-step tutorial on how to do a braid list sewing using the micro links own in extension method. This is a great option for clients who don't want to have braids in their hair clients who just want to add a few tracks for volume or length or clients whose hair doesn't stay in braids very well, but still want to add hair to their head. So these are the tools that you're going to need number one. Is this fusion master tool? It'S basically like pliers, you're gon na use this tool to clamp the micro bead onto your clients, hair, which leads me to number two: the micro beads themselves. They sell these in two or three different colors at your Beauty Supply, so make sure you get the color that most closely matches your clients, hair and then you're going to need the loop tool that allows you to slide the micro bead onto your clients, hair. Today, we are using here that has been supplied by weave pronet details for the supplier of this hair are in the description below this particular product is called the halo clip. In extension, I know that there are clips on this West, but you don't necessarily have to use this solely for clip ins, as you can still sew it in if you want it to be more secure for a longer period of time. Here are sectioned off my clients, hair, because we are going to be doing two tracks for this install. I did cut the halo clip in extension in half, and I sealed the ends so that it wouldn't shed this way. One clip in wasn't too long for the amount of space my client has in her head. If you want details on how to do that on another video, let me know - and I can see about getting that up so for starters, I just want to show you that you are gon na section off a portion of the hair, leaving some hair beneath this Track and leaving hair on top to cover it up and then you're gon na go through and you're gon na take a small section of your clients, hair at a time and you're going to loop. The bead onto that section clamp it down very snug and secure without being too tight, and that is how we're going to create the row that you're able to stitch on. But I wanted to show you really quickly the basic gist of doing this and show you that you don't want to slide the bead up too closely to your clients scalp, because then they won't any room for you to stick the needle through in order to leave The track on to that bead, you also don't want it to be too close and tight to the scalp, because that can cause redness damage to the hair and potential pulling you want to go in with that fusion master plier tool, and you want to clamp the Bead securely onto the hair, now here's an example of what might happen. If you don't clamp, it tight enough, you'll be able to spite it off just by slightly pulling and don't worry about them being too tight onto the hair, because there is a way to remove, which is just like this. You take these pliers and you attach them to the bead as so, and then you are able to open that beat up and very easily remove them from your clients, hair. If your client doesn't have this tool at home, advise them to come back to you for the removal of this product or to add some oil to the portion of hair where the beads are applied and try to gently remove them. If they do not gently remove, they need to get the tour. They need to come back to you or else they're gon na pull their hair up. This is what one row looks like after I've applied the microbeads, then I'm gon na go in and I'm actually gon na stitch the track on and that's what it looks like after the track has been applied. But now we're gon na get into the actual detail of how I did this now, if you'll notice, I've already kind of straightened this clients hair out, except for at the root and the only portion of the root. That'S not straightened is the portion where I want to apply the microbeads. So if you were to look underneath all of the hair that I've straightened beneath that row has been straightened out the week. The reason why I do this is because I find that the more coarse it is at the root, then the easier it is for those beads to grip onto the hair. Of course, you're gon na have some clients who don't have coarse hair at the root and it's still fine, but to make the job a little bit easier and more secure. I prefer it this way, and so now I'm gon na go in section by section and I'm going to add the beads one by one about half an inch to an inch apart from one another, so that I can create my row to stitch on. You can attach your beads closer together, but definitely don't do them any further. Apart than this, I prefer not to use too many beads in my clients hair, because it's just more room for damage if they're, improperly removed, but otherwise, if your client knows what they're doing and they've gone through this process before and you feel more comfortable, adding more Beads go for it now. I'M gon na go in and slide my needle and thread through the weft of this bundle. First and then we're gon na start to stitch on now, when you're stitching on then make sure that you're looping your needle through the hair that is above the micro link. So I'm just gon na go through bit by bit and I'm going to stitch this track down for the first part of the track and the last part of the check you're gon na see that I'm adding two to three stitches on that one micro bead. But you don't really want to stitch too much on one micro bead, because there's not a lot of hair there to stitch on too, and you don't want it to be sore for your client. All of the rest of the tracks that I do. I'M only gon na loop, the needle through one time, making sure that when I get to the middle of that track, I'm adding an extra knot just to secure it in place so that, as my client wears this style, there's no room for error or sliding out Of this track, like I said Here, I am at the end and I am stitching two times to make sure that it is fully secured against my clients head and I'm also knotting it two times, and this is what it looks like in the end, all together. I'Ve added one full bundle of hair that was cut in half to my client's head and now I'm just going through, and I'm straightening that hair out so that it can blend with my clients, hair. She wanted this option just to add some volume and length to my natural hair without having to commit to a full, so envy another great way that you can use this micro link. So an option is, if you want to add tracks to at the top of your clients, hair without the bulkiness of braids. For this particular client, we only added hair to the middle and the bottom portion of her head. So now I'm going through and I'm straightening out all of the hair on top so that it can blend seamlessly with the tracks and as you can see, I only sectioned a really small part right here and it's covering this halo clipping extension very easily, which goes To show that this clip, in extension, is flat, despite the fact that there's about four to five layers of hair, some of you asked in my last video of this clipping extension, was heavy or too heavy to be sewn onto one small piece of hair, and I Wanted to answer by letting you know it's not. My client today specifically said that it feels very lightweight. She can't even tell it's in her head, but it does feel secure so yeah. I hope you learned something. Let me know in the comments below. If you have any questions about this process, god bless you guys and I'll see you on the next video you
Comments
AMATEUR DECORATING LIKE A PRO: Thank you for this alternative. This will work for me! You also applied the extensiond to the areas that I would like to. She looks amazing. Cathryn
Shell Jay: by far one of the best instructional videos I've ever watched!!
Emanate Venuste: I love this lady, she’s the most humble and peaceful person, she’s not afraid to share her knowledge and talent about hair and hair extensions... thank you stay blessed!
MamaKat: Hey ya’ll, every type of hair extension CAN be damaging: fusion, tape, beads, sew-in, etc. How you prevent damage is 1. Consultation and knowing (as the stylist) what type is best and what’s not. 2. Proper installation is very important. For example, she explains not putting bead too close to scalp and why. 3. Client education on how to care. VERY important!! For example, not using a comb that could catch on the beads, or with fusion making sure your client brushes everyday to prevent them from tangling. A hand out is great and maybe even something for them to sign as a CYA initiative so they can’t come back say “you didn’t tell me.. ..”. And maintenance in between is crucial!! Once the anchor points get loose due to growth there’s more movement which could cause pulling and client could experience hair loss at those points. So, all you “know it alls” might not actually know it all cause there’s a lot to know that’s why it’s important to choose someone that knows what they are doing, like the stylist in this video.
Ashley Mae: Guys I’ve had this method done several time and it never damaged my hair if it’s installed and taken care of properly you should have absolutely no issues
Jennifer Audeon: I have been looking up this method of extensions a lot lately to use on my clients and your video was so to the point and explanatory! Please do more of this extension with different hair types!!!! Perhaps a curly model with curly extensions?
Cotton Candy Nail Factory /CCnailfactory: Absolutely Grandeur!!
K B: Thanks for sharing. I used to get this done alot when I lived in NYC. Now that I'm in Jersey people want to charge an arm and a leg I can definitely do this and I dont even do hair. I'm gonna make my friend learn so we can do each others hair.
B. Avery: Started offering this at my salon cause its cheaper then my hair dreams extensions and im making hundreds of dollars on top of what i make already cause i learned from this vid
Maxine Ross: NOW THIS IS THE WAY TO TEACH PEOPLE , WHO ARE LEARNING /OR GOING TO BE A PRO , LOT"s OF CARING , GIVING US A GREAT ! METHOD OF WHAT HER KNOWLEDGE IS OF THIS [ TUTORIAL IS COMPLETE INFO: ALONG WITH GOOD INSTRUCTION ON ALL GOD BLESS YOU & YOURS OH! BUT NO-WAY FOR ME ALL MY LIFE TENDER HEADED-NO-WAY,NON.A GAIN EXCELLENT JOB, I JUST DON"T DO PAIN MOSTLY ON THE HEAD.""SINUSES" KEEP-UP THE LOVE YOU HAVE FOR WHAT YOU DO ,AND EVEN BETTER THE LOVE YOU SHARE WITH YOUR GOD GIVEN SHOWING OFF THE GLORY YOU GIVE YOU MY" DADDY "HEAVENLY FATHER YOU GO GIRL.
Story Time Nails: Thank you for the detailed review! Some of us have the skills and can DIY it, so thanks again. So disappointing to see IG and YouTube influencers acting as if they created this technique. They should be giving credit where it is due, to the black men and women who’ve been doing this technique for decades.
Lashawn Carter: Thank you so much, I love it. You're a amazing teacher cause I did it just fine after watching you
Lesley A.B.: Thank you for the detailed explanation. I highly enjoyed it and learned a lot!
Yasmin Villanueva: Just wanted to tell you that you did a fantastic job, I wish you lived near so I can go get my extensions done
Braids N shine: Thank you for your beautiful work, I have been looking around as I have some clients always asked for this method but I wasn’t able to provide but sew in extensions only, now with your video, I will be able to help client’s in needs of their extensions done this way, I have watched many videos but I find your video to be the best in details. Thank you so much for sharing stay blessed xx
Kayla Perez: Thank you for being so incredibly detailed! This helped a lot! ❤️
Creshawna Taylor: Perfectly explained. Perfect style. Just perfect all around
Janene love Love: Man.... This girl is good ! She has walked me through, so I could do my own hair extensions! THANK YOU you very much! And God Bless You
Lisa Timmons: Awesome! I get my hair done using this technique but I wanted to see if I could do it myself. Sometimes the installation can be a bit pricey for me.
porsha Miles: This video was very detailed and informative. I love this and i love you for this!
Angela Baldwin: Thanks for sharing. I tried clip ins and they kinda gave me a headache. This seems a little less more comfortable
D Magnificent Imposing Queen: Beautiful,well done!
Kelly Ard: Wonderful EXCELLENT training teach mode. Thank you for you video
Natasha Wiley: Wow that looks SO good! Great job!
Tee E: Beautiful client, results, and stylist
Alberta Middleton: That is so nice. I want to try some clip ins.
Serena FAN Life: Thanking you for doing a GREAT tutorial.
Jacqueline Luciano: WOW I LOVED THE CONTENT OF YOU VIDEO YOU DID SUCH A GREAT JOB THEY LOOK SO BEAUTIFUL.♥️✌️
Ashley Jones: I love love love this I always wanted to know how to do this and this explain perfectly I actually did this to my own hair as it had been breaking off from me bleaching and I didn’t wanna cut it all off just know it turned out perfect light weight easy to handle and even better I can part it any way I want and any style thanks
Natasha Dwyer: Can I go swimming (regularly) in this? Can I wash my hair after each swim? Will this work on 4C short hair?
Khristina Aguilar: Amazing work ❤️
E C: Hi! Love it! What bead sizes do you use?
Tamika Smitt: Very beautiful. You did a great job. Your client is so beautiful
Valentine M: Wow this looks great. I can’t wait to start incorporating this
Naty Gzz: Lindo , muito bom vídeo gostei
Kristina Freeman: Beautiful work!!
Kellie Peterson: THANK YOU FOR THIS!!
naturallytammii: Will be trying this out on my own head! Thank you!!
Sheron Kelly: Do you do full head fusion on short natural hair? I want to grow my hair out this way
Erica JOY: Omg. Love this
Jodie Chestnut: Very nice, detailed video; thankyou!
Melissa Boomer: Hey ! Great video . So I got this done to my hair about 2 weeks ago . When should I get them replaced ? How will I know when I need to go back to the salon ?
Dream Hill: Excellent tutorial! Natural teacher!
Eusebio Orellana: I love it, thank you, great idea
Januari Johnson: How long does this style last with good Maintnance?
Zsa Zsa Umbra: This is brilliant! I taught my husband how to do fusion so he could do my hair before our wedding lmao! They damaged my hair so badly that I ended removing them after a week. I used the keratin glue method and the hardness of the glue actually ended up cutting my hair. Which was actually a relief because at first I thought my hair was coming out at the root.
Autumn Summers: Just use clipins. This seems so complicated, and I'm not sure it's safer than a sew in.
Tamaalamaa: So you are able to use clip ins, remove the clips and use a sew in method? I have clip ins that are a pain and im debating on doing this but with the braid method. Is that possible?
Mrs. Cherry: Yes yes yes, the best method
Its Zeeshan: Thanks for share this video , this is very helpful as well as I learn from your video clearly thanks so much Allah blessd you ameen
Nail Chemistry: Hermoso
Livia Rhuma: Very detailed instructions and lots of good info. Hair looks so natural and pretty Well done!
dark6397: How would this method work on find texture hair? Would it pull at the hair when the client is shampooing & detangling their hair?
Monique Reid: Do you have a tutorial for the removal process
Sara Douglas: thank you much for posting this video. i have clients all the time if i could just use the track of hair they have already. now i can use there hair. ive been only using i-tip extensions which can be costly and not all beauty supply stores sell them. thanks again
Tiffany Ferraz: I have a halo extensions I thought about doing this too that’s how I came across your video. How did you seal the extensions when you cut it?
bronx chick: Loving your ring with the ruby stone on that left hand ❤️
Be'n Angie B: First one! Remarkably, Beautiful
VanitraTV: Hi! Are you going through the weft when you’re sewing each time or just at the beginning and end ?
Melody L.: Interesting technique. The hair is gorgeous! What type of flat iron is that? The Lord Jesus bless you too! ✝
Tenacious Dee: Excellent method I can’t wait to try
Community Engagement: great job and excellent explanation.
Kim Nevils: This is by far THE BEST video on YouTube dealing with microlinks. Hands down. End of stoty.
Theresa Elidor: Omg
DK TayTay: How do you tighten the beads when there is new growth? Do you have to remove the entire track and reinstall?
L L.: That’s really pretty
Shantresha Turner: That was beautiful
HannahEstherRuth: She’s such a pretty lady!
Samantha Maww: Thank you soo much i just did mine by myself by watching this thank youuu
L. Mat: This video was very helpful. Thanks!
Beauty Luv: I want to see the update...what the hair in the clips look like after some time...
Sharp Enough To Code: Gorgeous
Sasha Hanna: pleasepleaseplease do a tutorial on caucasian hair. perferably short
Her Royal Hair Bundles: Looks really good
Touchdbyhaze: Love it
LoveLeys Hair: Loved this video, very helpful
Vicky Landing: I wish knew some one can create such Hair stylist very pretty thanks for sharing
nykeria clemons: Are you going through the bead when sewing down ?
K B: Can you do a tutorial on the individual and Brazilian method with the really stretchy thread?
TheDOTKU: If you have really slippery fine hair like mine I found that it helps to link them like a Y before sewing in the row. ;)
Britt Nb: Perfect
Its Zeeshan: Great work
BKLYN SOUTH: This is a great idea. And i have learned something. ☺
Janay Williams: Helped me sooo much. Thank you for the video
Adriana Dutra:
Blossom: gorgeous
ES: Omg thank you so informative
Denise Harris: It looks beautiful. Where do you purchase the hair?
Raszsa: Awesome. I wish you could do my hair
Molls: Aside from clip ins, this is the next LEAST damanging method of extensions. Anything with tape, glue, or “keratin” is allllll sticky residue being left in your hair, even AFTER PROPER removal. This method is just beads and weft!!
gloria walker: I Really enjoyed your video but however I have a question . My hair is thin at the top and I was looking for a way to get some fullness at the crown of my head . Would this be a solution for me ?
Beyond Limits: How is this micro link hair if you are using tracks? I'm confused, I thought this is supposed to be used with loose hair that the person has a more versatile option
Marie Metayer: Beautiful
Peaches The hairstylist, jack of all trades: How much do you normally charge for this method?
Charles Bush: Very pretty!
ladynefertitibk: Thanks for showing your method. Is there a update video on her hair?
La-la-la-la_la!: Love it
Marquitta Gilliard: this tutorial is very helpful!!!
Tashawna Sorrells: Ms. Rudy, how much do you charge for this process?
Kailynn Washington: Hi i was wondering how many bundles do you need ?