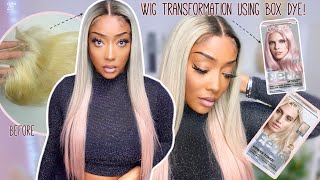
How To: Make Clip In Extensions (Beginners)
- Posted on 26 January, 2015
- Sew-In Hair Extensions
- By Anonymous
Amore teaches you step by step how to make your very own clip-in hair extensions using your Mayvenn Hair. | Subscribe Today For More Tutorials! |
Amore used 2 bundles of Peruvian Straight in 16". After measuring the lengths in each section on her 1st bundle, she then copied the same measurements for the second bundle, and made them slightly longer.
TOOLS:
Scissors
Weaving thread
Curved sewing needles
Clip-in Clips (Black, Brown, or Blonde)
Comb
SHOP THIS LOOK
CUSTOMER SERVICE
1-888-562-7952
8 AM to 5 PM
PACIFIC TIME
FOLLOW US:
Twitter: Mayvennhair
Instagram: Mayvennhair
https://www.facebook.com/MayvennHair
Subscribe to Amore's Channel:
Hey everyone today, I'm going to teach you how to make clip in hair extensions using your mavin hair. Clip in extensions are great for those looking for a fast and easy temporary style change. Clippings are great for clients who want to add extra density and fullness throughout their hair, they're, also great for a pop of color or highlights throughout your hair, now clipping those temporary extensions and should not be slept in. They should be removed at the end of each night. It takes about five to 10 minutes to completely install your clip in extensions to make these extensions. You'Ll need scissors, weaving thread curved sewing needles. The clipping clips that come in a variety of colors, like black brown and even for blonde hair, your first step is going to be to thread your sewing needles. To do so. You'Ll, take your thread you're, going to take one end of your thread and a curved sewing needle and you're going to leave it through the tiny hole. Once you have your two ends, you want to take them together and tie them in a knot and then tie one more nut. Take your scissors and cut off the excess so that it doesn't stick out on your weft, and it should look just like this. Then you're going to take your bundle, that you have and cut the elastic band and be careful not to cut any hair. So once you have your bundle completely unwrapped, you are going to leave the wefts doubled in half. Just like this. The reason you want to double your webs and sew them together is so that when you create your clip, in extension, it's going to be a lot fuller than just one way. Then you're going to take your needle and thread and the two loose ends of the width and you're going to sew these together. All the way the work is finished on the other side of the court, taking the two ends of the web and matching them together, then you're going to penetrate through the web at the ends and be the read through before it gets all the way. To the end, just go ahead and loop it through, so you lock the thread. You are now going to sew right around the way so again go up and through wrap your thread around and then you're going to pull your thread through and walk it at the top of the way, and you just want to keep on continuing that method. All the way until you get to the end of the other folded side going directly under and straight up, once you go under and wrapping it around will help your thread go straight to the top and not push the hair over so going straight under right. Above the same, and since that you went over wrapping it around to the top, when you're finishing up sewing the West, you want to make sure you penetrate the West so that the end stays black, so go straight through the width and then you take the thread. Move it around and pull it through now, once you get to the end, you just tie a knot and cut the thread off so once you're done, your wedding should look just like this all the top and all the sides all the way to the end. Okay, once your webs are sewn together measure the nape of your neck and cut the west where needed. Now, you want to be sure not to measure it too far, because then your clips will be seen from the outside of your hairline. So what you want to do is measure to about here on both sides and once you measure there with your weft, you want to cut the way so measuring from here to here. Once you have your exact measurement mark it with your thumb and then you want to cut the web to properly cut the web cut from above, going straight down. Once you cut your weft, you want to pull away any access hair that could shed later. So this is going to be your first tracks, which goes in the back of your neck. Before we sell the clips onto the web's, we want to prep all the clips and open them. So take your clips and snap it open doing. This helps you to prevent from sewing the clip on in the wrong direction. The direction you want to have your clip point is with the comb on the outside. This is what your clip clothes, and this is with your clips open. The reason we want to open our clips is to prevent us from showing it on the wrong way. It'S so easy when it's closed to sew it on backwards with the bar facing you, but once you leave this mistake, it's really hard to clip the extension on to your root area so again just to prevent you from making a mistake, open all your clips, so That the comb is facing the outside of the weft, so we're going to take our clip and the comb is facing the outside of the weft and it is still open and we're going to place it at the end of the weft. Once you place your clip at the end of the whip, you want to take your needle and thread and thread the needle through the weft and through a tiny hole like that. This is the hole we're going to put the needle through, and so you want to place that hole right on top of the way. So when you sew through you're, going to go through both webs so before the did not get to the ends, we want to just go inside, so we can make sure that it is cured without having to tie another nut. So once you get the thread on the west, you can go right back through and through the weft again at the end is the only time we'll go through the weft. The reason you want to prevent going through the weft every single time is because going through the West can encourage shedding, and we do not want the hair to shave. Now that we've gone through one hole, we don't want to just end it and go through the hole all the way. At the end, we want to go through the comb teeth and around the West this time through the web around the web, so going directly under and pulling upward and then go through and skip one and then go through skip a rope around wet and then now That we are at the ends we're going to go through that hole on the other side and then remember, as we did in the beginning, we're going to go through the West at times as we're ending our threads. So going straight through the weft and straight through the little hole, send it straight. It goes straight through wrap the thread around and for the needle types and just to secure it. We'Re going to go ahead and do that same step once more go through left and the hole wrap your thread around and pull it through to the top. The way I taught my threads off is to take the needle weave it through in a hole, and I place this all the way at the bottom of the West hold my thumb down and pull the thread, and that will make the not be at the base And then I'll repeat that process one more time so wrapping it around making it at the base, putting my thumb over it and pulling the thread. Okay, we're going to make the knot all the way up. The bottom you'll take your scissors and cut so once you end it off and tie a knot, your click should open easy. It should be pretty seamless so to clip it in the hair. You want to open the clip and positioning it at the root area. You would go straight through and then close this book by bending it against the steps and you will begin to hear click so that extension is not going anywhere. Okay, so now we're just going to sell a clip on the other side, and that is how you do your first rough, so to unclip it. You would just bend it backwards and it clip removes easily out of the hair and not going anywhere and then unclip to remove pretty easy. So now we're just going to do the other side just want to show you how it clips into the hip. So taking our next clip making sure that it's open in the clip and the comb is facing outward take the other side of your weft, starting from the edge take the needle through the hole and through the width. At the same time, just to lock the thread and go through so now we're going to go around the West. And now that we're, at the end of the clip, we're going to go through the top fold and through both ways and repeat the same thing again and the whole entry over now, you just want to tie a knot to end off the thread. And that is your first clip in extension, so you can open and close the weft so you'll place. The extensions at the top of the party can comb down and snap and do the same thing on the other side. Take the extension calm down and snap okay, and that's your first one now, let's just say your hair is a little bit too fine and the clip in extensions really slide out of your hair. So one of the methods you can do is just to not worry. For one, so if your hair is too fine, this is a method you can use for clipping in your extensions. You would take your out your entire section. Then you will take a skinny sliver at the top of your section and do a really tiny braid and then taking your open clip. You would place it in the so that way your extension to Loxley, if your hair is too fine, and this will give a way sturdier base, especially if you like to finger through your extensions throughout the day, they will not move okay, see all that pulling. It'S not coming out. This is a method you can use when you have really fine hair, just be sure not to make your braids go all the way to the ends. So that way, you can have some hair to lay over your extensions. In case you want a ponytail or any other thing you may want to do so. Leave out your edges. We do do a small braid so that way, if the wind blows or you bend over to grab something your extensions aren't going to show okay. So now you want to continue out this process and you want to measure your next extension starting about here and then your next one going about here from here to here and then when you're done, you want to come from here all the way around and another Row all the way around all the way until you get about here. Okay, that would be a bullhead you'll, probably have about seven or eight rows, so your pieces are going to get too long to only have two clips. So once you finish your two clips on the ends, if you snap it to the hair and there's still a lot of wiggle room, you want to make sure to put another clip in the middle. This is going to help to ensure that your clips won't just move around and bulge out in your head. It will be secure and tight, so we're just going to add another clip and just little section by following the same step as before. So once you finish installing your third clips, your web should look just like this, so this is what your weft will look like when you sew down forward and it's better to just do four instead of three. So that way, the weft will be more secure and you'll have way less wiggle room when you would clip in your extensions. So once you complete your second bundle, this is how many tracks you should have. So I have two nape pieces with two clips. Then I have two three clips and then I have one other one: that's enough to be pre clipped, but I just didn't add a surgeon. Then we have longer ones with three clips on them. Just like so and then two four quick ones. So once you're done with your full head, two bundles feel free to do three. If your limps are way longer because the wefts are shorter, the longer your bundles are, for instance, a 28 inch bundle. The weft would be really short compared to a 12 inch bundle. The web would be a lot longer so you're going to have to accommodate for longer links when you're making clip in extensions for a full head. So with lengths longer than 24, I would suggest to get at least three bundles and four. If you like extra fullness, you can store your clip ins by stacking them on top of each other, and I line up the longest width at the bottom, which is the four clips, and then I just stacked them switching from one side to another. So that is all easy, even so, once you get it in a nice new row, take a and collect the West from the top and just click them together and do the same thing on the other side. Now you can move them around and they won't come loose and they'll be nice and neat for when you're ready to put them back in your hair. You can see how full the hair is. This is just two bundles, and actually I didn't cut the ends of these. It'S actually really that even and hold towards the end - and this is the Peruvian straight hair in 16 inches. As for my hair, I'm wearing their Peruvian straight in 1820 and 20 inches and I've had this hair in for about two months now. This is my second install. I colored the hair into a bleached, ombre balayage and then I colored it with joy, called semi, colors, semi-permanent color in cents and it's kind of faded now. But my hair is still holding up great and I curl it almost every single day and the end still looks great and it's full of life and I'm loving it. So if you would like to purchase your mavin hair, you can go to WWE, calm and all megohm products have a 30 day quality guarantee. So if you're not satisfied with the quality of maybe parents, they definitely have exchange and refund options available. Just be a customer service at call and they'll help. You take care of your order. Thanks guys I'll see you in the next video


Comments
Tatiana Viz: Wow I'm so impressed by your how to video, it was so easy to understand your explanation! And that you don't fast at all!! Thank you so much for this great video!
Amber Delivered: The most informative tutorial ever tfs seriously I needed this.
k luv: I glue 2 wefts together with hair glue to make the weft thicker and as far as the clip, I just sew the thread in the 2 holes only on each clip, it works as well.
Melie305: For anyone who is buying the supplies for this: you need a tiny needle to go through the wig clips. I found two tiny “C” ones from Sally that went through all the way compared to the ones I got from the beauty supply store that didn’t work
Erica Cumbo: The explanation of the whole process was PERFECT!!! I was wondering how I’d keep track of all the parts that were measured out and you answered that at the end!!
Jessica Falcone: This is the most easy to follow how-to video I have ever seen. Seriously, thank you so much! I've subscribed!
Jenny O: I really like this video! You explained things in depth, the lighting was great, so the viewers can see how to make the loop through the thread. All in all, great video!
Christina G: Best tutorial I've seen. After seeing so many bad reviews on so many clip in brands I just gave up looking. I'm just looking for volume since I have thin hair. The face that you've had that hair in for months and it still looks good is a true testimony of how good the hair quality is. Definitely will look into this hair.
Pickles: This tutorial was perfect! Thank you for showing in detail every step of the process, including how to clip it into the hair. I could never figure it out before. You made this much easier. Thanks.
J Ausserehl: best diy video! thank you! I however measured out layers and cut before sewing!
Leslie Sieler: One of the best tutorials I've seen. It was thorough, informative and easy to follow. Thank you for taking the time to share this information with all of us.
Menosha Chetty: Thank you so much for doing this you're an amazing teacher. This was so helpful and really clear and easy to follow and learn especially for someone new looks so professional
Juss Jess: Amazing, well explained video! You've empowered me to make my own clips
Lia Ayala: THIS VIDEO WAS LIFE!SO MUCH INFO, I AM A HANDS ON LEARNER, THIS VIDEO DEFINITELY MADE EVERYTHING MAKE SENSE!THNK YOU!
sam mehmoona: This is by FAR the best tutorial I've seen, and I thought I'd seen some good ones, but the way you went into detail about why each step is important, what it does, and some alternatives for people with thinner hair, so thank you for this! I was wondering, is there any huge difference in one-piece clip ins where the whole bundle is applied on one strip as opposed to several besides styling versatility? I only ever really wear extensions straight with my hair down, so I never really style it, and I thought it would be easier to take in and out, but havent really been able to find a lot of information on it and dont want to risk it!
Vanessa Walker: I'm almost halfway done with mine and I've been using this video it's so helpful
ROBLOXGamer23 XOXOX: You can buy the clips from the nearest Hair Extention shop, In my opinion, This video showed a IMPECCABLE reputation and the impact given was extraordinary! Thank you for teaching me and now my hair is nice and silky. Your amazing and unique in many kinds of way but I fortenetly accept all your hard work making this video. I'm SO contented that someone impressed me for the 1st Time!!! I just... I'm SPEACHLESS
Audrey Ortega: Browsed through many videos! By Far! Yours was the best! Thank you for such an informative and efficient video! So glad I came across this video.
Vanessa Welch: LOVE your video! Thank you so much for the step-by-step - I am about to attempt making my own extensions for the first time and I appreciate all of the great info!
Gel: I'm so happy to find a tutorial by a fellow lefty. It's hard to translate in my mind how the stitches go when I try to watch a righty do it. Thank you for such a helpful video!
Acadia Mercer: You’re a great teacher and your voice is amazing ❤️❤️❤️
Shannon Dagley: Amazing video I just made myself two clip in bang extensions for my pixie cut. They turned out great! It cost half the price of buying them already made. She gave great thorough, detailed instructions. I just need to cut and style these babies and get cute! Thank you!
ShirlAnn Solomon: Thanks for the tutorial, just bought some hair I want to keep re-using for awhile and don't want to sew it in.
MJ X: UGGHHH Thankyou! This tutorial was a lifesaver, you were so easy to understand and very thorough! Thanks again.
PQM: this was so informative and helpful! thank you! can't wait to make some tracks for my baby's Halloween costume thank you
Tracy Guzman: I loved this video and was so informative I actually had three bundles. I started with the 18 inch first and that seemed to be enough for my head it made my hair look real thick. I think I am going to make clips from the 14 the top of my head.
nitsrah: Neat work and clear instructions. Thank you!
Song Byrrd: I was going thru my playlists and found this again! Wow I was looking for something I could do differently to my hair and this is it! So well done...Excellente!
lauren cantres: Girllllll this is the best video I've ever seen on hit to make clip ins! Can't wait to make new ones using your technique
Lauren S: This is how you make a tutorial! This video was so informative and well done, thank you!
Miller Miz: Excellent tutorial! I'm going to make this a project for old EP HAIR I have that is still useable but has been cut up in many pieces after many sew-in installations!
Comella Sloan: Thanks hunny! of all the videos on clip ins this is the most detailed and most helpful video you showed me exactly what I needed to do to make my clip ins and I've just completed the installation and my hair looks so good I'm so proud of myself thank you
Princess Donn: yassd, great video, very accurate, and great instructions!!!! I'm definitely going to do this, just need to find the patience lol
Analise Zagar: Thank you so much!!! I wanna start making custom clip ins . Including the coloring and sewing !!!
Penelope Freeman-Booth: Wow. Thank you so much for this! So kind of you to take your time and give such detailed guidance
Chocolate Thunder Cherry: FAVORITE VIDEO OH WOW I'M SO ANXIOUS TO DO MY EXTENSIONS !!! I'M USING THIS METHOD !!! BEST ONE I'VE SEEN OKAAAAAAAAAAAY <3333 TFS
Jessica Chen: This is so helpful! Thank you for the detailed instructions. Truly beginner level.
La-Kisha Nance-Houston: This is simple and sweet. Thanks for being so detailed. Great tutorial!
Sianie Idaly: This tutorial was exactly what i needed!!!! Your amazing i swear! This was so detailed and was explained slowly and thoroughly! I wanted to ask a question how did u secure the braid when applying the clip in? Btw I’ve subscribed! Thank you love!
Sherika Rollings: Great tutorial!! Honestly this is the FIRST video I've seen on YouTube that I'm not left with questions lol Great job
M Jennings: Thank you so much for your video. I was extremely helpful and now I am able to make my own clips!!!
Bella Channell: Damn girl you're thorough! THAT'S how you do it! Excellent!!!
S D: This was sooooo helpful. Thank you so much for sharing!
sheryl santos: this is a great tutorial, I bought a hair extensions and I was planning to redo the wifts. good job
Claudine B. Jimdar-Rowe 10 CV 2041: I’m going to watch this again if I’m going to make one. I bought extensions, but haven’t used them in awhile.
gigimyworld: This video gave me life. So easy to understand. the best I've seem so far.
Sunshine: When sowing, how far apart should you be before putting the needle through again (hopefully that makes sense )
gabberbabe: This was super helpful I definitely have something to follow before I do this myself thank u xoxo.
Araceli Barboza: So easy thanks to you. I have medium length hair but I wanted to put it in a 26" bundle and my clip ins are popping rhanks to you. I have zero experience and zero knowledge on bundles and wefts etc but you still made it easy to follow along !!!
faye5108: So helpful, knowledgeable, detailed, perfectionist. Thank you for sharing your skills.
SoRena Dix: Hello! I understand that it would be done with the same steps, but please do a tutorial using 4b/c tracks. Thank you!
Marriah Franklin: thank you thank you! I have a thinning spot on the top of my head and need to cover it for awhile in order to let it grow, and I just made made my first clip ins because of your video.. THANK YOU SOOOO MUCH!!!
Bria Niccole: This was the BEST instructional video. Thank you!
Kawaii Manguru Chan: Thanks! I needed this for cosplay!
Sophie Wesselman: This was so helpful. also, i just wanted to take a second to acknowledge the horizontal braid trick, to keep the clips steady. fucking incredible.
Maya: Thank you for posting this video! It was very thorough.
MsButtaSoulFly: Veryyyyy informative and carefully explained I will definitely be trying this method. I would like to point out that unless you have a kinky curly texture of hair your clip-ins will slide slightly if your natural hair is as straight as the mannequin. Gathering the mannequins hair along with the track hair when tugging to show how secure it is is very deceptive. Otherwise great job
Caroline Ali: Thank you for a thorough tutorial, very useful. Did not realised how much detail goes into doing it, make it relative simple but have to set time for it. Very useful
veroh1291: thank you so much!!!! you make it look so easy. Now I just hope I can get it done right lol.
Sandra Ekhoff: I love your video, LOVE IT, LOVE IT. Very easy to follow. WELL DONE!!! Thank you!!! Have you made any Non-track frontal hair extensions? and Seamless filler clip hair extensions pieces? Do you know how to make them? I would like to DIY them!! Please help
Big Hill Tv: Thank you for the video....i've watched a few on how to make clip extensions however your video was very easy to follow and understand! Very thorough and explained everything!
Allie Champagne: This is the best way in my world. Stands up to repeated washings, very sturdy & doesn't feel stiff like glue can. TOTALLY worth the time & effort, considering what I pay for high quality Remy hair. Excellent tutorial!!
Izza Zaparolli: Thank you ! I’m so happy you did such a great video without nonsense talking
Nancy Ching: Thank you for the amazing tutorial!
YourFavoriteMadison: Your video was the most helpful and understanding and very detailed. Thank you so much for sharing!!!
kitkat Xoxo: Lol I’m so late but I came across your video when I was searching up how to make clip ins and yours was the most helpfulmy clip ins came out beautiful! Thank you for this video!
Desiree Beatty: A very helpful video! Thanks for going step by step! Definitely a new subscriber ! ❤️
t o ñ e t a a a: THANK YOU SO MUCH FOR MAKING THIS VIDEO!❤️ GODBLESS YOU!
Kim Jackson: EXCELLENT TEACHING SKILLS!
Shy Shy: Ty for being so clear and concise. Very professional. Good job! Please if you haven't and know how upload a DIY on sew ins
R AFC: Excellent instructions! Perfect ~ thanks
Ginger Lovee: Great video! Best tutorial I have found for clip in extensions!
Bkhottiema70: This is an excellent tutorial. I love clip ins.
Journal Journey: You are awesome!!! Thank you so much for this tutorial. This has been the best one I've seen. My your channel prosper ❣️
Bella L: This was really detailed. Thank you!!
Analise Zagar: I made some back in beauty school and made a wig and learned differant braids and how to sew tracks in . That was a long time ago. So this is a nice refresh course .
Ke Ke: Very informative video! I really like ur videos. Please keep making them. I wanted to know how to sew in clips and now I know!
lilmissanaelle: Definitely will be trying this, I’m so over using Glue...great video
ForeverErica Love: Just came upon this after looking up how to make clip on extentions. Great video. Thank you so much
Keda King: Thank you so much chic! Very informative video! Great job
Pink .Butterfly: Thank you!!! You made this so easy for me!!
La Cartel: So detailed. New to your channel and I so love it ❤️ thank you God bless you
Steph: Amazing, clear, and helpful video! Omg thank you!
Cecy L: thank you so much, made everything so much easier!
Ecdreamz: claps and cheers for you. thanks so much and u seem so patient. lol came out nice and clean!!!!!
bthmcrlvr: I’m so glad I found this I bought my clips, thread and needle for $5 on amazon. I was going to ring up a hair extension place to do it for me but they were charging me $40. Can’t afford that! Thank you
Sade *: Very easily understood. Thanks very much!
NativeMoe Risin: I love this video. It has alot information and instructions. Thank you for that. God bless
Pretty Nikki: Perfect explanation.. Can't wait to try this myself
Karen Colon: Thank you so much, this tutorial is quick and simple
Kanaan Williams: Amazing!! Now ik my hairstyle for graduation.. Thank U sooo much <3 keep it up
Hazel Eyez: I love you lady know we don't know each other but this was a very easy and simple video to understand and thank you ma'am.
Roshanda Allison: Great teacher! I have tried several brands of hair none has beat Mayhven
70’s Fashion &Hair Channel: When removing the clip ins how does the hair tangle and web together making it hard to remove them? I'd like to make some and I was concerned about this.
Julie Macharia: very informative....i was always confused which direction to sew the clips thank you
Mexicat: Amazing video! Great explanation
Jazz Martin: Very through tutorial. Thank you sooo much!
brnize1969: OMG I LOVE YOU. THANK YOU FOR THIS TUTORIAL!!
Taylor Griffin: wow! so helpful and detailed. much needed video thank you for posting
RubieKitty: EXCELLENT VIDEO!!!!!! I appreciate your fine detail, great camera angles and editing. awesome awesome awesome.