Pronto Quickweave With No Leaveout
- Posted on 13 September, 2012
- Sew-In Hair Extensions
- By Anonymous
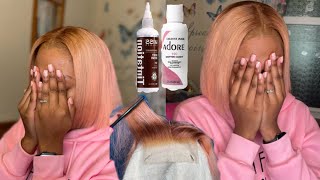
I wanted to attempt this method of doing a quickweave after watching Msdivalike's (Keke) recent video. Iamminglee is the originator of this method.
Finished Look http://www.youtube.com/watch?v=V-bH7Jz...
Hey guys, so I am back doing a video on how to do a pronto quickly. I was watching this leave a like and she showed how she did her. She was actually using longer hair. I decided to do mine with no leave out and an invisible part because I'm natural, so I don't want to leave any of my hair out, I'm first gon na start by braiding of my hair and the rays. I want to focus on the most. Are the ones around the perimeter, so I used some just some some regular braiding hair to add to my edges so that my edges aren't being so stressed and I make sure that those braids are, you know pretty secure the rest of them. I just kind of do big raggedy braids, nothing too fancy, and then I tied our look with a rubber band when I'm done. I'M gon na use some growth, protec solution here and you'll see why a little later in the video, so I'm just gon na use it right here where I'm gon na. Do my invisible part at just to make sure that I don't get it get any glue on my hair once I cut the cap and you'll see exactly what I'm talking about a little later in the video, so I'm just gon na use that growth protective solution Right in this area, this is not necessary. You can also sew the cap down. You know right next to your part, if you want to so I'm gon na just use a regular stocking cap. I mean these two of them actually one. My black one is kind of old I've been headed and I just decided to use it. Take my needle and thread and go ahead and sew the stocking both stocking caps to those braids around the perimeter. I didn't even really sew them really tight. I just sewed them just enough so that it will stay on and then I tie it off at the top and I'm ready to begin so, of course, we're gon na use some hair glue a little pump it up. If you need it. This is the 27 piece hair that I just had in my hair box, so I don't have to bring some clips if you need those a blow dryer and some scissors, so I'm gon na take my first piece and I'm gon na measure across the back of My head and I'm gon na also measure a second piece. It'S gon na go right above it I. What I do is I will measure two pieces, cut them and glue both of them. Then I will let the glue become a little tacky and then I put place both of them on my head, one by one. That gives a chance for the glue not to be so runny and uh. You know for it to dry just a little bit and I just pretty much space my space. The piece is about probably not even a half of it, a half of an inch apart, like really really close together. I'M sorry that you can't really see exactly how Farms facing it, but they really are just right above each other, maybe a centimeter, a centimeter apart, and I just keep going up with with the various lengths of the 27 piece and I'm using most of the longer Lengths, I didn't use any of the shorter pieces of hair to do this portion. I use probably the I think, there's like a total of four lengths, maybe four or five, but I use probably the the two longer lengths for my entire head. You can always, you know, use clippers or you can use a razor to to cut the hair down. If you know the pieces are too long which you will see in the next video, so I just keep gluing pieces. You know right above each other and using my blow-dryer to ensure that those you know those pieces are actually dry and I'm being careful not to go above, where my part is you want to be mindful of where your part is under your cap. Okay, so I pretty much have used all of the number 427 piece that I have. If I use these little pieces, it's gon na be an obvious, a lot of demarcation because they're not long enough, so I'm just going to go ahead and start using this long. Hair that I have - and I indicate somewhere what type of hair this is. I don't remember, I think it's I'll train velvet, maybe something anyways. So the next few Clips will be of me installing this I'll probably put a few pieces of this number 30 in there. Just to give it some Flair, so yeah, the next few Clips will be me doing it, you, okay, so we are pretty much at a point now where we want to actually cut the cap. So I'm here to pin this back out of your way. So you're not distracted by it, take you either a pair of scissors or get a you know the little eyebrow razors. If you had one of those, if you're one of those because they're actually easier - and you don't have to worry about doing like this - you can just kind of put it in there and swipe it. But if you don't so get you some scissors and you want to be really really careful like extremely careful and not cut your hair. You'Re gon na find this. The open area, which is your part, just want to cut a little bit to make sure you're in the right place. You should be able to see it. I don't know if you can, but I can see my part in the mirror. So please don't cut your hair because I can't help you cut your hair, but it is easy to do like this and if you need to cut one cap at a time, especially if you have two different color caps that helps so and then it's easier to See it should be pretty easy to lift up, because that's the part that didn't have the growth protect solution and if you didn't progress, growth protects solution on. You would have song this part of the cap down too. So it should be right in the middle of where you sewed it down. That'S gon na expose your part, so again be very careful if you have to put a little bit of time a little bit at a time. Okay, so once you got it cleared and exposed, and all the good stuff cut your excess off again being very careful not putting in your hair on this side same thing, all right, so there it is basically you're gon na. Do your invisible part right on top of it, sub-q go so for the invisible part had a few people. You know request me to show it up close, because I always skip it, because I have videos on how to do an invisible part. Plus there are tons of other videos, but I really I will show it now um I pretty much cut pieces about this big. It'S maybe don't blow my mind. Go by how be your spacing is so from your part into to your first well, you want to cut just a little bit past that so your first piece will fit nicely from your part, and then it slightly um covers the width, and I pretty much just Um at glue about four or five or more depending on you know, have my mood but I'll glue like a few of them and then let them kind of you know let the glue dry slightly too. It gets tacky and then I'll just place them one. On top of the other, not on top but directly above so that there's my first one, here's my second one and you want to get that as close to your natural part as possible, now have some pieces that are a little shorter. But that's okay! You just don't want all of your pieces like this see how it doesn't completely meet. The first will, but that's fine, because most of my pieces are longer, so I'm just gon na continue to do that. Again, you want those one right above the other, and then I just continue all the way up. So our fast-forward a little bit, so you guys can see you so now. I'M gon na close up their little section is open. We'Re just gon na wrap their hair around to form au and then the next one, I'm gon na form like a circle and I'm gon na leave room for my closure piece. So you can see how it's kind of circular. So I'm gon na put my closure that I made right down in that circle. Make it big enough just to fit right there in the circle. So I finished putting everything together and I guess mine really wasn't a prawn so quickly, because it took me a little bit longer but anytime you're using 27 piece hair. It'S gon na take a while, because the hair is a little bit more intricate and the wefts are salt, they're single whips, so you have to you know, put way more than if this was a fool like if you have virgin hair or something like babe or A long hair it wouldn't take as long but anyway, so you guys are gon na have to go over to the next video and I'll link it below on how I could and finish up the style, because this video is like hella long. So I will do all of the cutting shaping all that good stuff in the in the next video. So you guys make sure you go there and see how this down turns out thanks for watching


Comments
tabbyshauna: Wow you did a great job! Especially on the invisible part. Looks very natural. I wish more people would do it like yours.
fabulasityisme: This is soo pretty! its crazy how they have a name for this method now LOL i did my quick weaves like this all the time.. Its cool because you can leave the cap on!
Monica Fox: Your tutorial helped me a lot. This was the best video that I've come cross to show exactly how to do the part. When you sped it up tho, I got lost. I really couldn't see how you hid the wefts at the closure. I must have watched it 20 times and still didn't see how you did it.
_Domo_: Can't wait to see part 2. Really neat
Columbiana Roseboro: that part is great! it really helped me!
kandidbeauty: the method is meant to be a bit more quicker. but the use of the 2 caps eliminates having to mold or gel ur hair down and acts as a guard to protect your hair from the glue. it really does work better if your using longer hair. Since i didn't do a leave out and i used shorter hair it took me a little longer!!
kandidbeauty: lol, it def takes practice and patience more than anything. thank you!!
savegeboy g: Thank you for posting this...this helped alot!!!!!!
della dabner: U have one of the best invisible parts I've ever seen. Mine definitely never turned out that good that's why I don't do them.
Cina Bean: Did you find that sewing the cap to the anchor braids really kept the cap from shifting?
Tahira Miles: Looks very natural
Pebsia: OMG.....i have been searching youtube for some1 who doesnt have leave out on a pronto and now i found u *big hugs*.....i would have loved if u had shown the closure in more detail for i am a newbie to all of this
Manoucheka Damas: What is the cutting small pieces called ?
NeNe Shavon: gotcha i need to try this method if it's going to save on time..thanks a bunch
kandidbeauty: thank you!!
kandidbeauty: to be honest with you i didn't even leave it up long enough to tell a difference. i normally don't leave my quickweaves up longer than two weeks
kandidbeauty: thank you!!
kandidbeauty: thank you:)
kandidbeauty: thanks boo....yeah its pretty much a glue in wig that stays on ur head. I have done it before 2 but chile u know u have to give people their credit lol!!
SydneyKnows: You are so talented!!!
browndiva82: Thanks for uploading.
kandidbeauty: thanx hun!!
NeNe Shavon: i'm confused..whats the difference between a pronto and a quick weave? They both can have no leave out so maybe that's why i'm confused....thanks in advance
SydneyKnows: 2 videos in one day!!!!!! YES!!!!!
fabulasityisme: no problem! =) LMAOOO oh girrrrl yesssss i totally understand!! HAHAHAAA
kandidbeauty: thanks babe...its up now!!!
kandidbeauty: ur welcome!!
Pebsia: and also could you do a video on ur closure?..pls..thx
Aboveblessed: Nice job cute!!!
kandidbeauty: Actually I wrote that in the description box but thanks.
kandidbeauty: I am on a roll honey:) now there is 3 lol!!
kandidbeauty: its up now:)
Monica: Nice
Briana Vincent: Actually msdivalike got it from iamminglee but its cute !
FunkoDisco100: mines is too qt!
Zaida Pugh: she is doing the most why is she puting in weave jus to braid under the can smh lol her hair itself can braid
Jane Haywood: girl i like how u show step by step thanks i do my daughter hair but the closing was wrong but thanks to u i got it and i will be doing my hair soon and posting the after product lol