Quick Weave Tutorial With Leave Out | Under $40 | Beginner Friendly
- Posted on 30 April, 2021
- Sew-In Hair Extensions
- By Anonymous
*** BE SURE TO WATCH IN 1080 ***
WELCOME BACK TO MY CHANNEL
AS ALWAYS if you have any questions or comments, comment them down below. I would love to hear them and respond!
BE SURE TO TURN ON MY POST NOTIFICATIONS SO YOU DO NOT MISS A VIDEO AND SUB TO MY CHANNEL
PRODUCTS USED IN VIDEO:
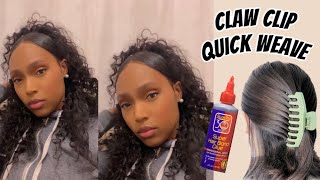
- Duck clips
- Got2B freeze spray
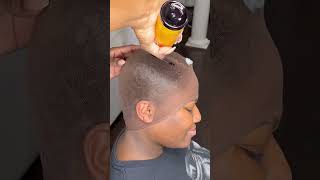
- Black cap
- 30 second super hair bond glue
- Ebin edge control (purple jar)
- Edge control brush
- Fine tooth comb
- Flat iron + blow dryer
- Foaming mousse
- Chi iron guard style & spray firm hold protection spray
HAIR USED IN VIDEO:
- Shake - N - Go Organique Mastermix Deep Wave 3 PCs 24", 26", 28"
CONNECT WITH ME ON SOCIAL MEDIA:
IG: sierraasaron
Tik Tok: sierraasaron
Twitter: sierraasaron
FOR ALL BUSINESS INQUIRES:
Email: [email protected]
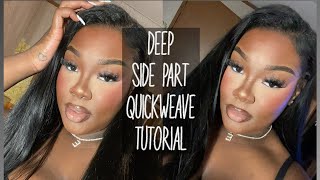
Welcome back to my channel, it's your girl, sierra saron, and this video is going to be a hair tutorial as to how i achieve this budget friendly, easy and quick hairstyle. So if you want to see how i got this hairstyle keep on watching next to my channel, it's your girl, sierra saron. This video is going to mostly be a voiceover, but i wanted to record this part first, so it doesn't drop jump in and y'all mad confused with. What'S going on so for this hairstyle, i did wash and blow dry my hair already and off camera. I had to figure out like what kind of parts i was doing, because we would have been staring at each other for about 10 minutes because they are still on one. It'S not like the typical, quick weave you need to figure out like. Where does your part? Stop where does it start, so i pretty much sectioned off the whole front of my head. The whole front of my head is sectioned off now. That doesn't mean i'm gon na use all of that, but it gives me enough space, so you would rather have too much hair left out than too little, because then you, what are you gon na cover the tracks up with? So that's just like a little fyi. A little reference if y'all are watching this tutorial y'all want to do the hairstyle, so the whole front is sectioned off and the whole back is out and, like i said, i blow dry this so now off camera, i'm going to do the cornrows in the back. I'M just doing straight backs nothing, fancy i'm going to show y'all after i do, i'm going to show y'all what it looks like before i put the cap on everything so yeah. This is my introduction and now we're going to get right into the video. So stay tuned right, so, as you can see, i just did straight backs for the back and then just two big parts to separate the hair in the front. So now just taking a black cap, you can literally just get it from the beauty supply store. You just want to tuck all your braids in and get it out the way, so i'm using the spray, because i could not, for the life of me, find that molding gel at my beauty supply store. So if you can find that gel use it, but there got to be spray work, just fine as well, and you just want to spray it all over your cap, because this prevents the glue from seeping through into your hair. I rotate it in between using the spray in the blow dryer about three times, so i did this for about three different layers of me, just spraying onto the cap and then using a blow dryer when it dried and then doing that three times over alright. So, like i said this is a quick and easy. If you need something really quick get beauty supply store, bundles. I was not going to use real bundles because i honestly did not know how this was going to turn out so with each piece of hair that you take. You want to measure before gluing cotton, whatever whatever whatever, because if the. If the piece is too long and you try and go and glue it to your hair you're, either going to accidentally glue it onto your real hair or you're just going to mess it up all together. So with each piece you take, you just want to measure it first cut glue and then stick to your head and blow dry. So i'm going to show myself doing it a couple times over. I had to do a change of scenery because i cannot finesse no mirror. I have to look in the mirror and see what i'm doing so. I had to move closer to the mirror, that's hanging on my door and then look at it that way. So if you can't see what i'm doing just also look in the mirror, because that can provide like a better view of what i'm doing, but that's really all i'm doing is that i'm just cutting the hair gluing it and then literally, estimating like the space in Between where i want to glue it at, i would say, leave about an inch, an inch and a half in between your tracks. You do not want them close super super close together, because then it's just going to look bulky and weird and plus, at the end you're going to see that i ended up straightening it. I was not thinking when i first purchased the hair. So when you go and buy the bundles, if you want like the look, the exact look, i have get straight bundles because i ended up realizing. I don't know how to curl my real hair into that consistency, so the leave out wasn't going to match. So i had to go back and straighten it, but it still looked good in the end. Knockouts do so so for pretty much the entire back of my head. I glued in a curved shape, but when you get to the top you're going to one use smaller pieces of hair and two you're going to glue the hair in a straight line versus you doing a curved shape, because when you get to the top, you want It to lay as flat as possible, so okay, so now i'm just taking out the braids in the front and i'm going to straighten it. I wasn't trying to get it blown straight. I just wanted it a little bit flatter than how it was blow dried and plus i had to take the waves out anyway in the hair so now using protecting spray. I use this on each piece i use so anytime. You see like the steam coming out. That just means i sprayed that before straightening it like. I said i wasn't going for bone straight. I was just going for a little straighter than blow dried. So that's why you sort of like still see it somewhat puffy at the end, because i really didn't care about that part. I just needed it a little bit flatter knockouts so now using shine and jam you're just going to apply this all over the roots of your hair, because this is going to help form your braid when it comes time to apply in your braiding hair. So now this part took some trial and error. I can't necessarily explain how to braid, because nobody ever taught me how to braid. For some reason, i just knew how to braid. I wasn't taught that i wasn't taught how to cornrow none of that, but it still took trial and error for me. So honestly, like this part, all i did was that i started braiding my real hair and then about maybe two three folds over is when i started adding in the braiding hair. So the best advice i can give, you is add small amounts of hair and then keep working it in. So it can look as natural as possible because if you add a huge amount or like a big chunk of the braid in they're, going to tell that. Well, one it doesn't matter if anybody can see that it's braiding hair, but you want it to still look as natural so and you want the hair to remain the same length. So that's why i keep saying apply the braiding hair in smaller amounts and spread out. So it can just look even throughout the entire braid, so just another quick tip is that i also apply the shining jam as i'm still braiding my hair down. Okay. So now using a bed head hair wax. I'M just going to apply this to my leave out before straightening it, so i can properly cover the tracks. I don't remember what time it was when i did this tutorial. I just remember toward the end i started getting so tired and i think what threw me off was when i came to the realization that i had to straighten the bundles, because i had already put half of the bundles in my head and i was still going. I don't know what time i actually got done this tutorial, but it honestly didn't really take that long. I just had to keep doing stuff in between all in all. If you sit there and do it all the way through without the washing and blow drying part, you should have this hairstyle done in like two hours: next, okay! So now i'm just taking foam and mousse and i'm going to apply it to the two braids, because this can help reduce the frizz and help it last longer. Okay, so what i didn't take into consideration, where my edges, until after the fact. So if you want a lot of edges out, pull them out prior to you doing the two braids, so you don't have to worry about snagging on your braids and ruining your braids trying to get your edges out. So now i went in with my even edge control the purple um jar i'ma, just use that apply that to my edges that i did take out and imma just swoop them. This is the best edge control brush ever because i use both the brush and the comb part. So it really is a two in one. So if you do not have this, you need to go to the hair store and get it, because that is a lifesaver. I literally bring that everywhere i go knockouts so okay, so this part is optional, but i figured why not because the whole pack only cost 1.99 and i just wanted to have it a little like a dangling hoop effect, just to add like a little extra. So now i'm just adding finishing results and brushing it through and i'll show you all the finishing look. So stay tuned. Okay. So this is the finishing result. I really like it. It'S giving very much cute very much affordable. It took me about me because i'm lazy and i like to take breaks. It took me two days but honestly, this hairstyle, all in all aside from washing and blow drying, your hair will take you like two hours tops and you're done, you're in and out and you're done, and it was easy because i use the beauty supply store bundles. I'M pretty sure you can like screenshot um the the packet that i held up in the video, and i will also leave everything down below, as always. So, as always, if you have any questions or comments, be sure to comment them down below and i'll be sure to answer, and if you like this video, please be sure to give it a thumbs up. And if you like me, if you love me, if you can tolerate me, make sure you subscribe to my channel and turn on my post notifications, so you can be seeing when i will be dropping another video and thank you so much for watching you.

Comments
Mercedes Lawrence Marsh: Cuteeee doing this today thank you .
Jaide with an "i": Super cute!!
Brittany: Ty for this ❤️
Zaiye Rich: Plzzzzz do a tutorial on this makeup look ?