Hair Steaming My Brazilian Hair Extensions. {From Straight To Curly}
- Posted on 29 June, 2016
- Sew-In Hair Extensions
- By Anonymous
Don't forget to follow me on.........
Facebook: http://www.facebook.com/Tayzway
Snapchat: tayvsohyeah
Instagram: ohyeahitstay
For business inquiries or advice contact me via email or phone
Email:
[email protected]@gmail.com
Phone:(682) 334-4395
-~-~~-~~~-~~-~-
Please watch: "4C Natural Hair $7 Hack: Making your hair more managable. {No Chemicals}"
https://www.youtube.com/watch?v=D-IYxE...
-~-~~-~~~-~~-~-
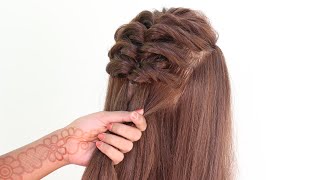
What'S up youtube nation, it's your girl, liberated one and i'm coming at you guys with a diy on how to steam process your extensions. Now i got this hair from the pretty hair lounge in fort worth texas, and i have ran this hair through the ringer. It'S been washed dried flat, ironed, curled, flat ironed, curled washed dried and, as you can see, i have completely killed the loose curl pattern. Now, i'm going to show you how to steam process your extensions at home without having to pay the hundreds of dollars. It'S going to cost to take you to an actual beautician or to send it back to the vendor for processing. So this is some virgin brazilian hair um in a 1b i have inches 18, 20 and 20.. This isn't all three bundles, but it's pieces from each bundle again, i'm reviving old hair because i'm going to add it to a unit. So, of course, what you need is your hair. Now this is based on preference. Some people don't like it, but silicone mix, which is the conditioner. This is virgin olive oil and soybean oil you're going to need aluminum, foil and a pan of boiling water. I'M also going to add coconut oil, but i'll show you guys that as we go along just gather your supplies again, you're going to need hair, detangled, hair silicone mix, if you prefer virgin olive oil, if you prefer virgin coconut oil, if you prefer again, you don't Have to condition the hair it's just recommended so that you don't dry it out, especially considering you're going to be using boiling hot water. You need aluminum foil and you also need a pot of boiling water, so i'm going to get started on the actual tutorial. So you can see how all the required tools come into play: foreign, okay, so first you grab one of your aluminum rods, which looks like a flat straw. Basically - and you want to twirl the piece of hair once over it and then fold, probably like a half inch piece over it, that's to secure the hair in place, then of course, you're going to wrap the hair around that area again to secure it. One more time, and then you just keep wrapping down the rod now you want to keep the hair as close as possible, because that will make for tighter curls and it helps to prevent unraveling. Now, once i'm done doing this, i take and fold the excess, aluminum rod upward, and then i wrap the end around until it's like locks it in place very similar to the function of a perm rod. Now you can secure it any way you want to, but this just so happens to work easier for me again. I take my rod. Put my strip of hair in it flip another piece of rod over that hair to secure it in place and then wrap the hair right on top of that piece to hold it and then i'll continue to wrap my hair down the shaft of the rod until I'M out of hair and then i fold the excess rod, because you should have excess rod left and i wrap the end of it around the middle of the actual um curl. If you want to call it that change my okay, so i've got my water to start boiling. I'M going to add my virgin oil, which i got from the dollar tree. My silicone mix, which i got on amazon, that i've had for a while and some virgin coconut oil that you could get like any supermarket. This will condition the hair. While you are, i guess, texturizing it. That makes sense so now that our coconut olive oil, silicone and ion reconstructor mixture is boiling we're going to go ahead and put in our hair and you're going to let the hair boil for about 20 to 25 minutes. All right. I placed these metal clips in the middle to keep them separated so that when it starts to boil again it's not um, i don't know, can you guys see it boiling? Let me put it down because it is it's boiling, but when it starts to boil just in case the hair moves around the wefts will stay in. I guess as organized as i have them. So here you go place them in there gently easy and boiling see you guys in about 20 to 25 minutes. Okay, so it's wash day and it's actually day two - i let them stay in for an entire night and they because i wanted them to dry in the um. What this thing called and basically the perm rod, because that's what it is, the aluminum foil rod. So yeah let them stay two days, so they could basically dry in the current wallet and now i'm about to wash the hair, because it's still got all the conditioner on it. Okay, so i wanted to come and show you guys how the curl pattern came out again. I had killed every ounce of curl that this hair had in it because i kept applying so much heat and now it's back to a loose curl pattern, don't mind the conditioner in it, i'm actually about to wash it so hold on there. You go that helps you see it a lot better, so you see the tight curls when i wash it don't worry, they will loosen back up into the nice loose curl pattern. It originally had when i first bought it, and this is my pretty hair, lounge virgin brazilian hair. Again it was a loose curl pattern and, as you can see from the video, it had went basically bone straight and me doing a steam processing. Diy is how i restored it, so yeah i'll be back okay guys. So, as you can see, this is the finished loose curl pattern. I put some ion reconstructor on it again, i'm so happy with my results, and this is the diy um. It took me probably about an hour or so to do the actual rolling process, but i let it sit in for an entire day after i did the steam and all that good stuff. So, all together, it would take probably about two two and a half hours to steam processing and then again i let mine sit in for a day, but i'm coming at schwa, i'm just playing um. I hope you guys enjoyed the tutorial i'll. Let you see the finished results. Let me know what you think. If there's some things, i could change. If it's something you don't understand, i didn't want to go too much into detail, because the young lady already has the tutorial out there. This was just my try at it. Alright guys you


Comments
Juleen Forbes: Looks darn good can't wait to see the style
𝓢_𝓗𝓾𝓽𝓬𝓱𝓲𝓷𝓼𝓸𝓷 #𝓖𝓻𝓮𝓮𝓷 𝓢𝓮𝓬𝓽𝓸𝓻💚: Love it !!!!! You did that.. i will share this will my daughter also when she gets home.
Yannick Taylor: Looking great. Love it
Uptown Nay Rob: Keep this up. I LOVE IT!!!!!
UNAPOLOGETICALLY AVIS: great job
L Rod:
GrowWithNiki Gaga: Nice