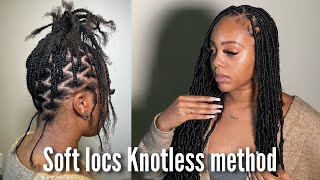
Gypsy Locs | Installing Handmade Locs | Derastyles
- Posted on 26 July, 2022
- Sew-In Hair Extensions
- By Anonymous
Don't forget to follow me on my socials:
Instagram Hair Page: @derastyles_
Instagram: @odera.Ani
TikTok: @oderaani
Business Inquiries: [email protected]
DETAILED Parting Tutorial | How To Get Perfect Parts:
How To: Teyana Taylor Inspired Faux Locs | DETAILED:
PURCHASE LOCS HERE:
https://derastyles.myshopify.com/produ...
Hair Used:
Color: 1B 1 Pack (Curls)
Organique Body Wave
https://tisunbeauty.com/products/22180...
Color: 1B 1 Pack (Curls)
Shake-N-Go Organique Synthetic Weave Hair Extension - BREEZY WAVE 30" (1B Off Black) https://a.co/d/5WgV2qu
Color: 1B 3 Packs (Wrapping Hair)
Outre Crochet Braids X-Pression Twisted Up 3X Springy Afro Twist 24" (1-pack, 1B) https://a.co/d/h6Kdl1o
Color: 1B 2 Packs (Base Hair)
Dansama Marley Hair 24 Inch Marley Twist Hair Afro Twist Marley Braiding Hair for Faux Locs Crochet Hair 3 Packs Synthetic Hair Extensions (24 Inch (Pack of 3), 1B) https://a.co/d/c8WW6zp
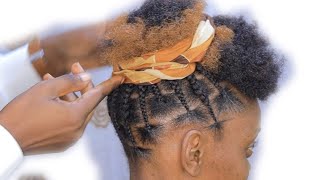
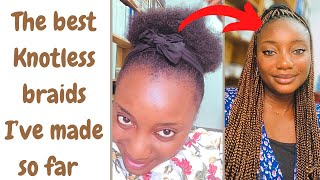
Hey guys welcome back to my channel, my name is odaira annie if you're new here go ahead and click that subscribe button, if you're returning welcome back so today we're going to be installing these locks that i made. This is a softer calmer, more like majestic. Looking version of tiana taylor locks, i like like the texture that i use with those locks, but i definitely love the curls that i used in these locks. So i'm going to show you guys how i install it and at the end of this video i will talk more in detail about these locks and where you can purchase them, and you know how to purchase them. What they include you purchase them. Everything about these locks more towards the end of the video, but for right now, i'm going to show you guys how i install them. Okay. So what i'm doing first is i'm pre-parting the sections, and i have a lot of pre-parting videos out there already that's in a lot more detail, this one's going to be more focused on the more the installing process. So all i'm doing here is um pre-printing. My parts parting them again and then braiding in the lock i'll show you guys a slower version of that later on. But for this for this client and the shape of her head, she had three rows in that line below her ear and then she'll have five rows in the front. If we're going from ear to above - and you guys will see that later - and this is me just stopping real quick to show you guys the locks honestly, this is my first time installing these locks on anybody like she was the first person to get these locks Installed, which is why, like i don't know, i'm looking at them, i love them. I was really excited to do her hair, so um yeah. These are the first three locks and we're gon na install the rest of them on her head, and here i'm pre-parting. The rest of her head, i already have a pre-parting video out and you guys can find that how to part medium, knotless braids. It'S the same way. I part for these um these braids and, like i said before, um different from that video in this video. Her head shape is different below her ear. I didn't want to put two rows because i felt those would be too big of parts. That'S why she has three rows, as you can tell one two three below the line i made from ear to ear and from the front you will see that i have five rows above the line from ear to ear, but this is me, showing you guys how I part each section and how i braid in the lock. So all i do is i comb it through add some gel comb it through and then i start with, like the basic knotless braid under under and i keep going down. I get part way and then i will show you guys how i add the log in okay. I usually like to go like an inch down and then i'll add the lock just so that the root stays flat. You know it's a knotless braid. These are knotless locks, make sure that you add the lock a little further down just so that it stays knotless. When you add it in you, just pull the um, the hair that you left out on the rightmost end through the loop, and then you continue braiding. Now, when i continue braiding, my under braid turns into an over braid and honestly, your under braid can be still being under braid. It'S just easier for me to switch to an over braid, and i just braid the rest right. The way down and the lock has been inserted. Okay, so here's me doing the process over again. The first thing i like to do is always comb through my client's hair, but, as you see when i comb through, i'm very gentle make sure that if there's any knots, you just take your time with your client's hair, because you know more texture, more coarser. It rips faster and breaks easier, so all i do is i do that simple knotless braid or that initial knotless braid. Let me not call it simple, because it took me a minute to learn how to do knotless um, so the knotless braid i braid down about an inch and i'm gon na get in frame. So sorry, this is me speeding up um, but i braid down an inch and then i add, hair to the right most or honestly, whichever strand you want to, the right mostly doesn't have to be that one just add the um, the lock to one of the Strands and then continue braiding down and i switch from and i'm in the way i switch from an under braid to an over braid. As you see here, and that's basically all i do if this wasn't as clear, you can just rewind the video and watch the other one and i'm gon na quickly speed through the last one and yeah. Okay. Now that you have the lock inserted into the hair you're going to insert the wrapping hair and you insert it at the base of the braid, you insert it into the clipping hook into the hook, and then you latch it closed and you pull it through and That'S all you do to insert the wrapping hair and then we wrap and like always, you wrap tightly at first, because it is knotless. It still remains like movable if that makes sense and your hair isn't as stiff as long as you do. The knotless method and i go down about an inch and then after that i stop wrapping so tight and i start to add like little humps or little curls, and i i do this in all. You hear this in all of my videos with i'm doing lots. I do the same technique for a majority of my logs. It'S like the butterfly method that surfaced a while ago, still is here, but a messier version um and i don't use the water wave hair because i feel like that's too unnatural. It'S too pretty per se. I don't know if that makes sense, but not natural and rough enough for me, so the hair i, the wrapping hair i use, is linked, but oh wow is linked below and all i really do is, i add texture with my thumb and i will show you Guys again, how i do that here i am pre-parting and prepping all the sections before i actually start the wrapping process. I braid it down, add the lock and then i add the wrapping hair and i will slow it down later to show you guys how i wrap more in depth. But here i am adding the lock and then adding the wrapping hair. Okay. So once the wrapping hair has been added, all the logs have been added, we're going to move them out of the way, and then we are going to start wrapping. So, like i said before hold on, let me move the camera so that you guys can see more clearly, okay. So what i'm going to do? First, is i'm going to wrap very tightly at the roots, like i said before, and i wrap about an inch down just so that the hair lays very flat also remember to take your band off. I do it when i switch from wrapping to parting um. I take the band off because when you wrap, hair does get everywhere and it will get into your gel watch um. So i wrap tightly for like an inch and then, after that we start the process of adding those cute little bumps. I don't know. I said it like that, i'm so sorry, but you add those bumps with your thumb. This is me like this. That'S real time so like now, this is sped up, but all i do is, i add it like the butterfly method, and i don't know if you guys want a more in detail like video of me, if you guys want a more in detailed video of me. Um, just basically talking through the wrapping process, i can do that as well. Just let me know down in the comments. Okay, so here i am doing it one more time, wrapping it tightly about an inch down before i even begin doing the let's call it mini butterfly method, so i use my thumb just to add texture to the locks, and that should be like my third time Doing it so, i hope at least one of the shots that i took of me installing these locks was helpful if it's not and there's a process that you need help with. Just let me know down in the description and i'll make a more detailed video. Just of like solely installing the logs okay, so that's really it for the installation process so that, if that's what you came here for, i hope i was able to help um. If you go to the very end of the video you'll, be able to see the results and you'll also get to hear a little bit more about the locks, how much they include um what it comes with! You can purchase it on my website. You know where to find it at, but just a little bit more details on the locks and yeah okay, so i saw you guys comments on this video, which is why i wanted to make a couple of changes to the locks. Initially, you could buy the locks on my site, which is 50 locks included, but then i realized, everybody's head shape is not the same, so you can now buy these locks for packs of 12, and this is one pack and in each pack comes 12 locks. Individual locks and based on the size of your head, you can purchase as many i recommend five locks, so you can purchase these on my website. These are how they come. I know somebody recommended like a lock class but as for right now, i'll be selling locks and i will keep you guys informed. If i decide i want to do a class

Comments
Dipped in Shanelle: thank you for sharing sis! the gatekeeping on this style over the last few years has been crazy! this was so good! i’ll be purchasing from you soon! ❤️
meraaaaaaaaaaaaa.___: do you sale the locs as well ?