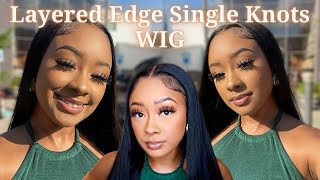
Sew In Weave Tutorial - No Glue - Diy
- Posted on 28 July, 2016
- Sew-In Hair Extensions
- By Anonymous
*******************************************************
LET'S STAY CONNECTED:
Instagram: http://www.Instagram.com/ItsMeMissRuby...
Twitter: http://www.Twitter.com/ItsMeMissRuby
Health and Wellness Products I sell: http://www.Linktr.ee/ItsMeMissRuby
Hey pretty girls, how you doing it's me miss Ruby about to show you how I installed my own sewing. We from home and achieve this natural finish, make sure you subscribe, make requests and comment below to get the most from my channel, because I know a lot about extensions and I am here to teach ok, let's get started. First, I braided down my foundation. I usually use synthetic hair to add in in order to make the braids tight and sturdy, but this time I braided it using the hair off of the weft, because it's not as dry as the synthetic hair, which is actually a fiber. And I've heard that it's healthier, so I cut it off the weft and proceeded as such. Now, I'm doing a middle part so in and only leaving the top out to cover the tracks. So it's important that with any weave to have anchored braids on top and around the perimeter that are small and neat, because these are the most important for achieving flatness. I like to be safe and make two cornrows on each side on the top. Before I start my beehive and that's how I avoid bulkiness people, often wonder how I do my own hair in braids and weaves, and I tell them using two to three mirrors at the time I usually sit on the counter and open the medicine cabinet actually to Use that mirror, but for the sake of this video I'll, show you how I do it with a handheld mirror boom moving on, usually I'd leave the sides out for a versatile so in which means I won't break them down. But this time I just wanted to braid it all down underneath, so I don't have to constantly Flatiron my edges or put products on them to lay them down and blend them with the um we've hair. So I did a perimeter braid on each side of my head, then proceeded with a beehive in the middle, which is basically one long cornrow, that's parted in an ongoing circle and ending in the middle of my head. When I do other clients hair, I make sure that the braids are much smaller than this, but it's too much to do on my own. So you know I just did this, but since my hair is thin once I covered it with the net, it was still super flat make sure to find space in between the cornrows to stitch down the tail ends of your braids, because that's very essential to maintaining A flat base as well doop before the net, though I added oil to my scalp, which is also super important. I don't know how many clients I've had complained that they hate how dry their hair is in weaves and while it isn't good to add too much oil or products to your hair, when getting a weave a little oil on the scalp will do more help than Harm trust me: do me a favor hit the thumbs up if you've learned something so far, uh-huh yeah that lets me know I'm doing a good job. But if I need to set my tutorial game up - and let me know in the comments below - and I will try to do better next time - okay, good looking out now - everyone doesn't need a net because there are not many gaps in between their braids and they Have fake hair, but I have a lot of gaps in between my braids, which means I don't have a lot of space to attach the tracks to so. The net gives me extra space to sew onto and make my weave as full as I want it. Despite how thin my hair is, the net is a challenge to do on your own, though I ain't gon na lie. So if you follow exactly what I'm doing clipping it down on, both sides sewing the front sides down. First then evening it out in the back and stitching it down all around folding it to maintain flatness you'll, improve with time trust me. But if you follow exactly what I did, you should be able to get at least something that you can work with. Now I like to use the standard weaving net with minimal elasticity for my Nets, especially with sew ins that have leave out, because the circles in these Nets do not get too big and they're actually pretty sturdy, which makes it easier to attach hair to. And that's my foundation flat and secure time to so. In my week I got this hair from a supplier asking me to review the hair, and while the hair was pretty and long, it turned out not to be as good as it was promoted to be. So I won't list the suppliers, the name after all, but I did use this hair anyways for this tutorial. I used an 18 inch and a 16 inch bundle of deep wave and doubled the weft in the back. Now, doubling the west's allows you to move faster, and/or fit more hair on the head all together, so I started out by pulling the thread through the weft, then stitching them through my bottom braid. I have another video on my channel where I'm installing someone else's weave and on my video, I discussed the method of stitching the web's down in more detail. But basically, I'm looping the thread through the braid and around the weft three to four times and then doing a stitch where I push the needle through the weft on the fourth or fifth stitch and knotting it as such. This helps to keep the tracks in you'll. Understand what I mean when you do it yourself? I do a lot more feeling than looking with installing my own weaves feeling for flatness feeling for the braid itself to stitch on to feeling for distance. It doesn't have to be perfect, but it does need to be secure and flat, so avoid little bubbles in you know the stitching avoid leaving too much distance in between each stitch, try to be very consistent and to avoid cutting my website just flip them every time. I reach the edge of my braid and I help myself out by clipping the tracks down with each row. Now, as I move up, I began using single webs and cutting them on the ends. Some people flip the whole way through, but I'm a believer that cutting the tracks on top make for a much flatter finish. The reason I stress flatness and neatness is because that's how girls achieve the most realistic feeling and looking so ends. My clients love my weaves because they can wear them so long and they look so natural. So I'm just sharing with you what I know you now. I wanted bangs coming up on each side, which is why I'm laying the tracks at an angle like this, and I continued this all the way up. I wish I'd have angled them at more of a deeper slope to really get more volume in my bangs, but oh well, you live and you learn now. I ended up having to stop doing my hair and leave for a little while actually for the rest of the day. So my weave was not finished, but I did get high up enough to take my leave out out and just kind of like lay it down and put a hat on. That'S what I did so far so good. But when I came back to finish the next day, I noticed that the hair was already tangling, which is why I said it was not a good quality of hair and that's a bad sign. It usually happens to hair - that's not 100 % virgin, which is another reason I'm not listing the supplier. I did make it work for this video, though so, making sure I laid the tracks evenly from end to end moving up and laying the second-to-last track at an angle. Just underneath the top track was essential in achieving the bangs. I wanted, if you want your style, to look exactly like this, just try to follow exactly what I'm doing. Okay, now, if you lay all of your tracks horizontally with no angle at all, you are not going to get bangs that come and hang in the side of your face and the deeper the slope of the angle, the more your bangs will fall in your face. It'S like algebra, ladies, you feel me. This stop track is probably the most important and I recently touched up a client's weave who had gotten it done by someone else originally, because I couldn't fit her in my schedule and this stylist did not lay a top track down. I do not understand why she also flipped all of her webs all the way up and it was lumpy and just exposed and just a mess. So please lay your top track down neatly just like this. You should be able to part and flatiron your leave out on top and lay it flat on top of your weave, looking and feeling natural. If you follow all the steps I just gave you now, I proceeded to cutting my bangs by first using a razor to cut the pieces closest to my face at an angle as well as the top couple of layers on each side. My shortest layer on top was aligned with the length of my natural leave out, hair and angled from there. I highly recommend blending your natural length with the length of the weave by layering and angling, so some of the length changes are gradual instead of having just one short two to six inches of your natural hair, starkly contrasting with the 16 inch weave you just put In you feel me, I wanted to make layered bangs so then I went back on each side and cut a few layers at a time and then framed the ends to have a natural. Looking finish after learning more about cutting, I would do it a bit different. Next time, but this is the amateur process I took at this point and it works for me. So let me know if you have questions about this below okay using the Flatiron to bump my bangs. I grabs one horizontal layer at a time added a little spritz grabbed about two inches thick, each section: moving up grip to the hair in the Flatiron and pulled it backwards, while like rounding out the Flatiron as such, you see what I mean anyway, I mess with It a little bit until it works, it's harder doing it on yourself and it is doing it on someone else, so you might have to play with it a little bit, but you know eventually it should work out and there you have it. My full sewin weed from home. I was so happy with this outcome and wore it for a month, even though the hair was kind of crappy, I made it work and I'd have kept it in longer if the quality of the hair was better anyways. Thanks for sharing this with anyone who, you believe can learn from it, and I will see you guys on the next video god bless you and remember, be you love you and make it all beautiful. You

Comments
charlene clunie-brown: I have been doing my own sew in for years now, but your video has taught me new tips that will enhance my skills. Thanks so much for sharing.
Brittany Michelle: Wow! Firstly, I love your natural hair! So voluminous! and you have flawless skin! Such a beautiful woman! Thank you for this tutorial. I know I can do a sew in because I can braid but just wanted to know how to attach everything without it looking bulky. You did a great job with this tutorial! I feel confident I can do this now. I loved the whole idea of the net, I never even knew that could be a possibility! I’ve been trying to grow my hair out for a while. I’ve wanted to color it but have been wanting to have my natural hair be as healthy as possible so coloring it would have set me back. I got wigs and tried those out to just have fun and switch stuff up. Then I wanted something more permanent! Thanks again for this tutorial!
PlushByAngel: This tutorial was exactly what I was looking for I love how you explain how to leave the hair frame in the face
The Blessed Mystic: Great Tuturial, you made it look easy and effortless
Tasha Richmond: I like how you used the standard weaving net and you pinned it down before sewing. It turned out beautifully. Great tutorial!
Always True: Love your tutorial, you did a great job.
Jenny Boom: this looks so perfect!! thank you for sharing :)
Shaila Diamond: Looks so good. Great method. Texture match is perfect. Just came across this
Keshia Brooks: love the tutorial, i love the fact that your hair seems very healthy underneath, can you go over maintaining healthy hair under sewin please, but great job!!!!
Avah valenta: Love your videos!! Sometimes I have to watch multiple videos on YT before trying something, but your videos are so helpful-and straight to the point. Thank you!!
Reina Roano: very beautiful i always wanted to see how to do this on my own head..this was a big help thank you so much ✌
Paula G: Best instructional install. Beautiful!!
Sheizsoziah Curly: Love ur tutorial!!! U did a great job!
LaTrina Walker: Great Job I love it !! And very helpful I will be trying a sew in for the first time on myself once my hair comes in the mail ... thinking I will post a pic on here under your video after I complete it following your tutorial thanks hun keep up the great work
Sushy_Rose: aw this was so well done! new subbie here!! keep it up girl !!
Denise Garrett: Great job I love it
Courtney Taylor: You're great at what you do! Thank you for this video!
Georgette: Very helpful info. Because I jus attempted my first sew in on myself and yea I should have found this sooner. If u teach a class in person I'm most definitely attending. Very well mad and informative.
Just Me Stephanie: I just learned so much from watching your video. I believe you are the 1st person to show how lay the tracks at an angle to achieve a more face framing layered look.
brookekng: Beautiful job!
Sabrina Trevino: I can't wait to do my sew in for the first time next weekend ☺️
Lisa Sweet potato: Your videos are so informative, I love it you are doing a good job thank you
Magnolia Alexander: You did a real good job,very pretty on you.
Rivkah: how long does this take from start to finish? looks great
Janay The Doll XoXo: Thank you this video is super helpful!
randa: you did a fabulous job, looks nice on you
Gail Hopkins: Just SUBBIE!. Your work is excellent. Came out very pretty & natural!. I am THINKING of sewing i. A weave & this video has been a great LEARNING curve for me. ! Thank u. Very much. I like your straight to the point ATTITUDE!, HONESTY. Sure hope i can do my own weave as well as what u have done. ! Grace to all. gh
flanmaryj: I am so happy to have finally found a very flat looking diy sew in installation! Therefore, I'm a new subscriber. I love thevway you talk and work. I plan to buy 12 inch deep wave hair and I'm dealing with a little forty seven year old, stressed out, widow lady, with hard headed half and too grown sons shedding at the top of my hair. lol. Once it grows out with my braiding, I will be ready to do my own hair. I'm good at doing hair by feeling and want to save the money. My goal is for various middle part styles to eventually be my regularly trained go to style. Thanks and have a wonderful year!
Shalay Williams: This came out so natural looking.
Monsie Babe: New subbie and thumbs up. You have magic hands. I'm so looking forward to more weave tips and hair vids
Anita De La Cruz: Thank you! You're a great teacher.
Jamie L: Yes that’s what I’ve been doing since I was twelve using the double mirrored medicine cabinet I do my own braids and all just like that
Charmaine Espeut: Your natural hair is so full and pretty!
Sarah VanDunk: Yes your tutorial was on point. Just when giving a review, especially if hair is bad, people need to know.
Puppet Master: Looks great!!
R. Roman: That turned out terrific... Your skills show.
Natasha Payne wynter: really helpful. thank you
Nicke Smith: The best sew-in's I ever had were ones I did myself.
Rosemary Gonzalez: Yes boo just subscribed you are so beautiful! Thank you for this video!
LeSha baby: You did a really great job
Daphnie Nyasha: Hey thanks heaps for sharing this. I'm just wanting to know, how long it took you to do all of this?
Simply So Lovely: very informational!! New subbie
Jessica S: Hi, for how long can we wear a weave? How many weeks does it last?
Jade Rego: this is so old but here I am. I know that girl did her own sew in and tried to blame a stylist lol. this video really helped with the face framing. thank you Mrs. Ruby!!!!
brownsuga298: Wow U did that I wish I could do my own hair it's cute and darling u don't need weave your hair is already long and beautiful thanks for the video
Sharon Barnes: Gr8 on fleek do more tutorials hunni
Cassandra Vildosola: It's too hot to have a net and menopause at the same time, Ruby...lol...otherwise, you doin' a great job, as usual!!!
Prophetess Lady Of Wisdom: Love your real hair& weave. Very beautiful❤❤
edith orede: nice one .... very detailed
monica helligar: Just beautiful WOW God bless you and your family too
Lulu Vanity: Thanks! U are awesome!
lov3rbox: great job! what braid pattern do you suggest for a "halo" leave out. no part.
frankelijah1: I paused at 8:52 and I think that's the most important "still shot" because it shows that you took the last 1/4" of the track from the 2nd to last braid and looped it up to the last/top track. That was crucial.....Thanks for that tip!
Loyal Beau: Love your necklace and I did learn something I'm a beginner so I need the basics such as braiding laying tracks and sewing .... The whole nine ohh yeah and a mannequin head with a stand
Stephanie Renee'🌹: Beautiful job so pretty!! I've never worn a sew-in and want to try now. What state are you in please? Thanks.
Georgianna: Great job! Can I set up an appointment to get my hair done?
Xo Babieee: Her real hair is long a cute already without weave
IamCarita: BEAUTIFUL!
January Beloved: could you please do a diy frontal closure tutorial?
Reese Jenay: how do you accomplish your bang look with no leave out and using a lace closure?? I love this, your amazing at what you do!!
Cheryl Washington: Good job look beautiful
confused_ks: Beautiful
Shannan Pinkney: Very good instructional video! Using this video tonight
Loyal Beau: Love it !!!! Love your necklace too
XABE Anderson: the hair is quality. think about your own hair, it godly given natural, an it shall tangle easily. but amazing tutorial,gotta try the chase(comb method) simply gorgeous! especially on your natural beauty hair
Diamond Lewis: Omg what you need weave for the beginning of the video said it all
Asia Bell: im soooo jealous right now. I always sew in my own hair but I cant do my own beehive and its not flat flat how I want is but i love this!!
Chandra Shinholster: amazing I am subscribing right now
NicNacAttack: Thanks for showing a braid down with human hair, not synthetic. I am allergic to synthetic. I had to remove a sew in after one week
al quaeda: Love this video
CoCo The Goddess: You Slaaayed it, thx for the tips & video! :)
Khari Khari: Looks professional
Lon Collins: When installing the hair do i need to put the tracks close together or leave a small gap ?
G u m m i: omg I could never cut my own hair :O
Kodak Kirby: i have really short hair so do you recommend a stocking cap and glue ? i dont have enough hair to have a braid down
Shree Beavers: girl u go!
NicNacAttack: I'm allergic to synthetic hair, so the few times I get a sew in, I bring my own human braiding hair because no one ever has it
missladyzee44: Great job. Where did you get your Necklace?
ebony kendrick: girl u have such Beautiful hair already. why weaves I love ur natural hair
KAWATAOLIVIA: How many bundles did you use?
AAD88: What are your thoughts on the rubber band foundation sew in with a closure?
MyLovelyRoots: great video very informative. I would recommend maybe better lighting, maybe a o- ring light.
Shannon Miller: So do you go around the track and not through it?
Grace D: wow how do u braid urself like that?love it n ur gair is soo beautiful.
The Oh' Zone: What do you recommend for hair growth please
Kash J: Definitely wouldn't cut my hair just to fit the temporary weave.
Psychbabe: nice job, you are beautiful
LaMiya Robinson: Your hair is long I love it but the hair extensions are not deep wave that's definitely body wave. The pattern is too loose but it still looks cute
Itz_jaylagaming: What's a good brand for first time sew in on natural hair no leave out
Anishka Daley: How do you cornrow your hair upwards like that
Louv Nails: Hi Miss Ruby! I really love your installs and I was wondering what state you are located in? Thank you!
Hannah Thomas: i love it
Lyra Legacy: All that damn beautiful hair omg
Kathy Smith: Cute! What kind of flat iron are you using?
Angela Jones: Really pretty
Jeannette Menchaca: Can you do a frontal install video
NaturallyMe: This turned out really good! You definitely did that and I subscribed. Where are u located so that I can be one of your clients?
~Daphne Amy's World~!: your own hair is nice and long if I had long hair again I would not need weave or wigs no more your lucky ☺
Psychbabe: nice job, you are beautiful
Psychbabe: nice job, you are beautiful