Braid Pattern For Full Sew In Weave Tutorial – (Part 2 Of 7)
- Posted on 26 May, 2015
- Sew-In Hair Extensions
- By Anonymous
Virgin Hair From: http://www.MrsRutters.com
Instagram: http://www.Instagram.com/MrsRutters
Facebook: http://www.facebook.com/MrsRutters
In this step of the Full Sew In Weave Tutorial, Breanna Rutter will teach you step by step how to achieve your braid pattern for your full sew in hairstyle with no leave out! Breanna Rutter has relaxed 4C hair and you can still achieve this braid pattern on stretched natural hair. If you do not know how to cornrow braid your own hair, be sure to purchase the braiding DVD to learn how!
How To Cornrow Braid With & Without Weave DVD http://goo.gl/1q6WRH
After braiding your braid pattern for your full sew in, you will then learn step by step how to sew your weaving net down as well as your extensions in a later step. When wearing the full weave hairstyle, braiding with braiding hair is critical to prevent your real hair from frizzing underneath your install. Also, braiding hair and a weaving net protects the health of your hair by adding strength to weak and/or thin hair and it also prevents the weight of your extensions from damaging your hair because the weight is on the net and not your real hair!
PRODUCTS FOR THE FULL SEW IN WEAVE HAIRSTYLE;
3 Mrs. Rutter’s Bundles Lengths: 24 in, 22 in & 20 in http://www.MrsRutters.com
Black Nylon Sewing Thread http://goo.gl/rr36p4
Weaving Needles (Curved C-Needle) http://goo.gl/cugnQi
Weaving Net http://goo.gl/Vtp5zo
Braiding Hair http://goo.gl/or0fsk
Rat Tail Comb http://goo.gl/NTJJnC
Wide Tooth Comb http://goo.gl/mkXsZC
Dry Towel http://goo.gl/JN0XQP
Hair Cutting Scissors http://goo.gl/rYH7BX
Rubber Bands http://goo.gl/8bYkAF
Duck Bill Clips http://goo.gl/SQ5SNn
Flat Iron (Nano Titanium Babybliss PRO) http://goo.gl/TbgJFv
Heat Protectant (Garnier Fructis Marvelous Oil Frizz Defy) http://goo.gl/NaspXv
How To Dye Hair Extensions Black HERE https://youtu.be/y93K9gZiBww
How To Dye A Lace Closure Black HERE https://youtu.be/f0F7FWrgnPY
FULL SEW IN WEAVE TUTORIAL STEPS
Step 1 http://goo.gl/8XYJ4D
Step 2 http://goo.gl/HQz9Mp
Step 3 http://goo.gl/5t3iG7
Step 4 http://goo.gl/iGLMJr
Step 5 http://goo.gl/IXB1TS
Step 6 http://goo.gl/zh4Axd
Step 7 http://goo.gl/kIBRxd
Thanks For Watching!
----------------------------------------------------------------------------------------------------------------------------------------------------------------------------------------------------
Free Giveaways & Weekly Updates By Email! http://eepurl.com/bN6ddr
Buy My Books, DVDs, and T-Shirts at http://www.howtoblackhairstore.com
My Website: http://www.howtoblackhair.com
Twitter: http://www.twitter.com/BreannaRutter
Facebook: https://www.facebook.com/OfficialBrean...
Instagram: http://www.instagram.com/breannarutter...
Google +: bit.ly/15gNK3M
Got Hair Questions? Email Me!
Email for Business Inquiries
----------------------------------------------------------------------------------------------------------------------------------------------------------------------------------------------------
DISCLAIMER: All suggestions, tips, prizes, techniques and advice given are for informational purposes only and should be used at your discretion and best judgment. I highly recommend conducting strand tests when trying or using new products, hair appliances and product mixes. I am not responsible or liable for adverse or undesirable effects including hair loss, hair breakage or other hair/scalp/skin/body damage as a direct or indirect result of the suggestions, tips, prizes, techniques and/or advice given.
FTC: I am not representing, being paid by, or endorsing any of the product brands in this video & I purchased everything with my own money - UNLESS OTHERWISE STATED in video/blog content. There are links to products that might be helpful based on the content of this video/blog. Each of your purchases via our Amazon affiliate links supports our cause at no additional cost to you.
Music Used
“Easy Lemon”
Kevin MacLeod
Incompetech.com
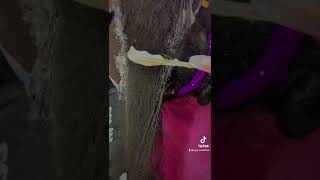
Welcome to step number two of the full sewin hairstyle in this step. I'M going to be teaching you how to create your braid pattern, as well as how to sew down your weaving net. When you're creating your braid pattern, you are going to need some braiding hair and then you rat tail comb and your wide tooth comb to assist you, while braiding, while sewing down your weaving net, make sure that your weaving needles are prepared, and you have your net On hand so, as you can see, my braid pattern is almost finished, but I have one last final braid to sew down, which I will teach you now. The reason why I went ahead and braided all of my hair is because the process is very repetitive. If you don't know how to cornrow braid your hair, I highly suggest that you visit howtoblackhair.com to purchase the cornrow braiding DVD. In that DVD, you will learn how to braid with extensions and without extensions, so for doing your braids. You have to use a little bit of extension, hair to braid your cornrow braids, to make your braids a little bit more firm and to also limit the frizz underneath your install. So what you want to do is braid two braids on the very perimeter of your head and make them go all the way around your head and connect them in the back for the rest of your hair. You are literally going to braid it straight to the back in cornrow braids, with each two cornrow braids that come to the back you’re going to connect it to turn them into one. So you are going to see that, as I'm stitching down the final braid to teach you how to sew down your braids to your braid pattern. Also, you braiding your hair make sure that the extension hair exceeds about 3 inches past your real hair and then tie with a rubber band. So that way, when you are ready to take down this style, you just got cut above the rubber band to safely take down your braids. So, as you can see, this is a very back of my head and, as I explained each two cornrow braids, you braid. You have to connect it into one final braid and put a rubber band at the end of your braid. Now the size of the braids will depend on how thick or thin your hair is and, as always no matter you texture. I suggest that you use small to medium size, cornrow braids, so that when you're doing your full sewin, your install is very flat. If your braids are too big, your style will look bulky, so the smaller your braids, the better. So now that your braid pattern is fully finished, as you can see, most of the braids have already been sewn down, and then this braid back here in the back was sewn just straight across onto itself. So now I just have one final braid here and when you stitch down your braids, what you want to do is: grab your braid open up your to cornrow braids and lay your braid right in the middle. So it's as flat as possible, stitch down your base to times and then stitch going all the way up by putting the needle underneath both cornrow braids and underneath the braid in the middle that you work your way all the way up to finish sewing down. You braid so now with your needle and thread prepared. You are going to lift the braid up to nestle right in-between the two cornrow braids and you are going to go ahead and begin stitching. You are going to go underneath all of your braids at the very base. Once you pull the needle through to the other side, grab one strand and wrap it around the needle twice and pull straight through to create your knot. You are going to do this. One more time grab your string and wrap around twice and pull through to create your knot. I am going to continue to do this knotting technique throughout any stitches. You do when you're stitching down your braids and also when you are stitching down your extensions, so make sure to locate where the braid is and always keep it nestled between your two cornrow braids and continue to make stitches going all the way around. All of the braids pull the needle out and then create your knot, keep working your way all the way up to your braid until it's all the way sewn down. So after you finish, braiding your hair and sewing down the rest of your braids. This is how your final braid pattern should look when doing your full sewin hairstyle. So now that your braid pattern is finished, I am going to be teaching you in detail how to sew your weaving net onto your braid pattern base. So, right before I actually begin stitching down my weaving net, I am going to briefly explain to you the process that you want to do from start to finish. What you want to do is make sure that you have weaving net stretched along the way you are going to place it over your head, so the sides are literally going to be very short against your braids and you have most of the net hanging down and Back which will see - and just now, as your sewing down your weaving net start in the front and you are going to sew going all the way down to the sides. I like to start my left side and you are going to take another needle and thread and start at the front again and you going to sew it down going all the way down to this side. So that way, as your finish stitching your keeping the weaving net stretched, and even now you can take your last needle hold the rest of the weaving net down. With your other hand, keep it stretched and then make your stitches and you are going to stop a little bit past your ear and you are going to let that needle hang down and you are going to repeat the same thing on the other side, you are Going to keep your weaving net stretched so that way its flat, your head as your making your stitches all the way past your ear. Then, when you finish, the back still keep it stretched with your hand and continue stitching up until you stop at the very back of your head and then repeat the same process until you stop at the back. When you're finished, you are going to cut off the needle and thread and cut off any remaining net. That'S hanging past your braids. The most important thing to remember is that you have to go back and forth to keep the tension even on the net. So it's not shifting and you also have to keep the weaving net stretched so that way, when you're done its flat to your braids. So now I am going to begin sewing down the weaving net. Make sure that you unravel your weaving net and you place it on your head. The long way, which means that when you put it onto your head most of the net hangs down in the back. And you have just a short amount and net here on the sides here on your head. Now you want to put a position evenly and make sure that the beginning of the net is going right over your perimeter, brain which is heretofore. Not you position it. You are going to begin making your stitches. You are going to start in the middle work, your way to the side, and let that needle hang, like I told you before you are going to start another needle go through to the side to hang down. At that point, and then you going to go back and forth one side to the other side to the other side, to the other side, to keep the tension, even so that you can finish sewing down your weaving net. So now make sure that you have your weaving needles prepared, make sure it's placed of your braid, and you are going to make your first stitch in the middle, make sure to go through the net under your braid back out through the net and create your knot And you are going to pull straight through keep repeating this process throughout braiding, your perimeters until you finish, sewing on the weaving net through the net under your braids and back through the net and then begin creating your knot go around twice and pull through once. You finish: sewing down your weaving net, make sure to trim off the excess netting that’s left behind. So I am going to start at the very middle of my head and I'm going to work my way all the way to the back and them I’m, going to same thing in the middle all the way to the side to finish removing my net as you Can see creating your braid pattern is an extremely easy process, just make sure to sew down the tail ends of your braids and sew your weaving net onto your braids. So now that your hair is prepared in the very next step step number three, I will be teaching you how to sew Mrs. Rutter's hair extensions from MrsRutters.com onto your braid pattern base.

Comments
Breanna Rutter: YOUTUBE HASN'T Been Showing You All My New Videos?? CLICK THE BELL ICON Next To The Subscribe Button to Turn on Channel Notifications To Never Miss A New Video Again!
Sho: Breanna, you just make me feel like I'm a professional hairstylist! All the tricks, the latest techniques. My hair is, for the most part, always on point. Thank you love.
Maegan: Breanna, you look beautiful! Thank you for the tutorial!
Scentsational Candles: @Breanna Rutter you always do such a beautiful job with your hairstyles. keep it up I have been inspired by you ever since I saw your videos.
Irene Alero Thompson: thanks for the lovely tutorial.i def will buy the hair you used but if tell me whats its called so i could get from your website.i couldnt stop admiring your beauty if i may ask whats the foundation you had on.cheers
Habibata: while multitaskin, I thought your name was Breanna Butter. Great Job!! I'm about to do my hair now. I'm takin out my twists
Itsmeslimtee: Love the video can you do a video on doing a sew in on middle part
Breanna Rutter: Video To Long? If So Watch The Shorter Condensed Version of This Whole Look By Clicking Here https://www.youtube.com/watch?v=BEuo7RsSyOc